


A Pod can have multiple containers running apps within it and this is technically called a multi-container pod. But the pod can also have one or more init containers. These containers are run before the app containers are started. Init containers always run to completion and each init container must complete successfully before the next one starts.
The difference between normal containers and InitContainers is that InitContainers do not support lifecycle, livenessProbe, readinessProbe, or startupProbe because they must run to completion before the Pod can be ready. If there are multiple init containers in a Pod, Kubelet runs each init container sequentially.
Init containers are used to set up custom code that is not present in an app image. Init containers can be used to offer a mechanism to block or delay app container startup until a set of preconditions are met. By keeping unnecessary tools separate from the main application containers, InitContainer can be used which can limit the attack surface of the app container image.
Every InitContainer must complete successfully before the next one is started. In this way, Init Containers provide a way to block or delay the startup of app containers until some set of preconditions are met.
To know more about InitContainer, click here to visit the official documentation of Kubernetes.
In this article, we will see the demonstration of InitContainers which start before the main container.
Pre-requisites
- Kubernetes Cluster with at least 1 worker node.
If you want to learn to create a Kubernetes Cluster, click here. This guide will help you create a Kubernetes cluster with 1 Master and 2 Nodes on AWS Ubuntu 18.04 EC2 Instances.
What will we do?
- Create a Pod with InitContainers
Create a Pod with InitContainers
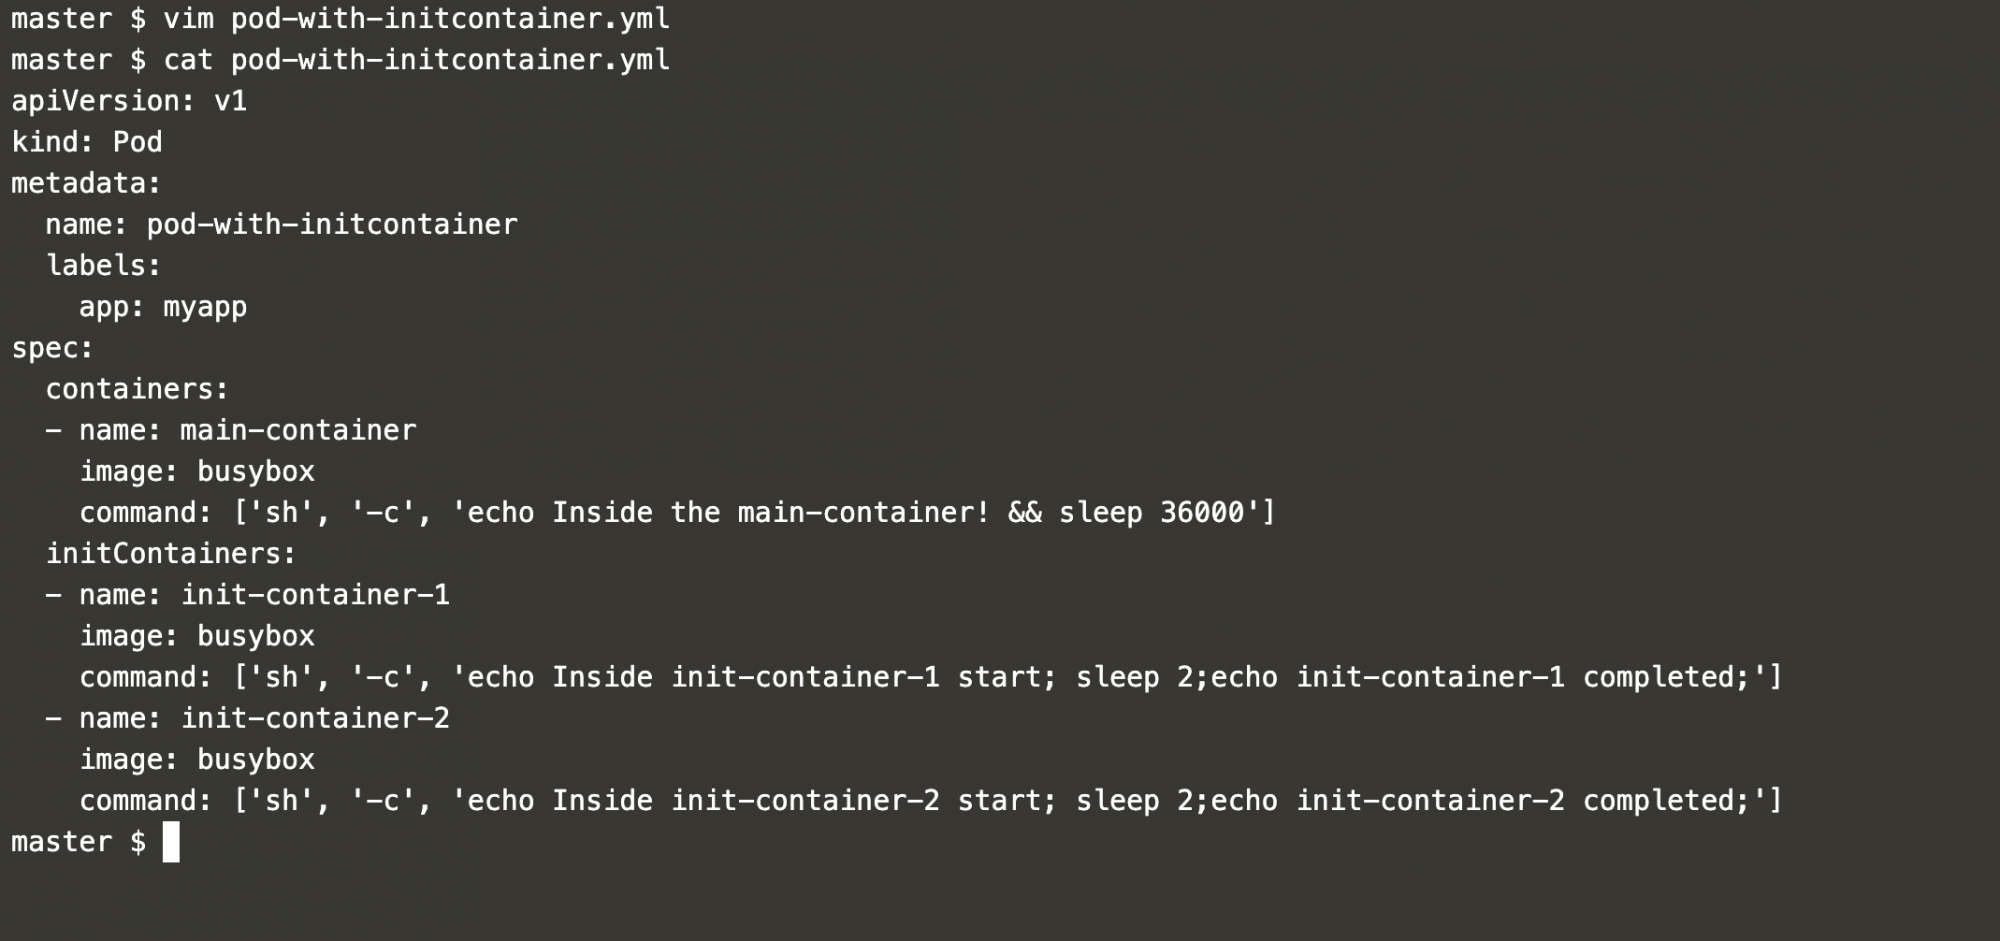
Create an object file for InitContainers using the following content.
vim pod-with-initcontainer.ymlapiVersion: v1
kind: Pod
metadata:
name: pod-with-initcontainer
labels:
app: myapp
spec:
containers:
- name: main-container
image: busybox
command: ['sh', '-c', 'echo Inside the main-container! && sleep 36000']
initContainers:
- name: init-container-1
image: busybox
command: ['sh', '-c', 'echo Inside init-container-1 start; sleep 2;echo init-container-1 completed;']
- name: init-container-2
image: busybox
command: ['sh', '-c', 'echo Inside init-container-2 start; sleep 2;echo init-container-2 completed;']
 \
\
In this example, 2 InitContainers will run for 2 sec each and when they successfully complete, the main container will start which will be alive for 36000 secs.
This example demonstrates the usage of the InitContainer functionality and you can have your own use case
Get a list of existing ports in the cluster and create an init-container pod with the following commands.
kubectl get pods #Get a list of existing podskubectl apply -f pod-with-initcontainer.yml #Create a pod with InitContainerkubectl get pods #Check the pod which got created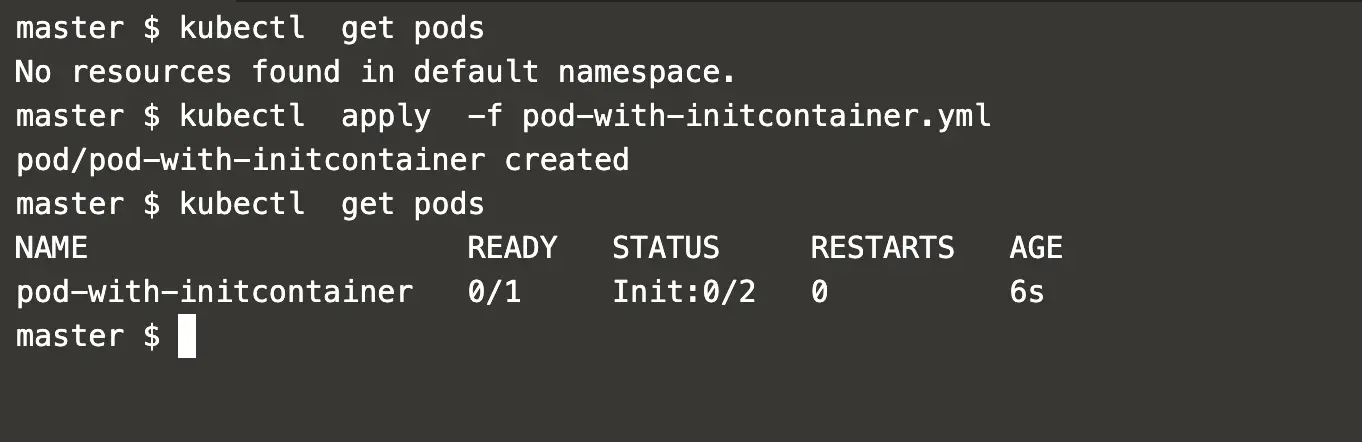
In the above screenshot, you can see that the body is being created.
We can check logs of both the init-containers and the main container to understand the execution and the flow in which the containers are created and executed.
kubectl get podskubectl logs pod-with-initcontainer -c init-container-1 --timestamps=true #Check logs of the 1st InitContainerkubectl logs pod-with-initcontainer -c init-container-2 --timestamps=true #Check logs of the 2nd InitContainerkubectl logs pod-with-initcontainer --timestamps=true #Check logs of the main container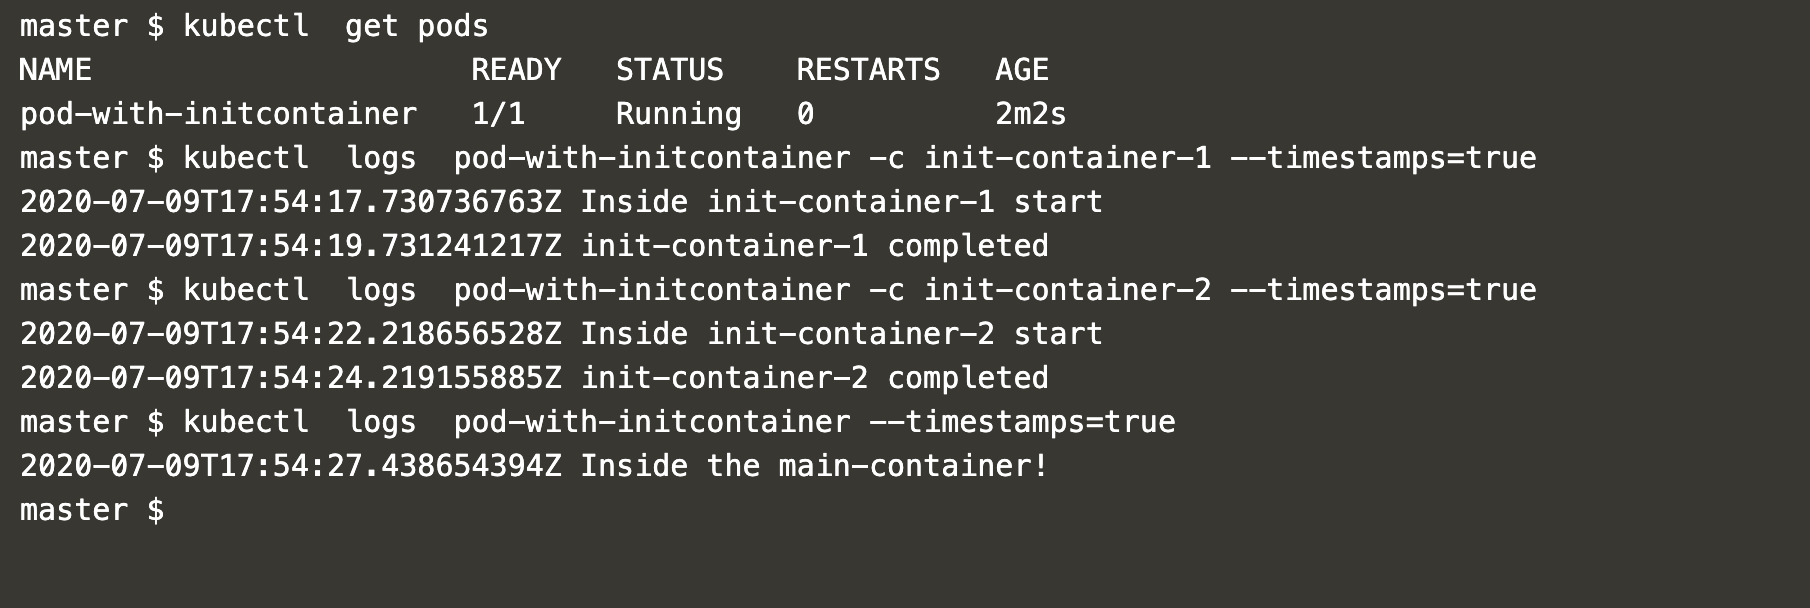
From the above screenshot, we can understand that you need containers get executed first in the sequence they are defined in the definition file. Once the execution of init-containers finishes then the main container starts.
Init-containers are always started in the sequence they are defined in the definition file.
We can get more details of the pod using the following command.
kubectl get pods #Get a list of Podskubectl describe pod pod-with-initcontainer #Get details of the Pod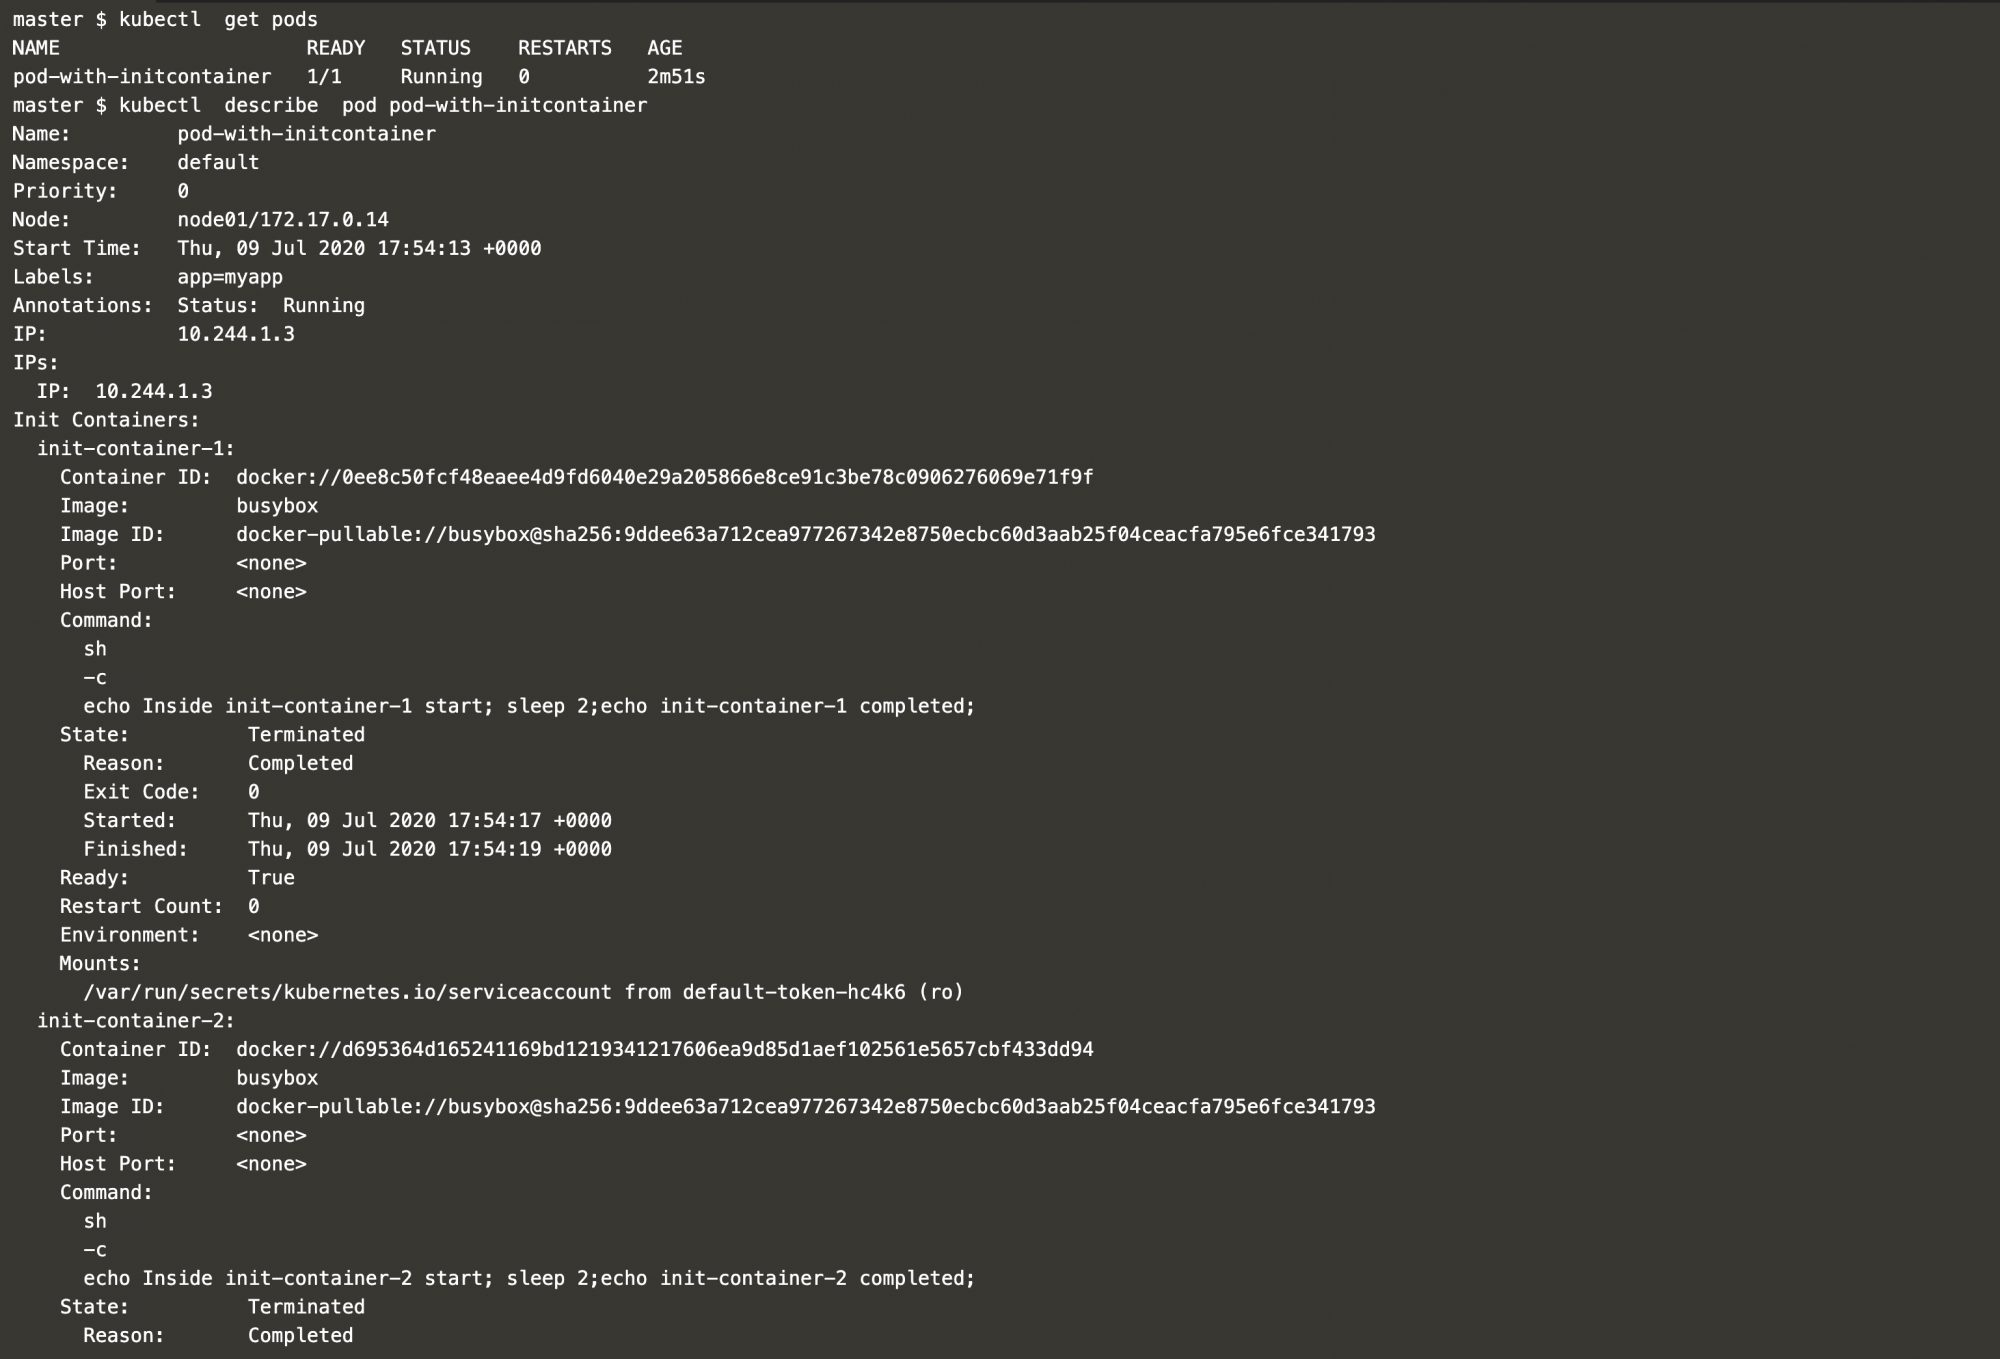
In the above screenshot, we can see that the state of both the init-containers is terminated and the reason is completed.
It means the init-containers successfully performed their operation and they have been terminated.

In the above screenshot, you can see that the state of the main container is running.
When you no longer need this pod, you can delete it using the following command.
kubectl get podskubectl delete pod pod-with-initcontainer #Delete the Pod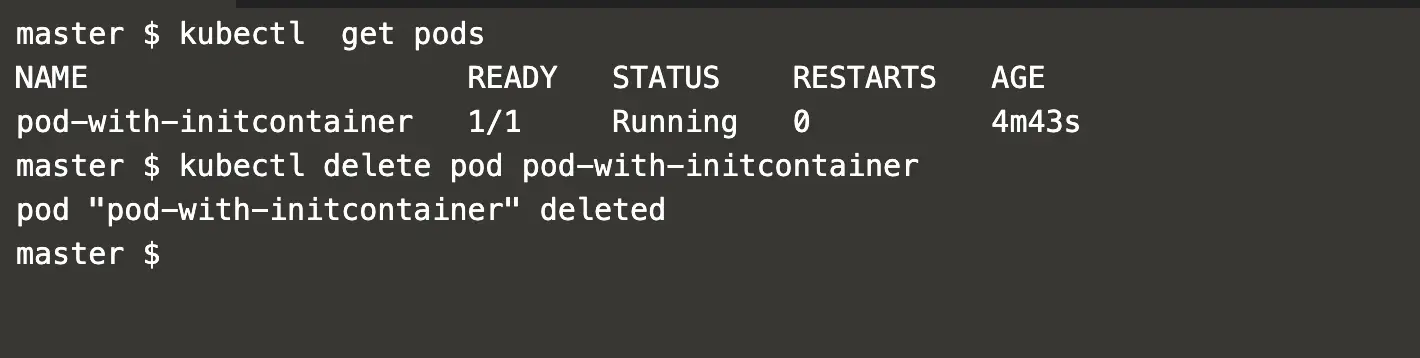
Conclusion
In this article, we saw the steps to create a pod containing init-containers and the main application. We observed the sequence of container execution in the pod. We also saw how the init-containers get terminated when they finish their operation.

Add Comment