


GitLab is an open-source repository manager based on Rails developed by GitLab Inc. It is a web-based git repository manager that allows your team to collaborate on coding, testing, and deploying applications. GitLab provides several features, including wikis, issue tracking, code reviews, and activity feeds.
In this tutorial, we will show you how to install GitLab using the Docker and Docker Compose. Also, we will be using the Ubuntu 20.04 as our primary operating system, and install docker from the official Ubuntu FocalFossa repository.
Prerequisites
- Ubuntu Server 20.04
- Min 4GB of RAM
- Root privileges
What will we do?
- Install Docker and Docker Compose
- Setup GitLab Docker Project
- Build a GitLab Container
- GitLab Post Installation
Step 1 – Install Docker and Docker Compose
First, we will install the docker and docker-compose packages to our Ubuntu 20.04 system. And we will be using the docker packages provided by the official Ubuntu FocalFossa repository.
Update all repositories to the latest version and install docker and docker-compose using the apt command below.
sudo apt update
sudo apt install docker.io containerd docker-compose
Once all installation is completed, start the docker service and add it to the system boot.
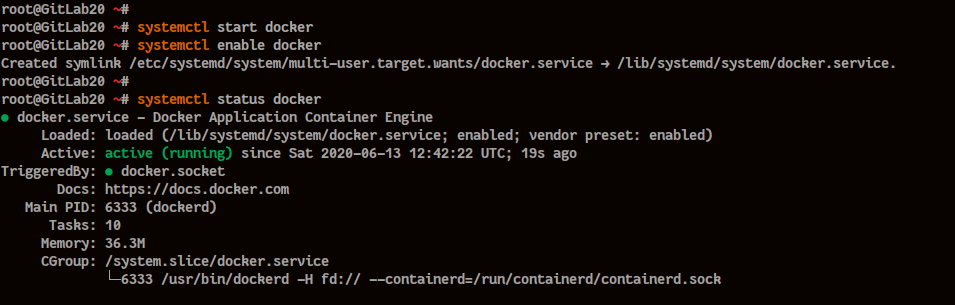
systemctl start docker
systemctl enable docker
Next, check the docker service using the systemctl command below.
systemctl status dockerAs a result, the docker service is up and running on Ubuntu 20.04 Server.
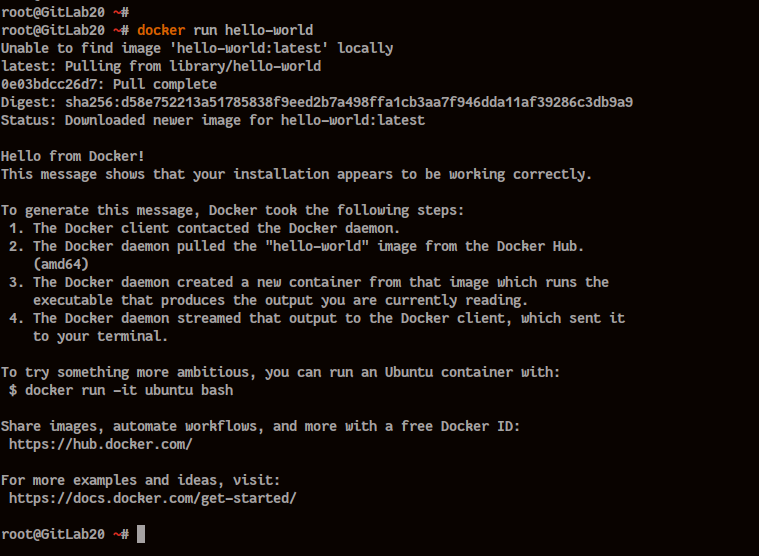
To verify the docker installation, run the docker “hello-world” command below.
docker run hello-worldNow you will get the “hello-world” message from docker as below.
Now we’re ready to install GitLab using docker container and docker-compose.
Step 2 – Setup GitLab Directory
In this step, we will set up our project directory for the GitLab installation.
Create a new directory called ‘gitlab’ and go into it.
mkdir -p gitlab; cd gitlab/The “gitlab” directory will be used to store all docker script and configuration for GitLab.
Create a GitLab Data Directory and .env File
In this section, we will create a new directory for storing all our GitLab data and create a new “.env” file that will be used by docker.
Create a new GitLab data directory “/srv/gitlab” using the mkdir command below.
mkdir -p /srv/gitlab/{config/ssl,logs,data}Next, on the “gitlab” project directory, create a new “.env” file using vim editor.
vim .envDefine the environment variable “GITLAB_HOME” with the value as GitLab data directory “/srv/gitlab” as below.
GITLAB_HOME=/srv/gitlabSave and close.
The docker-compose.yml script will use the environment variable for Gitlab volumes.
Create docker-compose.yml Script
Next, we will create a new “docker-compose.yml” that will be used to build our GitLab container.
Create the new ‘docker-compose.yml’ file using the vim command below.
vim docker-compose.ymlDefine the service named “web” with the image of “gitlab-ce” latest version, and change the “hostname” with your GitLab domain name.
web:
  image: 'gitlab/gitlab-ce:latest'
  restart: always
  hostname: 'gitlab.hakase-labs.io'
Configure the environment for your Gitlab installation as below. And make sure to change the “external_url” with the HTTPS secure protocol, and change the “gitlab_rails[‘gitlab_shell_ssh_port’]” with your alternative SSH port for the container.
  environment:
    GITLAB_OMNIBUS_CONFIG: |
      # Add any other gitlab.rb configuration here, each on its own line
      external_url 'https://gitlab.hakase-labs.io'
      gitlab_rails['gitlab_shell_ssh_port'] = 2224
      nginx['redirect_http_to_https'] = true
      nginx['ssl_certificate'] = "/etc/gitlab/ssl/fullchain.pem"
      nginx['ssl_certificate_key'] = "/etc/gitlab/ssl/privkey.pem"
      nginx['ssl_dhparam'] = "/etc/gitlab/ssl/dhparams.pem"
Next, define ports for the GitLab container as below. And make sure to change the SSH port “2224” with your custom port and match with the “gitlab_shell_ssh_port” port on top.
  ports:
    - '80:80'
    - '443:443'
    - '2224:22'
After that, define the volume or your GitLab data directories. All of GitLab data directories are available at the “GITLAB_HOME” directory, which is set the environment variable on the “.env” file on top.
  volumes:
    - '${GITLAB_HOME}/config:/etc/gitlab'
    - '${GITLAB_HOME}/logs:/var/log/gitlab'
    - '${GITLAB_HOME}/data:/var/opt/gitlab'
    - '${GITLAB_HOME}/config/ssl:/etc/gitlab/ssl'
Save and close.
Below is the complete configuration.
web:
  image: 'gitlab/gitlab-ce:latest'
  restart: always
  hostname: 'gitlab.hakase-labs.io'

  environment:
    GITLAB_OMNIBUS_CONFIG: |
      # Add any other gitlab.rb configuration here, each on its own line
      external_url 'https://gitlab.hakase-labs.io'
      gitlab_rails['gitlab_shell_ssh_port'] = 2224
      nginx['redirect_http_to_https'] = true
      nginx['ssl_certificate'] = "/etc/gitlab/ssl/fullchain.pem"
      nginx['ssl_certificate_key'] = "/etc/gitlab/ssl/privkey.pem"
      nginx['ssl_dhparam'] = "/etc/gitlab/ssl/dhparams.pem"

  ports:
    - '80:80'
    - '443:443'
    - '2224:22'

  volumes:
    - '${GITLAB_HOME}/config:/etc/gitlab'
    - '${GITLAB_HOME}/logs:/var/log/gitlab'
    - '${GITLAB_HOME}/data:/var/opt/gitlab'
    - '${GITLAB_HOME}/config/ssl:/etc/gitlab/ssl'
As a result, the “docker-compose.yml” script for the GitLab project installation has been created.
Generate SSL and DHAPARAM Certificates
In this stage, we will generate the SSL Letsencrypt for our GitLab installation.
On your server, install the certbot tool using the apt command below.
sudo apt install certbotAfter that, generate the SSL certificate for GitLab using the certbot command below.
certbot certonly --rsa-key-size 2048 --standalone --agree-tos --no-eff-email --email [email protected] -d gitlab.hakase-labs.ioOnce all is completed, your certificates will be available at the ‘/etc/letsencrypt/live/gitlab.yourdomain’ directory.
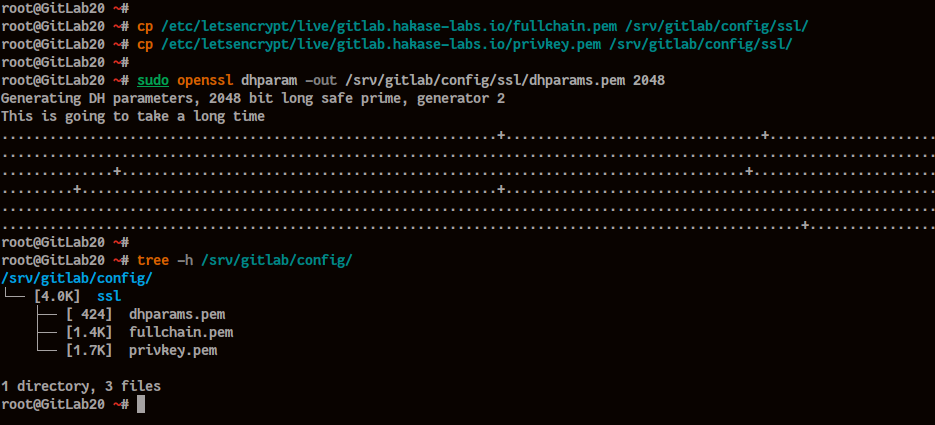
Now copy the certificate file “fullchain.pem” and “privkey.pem” to the “/srv/gitlab/config/ssl/” directory.
cp /etc/letsencrypt/live/gitlab.hakase-labs.io/fullchain.pem /srv/gitlab/config/ssl/
cp /etc/letsencrypt/live/gitlab.hakase-labs.io/privkey.pem /srv/gitlab/config/ssl/
And the SSL Letsencrypt for GitLab is ready.
Next, generate the DHPARAM certificate “dhparam.pem” using the openssl command below.
sudo openssl dhparam -out /srv/gitlab/config/ssl/dhparams.pem 2048And all certificates for GitLab installation has been generated, and we’re ready to build the GitLab container.
Step 3 – Build the GitLab Container
In this step, we will build our GitLab container using all configuration we’ve created on top, and using the docker-compose command.
Before going any further, you can check all available files on the “gitlab” project directory and directory structure of the GitLab Data directory.
ls -lah ~/gitlab/
tree /srv/gitlab
Below is the result you will get.

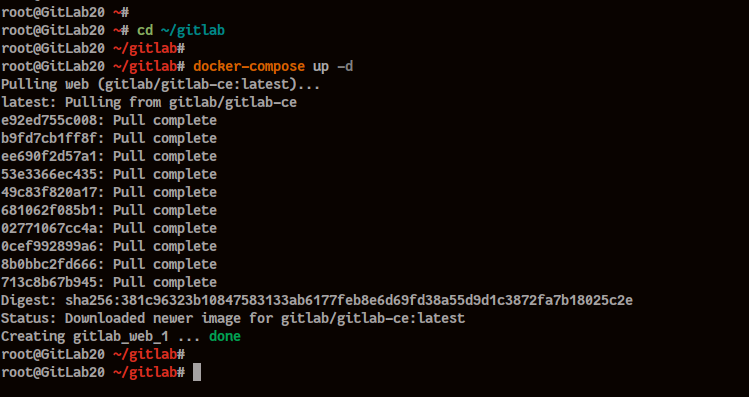
Next, go to the “~/gitlab” project directory and build the GitLab container using the “docker-compose” command below.
cd ~/gitlab
docker-compose up -d
Once all is completed, you will get the result as below.

Now check the running container and “LISTEN” ports on your Ubuntu system using the following command.
docker-compose ps
ss -plnt
And you will get the container “gitlab_web_1” is up and running, and you have got the HTTP, HTTPS, and SSH port “2224” used by the GitLab container.
As can be seen, the GitLab container is up and running, and we’re ready to set up our GitLab installation.
Step 4 – GitLab Post Installation
Open your web browser and type your GitLab URL installation on the address bar.
https://gitlab.hakase-labs.io/
And you will get the GitLab reset password page.
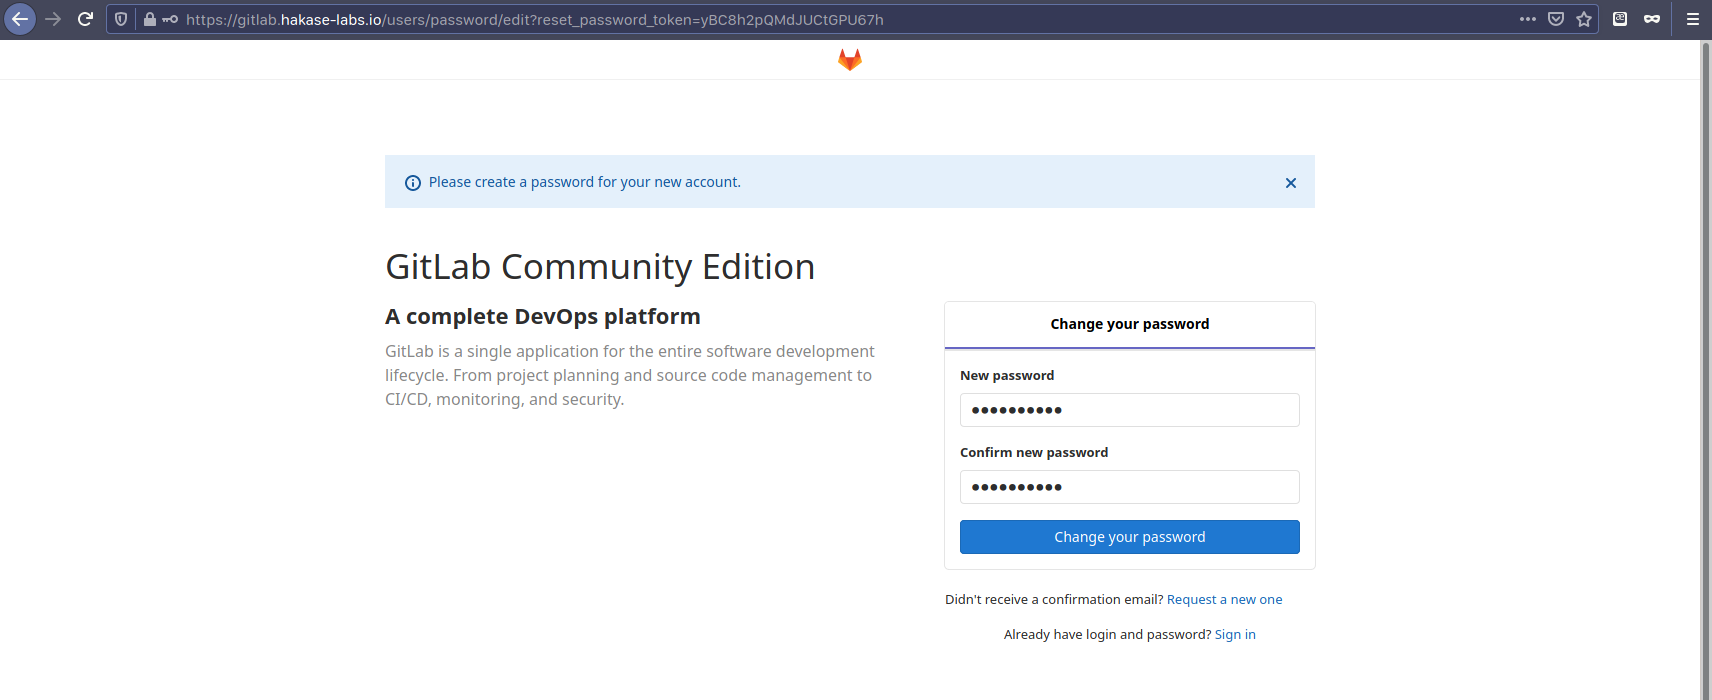
Type your new password for the default user “root” and click the “Change your password” button.
Now you will get the GitLab login page as below.
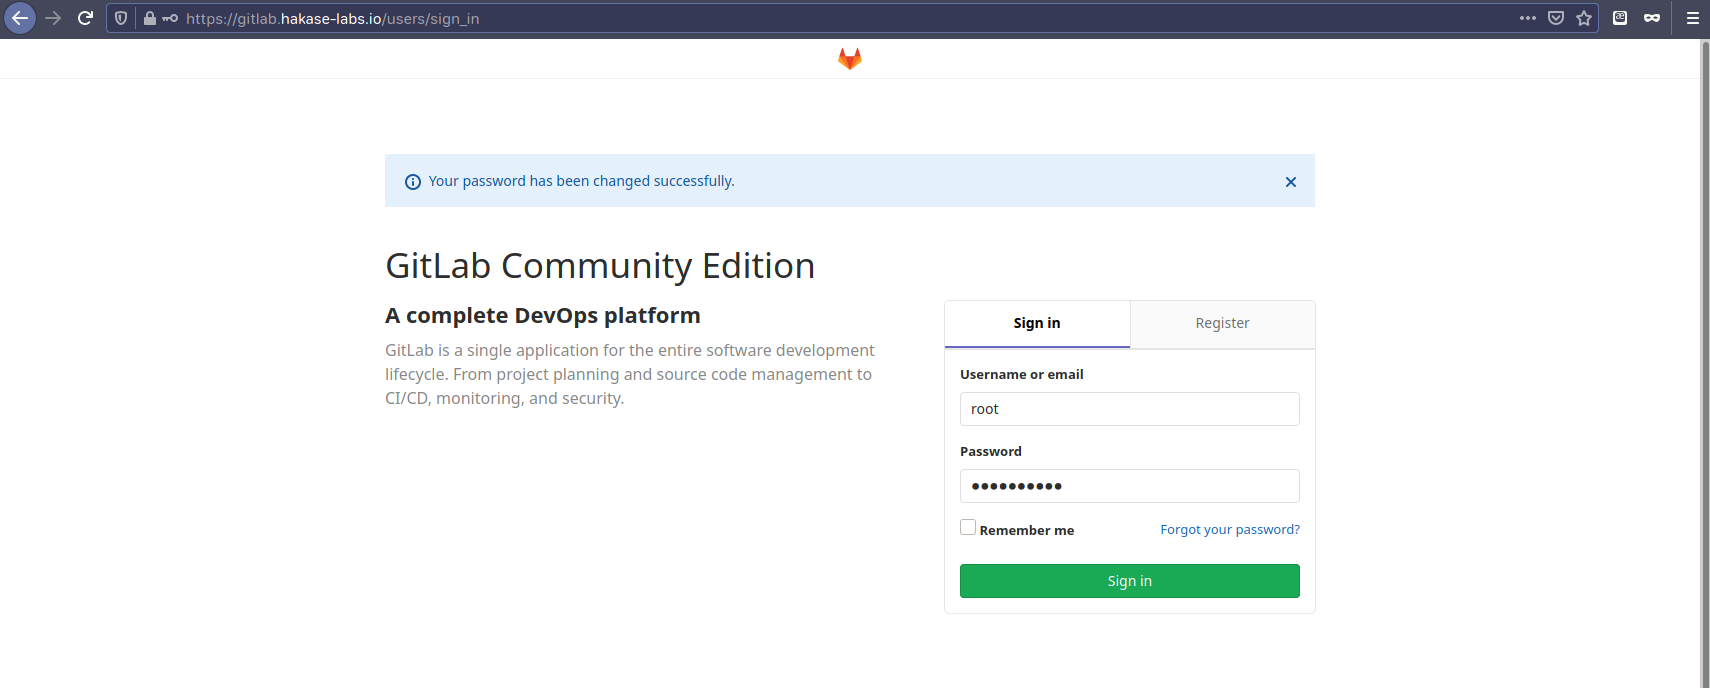
Log in with the default user “root” and your new password, then click “Sign in”.
And you will get the GitLab Dashboard as below.
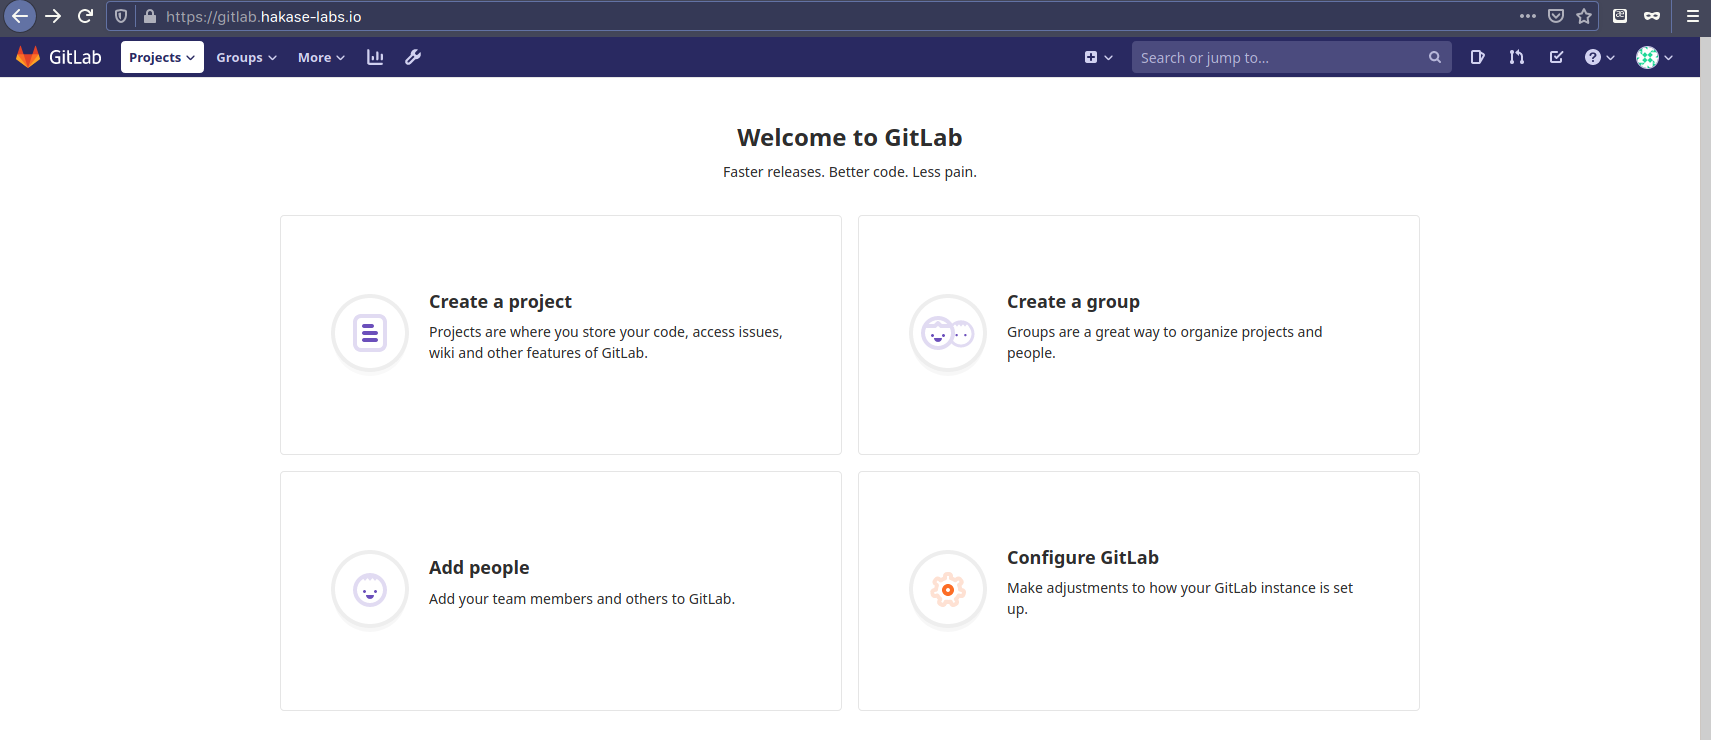
As can be seen, the GitLab installation using docker and docker-compose has been completed.
Step 5 – Basic Configuration GitLab Container
After the GitLab installation, you can add some additional configuration to the GitLab container without destroying the GitLab container. For this step, we will show you the basic way of managing the GitLab container.
Before going any further, go to the “~/gitlab” project directory and check the container status using the following command.
cd ~/gitlab
docker-compose ps
You will get the GitLab container is up and running.
Check GitLab Service Status inside the Container
To check all GitLab services inside the Gitlab container, use the “docker exec” command as below.
sudo docker exec -it gitlab_web_1 gitlab-ctl statusBelow is the result you will get.
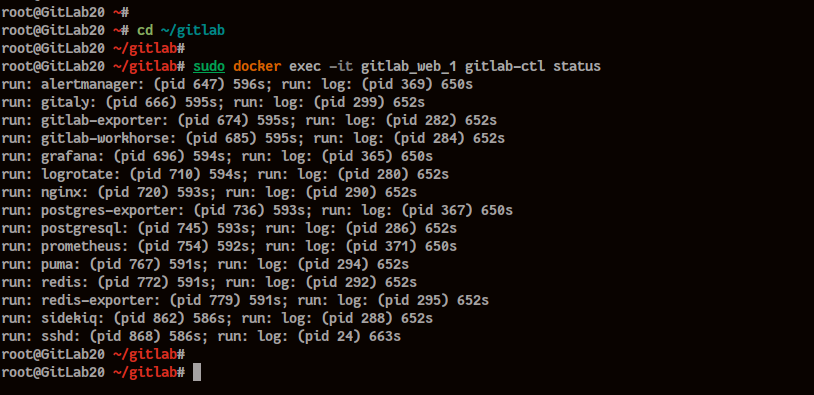
As can be seen, all GitLab service components are up and running.
Access GitLab Container
To SSH to the GitLab container, you use the “docker exec” with the “bash” shell inside the container as below.
sudo docker exec -it gitlab_web_1 /bin/bashNow check the default Ubuntu version of the GitLab container.
cat /etc/lsb-releaseYou will get the GitLab container is based on an Ubuntu 16.04 Xenial.
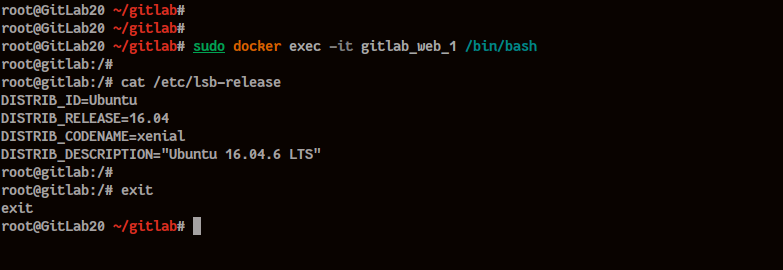
Now type “exit” to log out from the GitLab container.
Edit the GitLab Configuration gitlab.rb
Next, to change the GitLab configuration inside the container, you can use the default “editor” on the docker container itself.
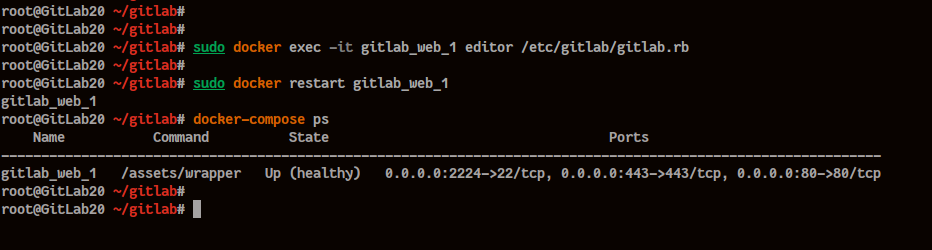
Edit the “/etc/gitlab/gitlab.rb” configuration inside the container using the docker command below.
sudo docker exec -it gitlab_web_1 editor /etc/gitlab/gitlab.rbNow you will get the default “nano” editor on screen, with the “gitlab.rb” configuration file.
Type your configuration, save, and exit.
Next, to apply the new changes to GitLab, restart the Gitlab container service using the command below.
sudo docker restart gitlab_web_1Now make sure there is no error, check the GitLab container status using the following command.
sudo docker-compose psNow make sure the GitLab cotainer is on the “Up (healty)” state.
As a result, the new configuration for GitLab has been applied.
And finally, the installation of GitLab using the docker and docker-compose has been completed successfully.

Add Comment