


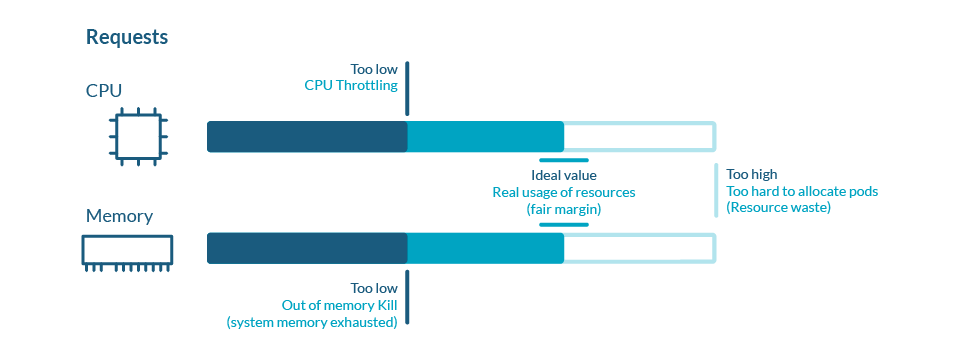
If the node has enough of a resource available, it’s possible for a container to use more resources. We can specify how much of each resource a Container needs. The common resources to specify are CPU and memory When we specify the resource request for Containers in a Pod, the scheduler decides which node to place the Pod on. When we specify a resource limit for a Container, the kubelet takes care of limits so that the running container is not allowed to use more of that limit we set.
For example, if we set a memory request of 100 MiB for a container then the container can try to use more RAM. But if we set a memory limit of 4GiB for that Container, the runtime prevents the container from using more than the configured resource limit.
CPU and memory are referred to as compute resources.
Each Container of a Pod can specify one or more of the following:
- limits on cpu
- limits on memory
- limits on hugepages-<size>
- requests for cpu
- requests for memory
- requests for hugepages-<size>
To know more about resources in Kubernetes, click here to visit the official documentation of Kubernetes.
In this article, we will see an example of a resource limit and request for CPU and Memory. We will also use Metric Server. The Metrics Server is an aggregator of resource usage data in the cluster and it is not deployed by default in the cluster. We will use this Metric Server to see the resource consumption by pods.
Pre-requisites
- Kubernetes Cluster with at least 1 worker node.
If you want to learn to create a Kubernetes Cluster, click here. This guide will help you create a Kubernetes cluster with 1 Master and 2 Nodes on AWS Ubuntu 18.04 EC2 Instances.
What will we do?
- Resource limits
Resource Limits
Before we proceed and create pods with resource requirements specified, let’s install Metric Server.
Clone the Metric Server Github repository using the following command and install it.
git clone https://github.com/kodekloudhub/kubernetes-metrics-server.gitcd kubernetes-metrics-server/Create Metric Server using the object files.
kubectl create -f .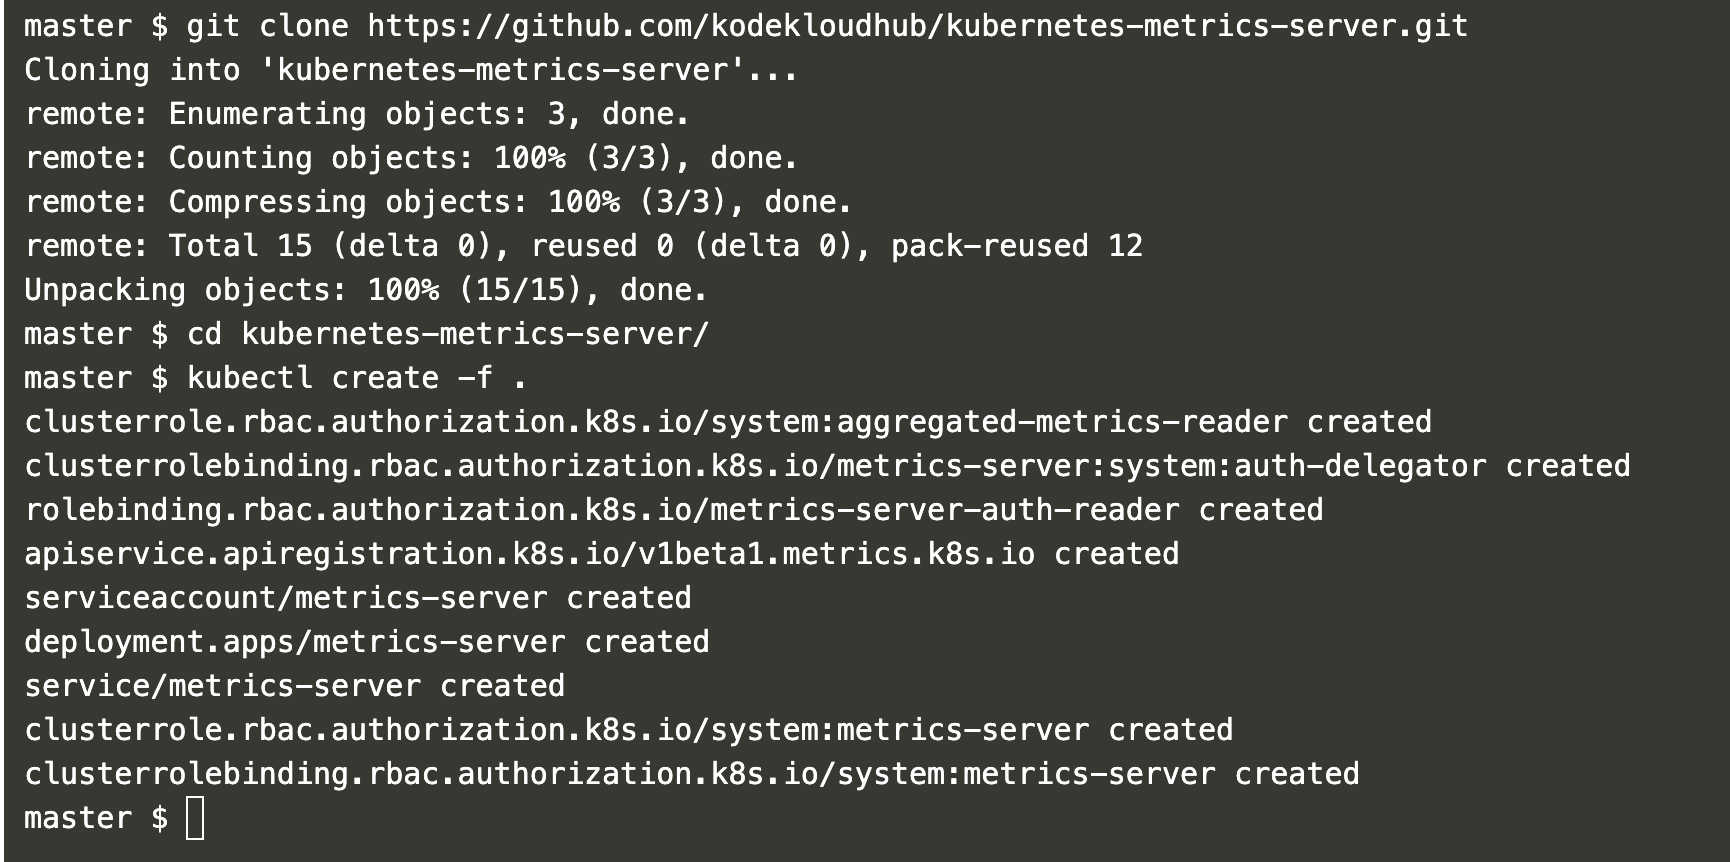
Wait for some time to get Metric Server initiated. After some time, you can execute the following command to monitor cluster nodes.
kubectl top node
Now, create a pod definition file with the following content in it which contains memory request and limit.
vim my-pod-with-memory.ymlapiVersion: v1
kind: Pod
metadata:
name: my-pod-memory-demo
spec:
containers:
- name: my-container-memory-demo
image: polinux/stress
resources:
limits:
memory: "50Mi"
requests:
memory: "20Mi"
command: ["stress"]
args: ["--vm", "1", "--vm-bytes", "30M", "--vm-hang", "1"]
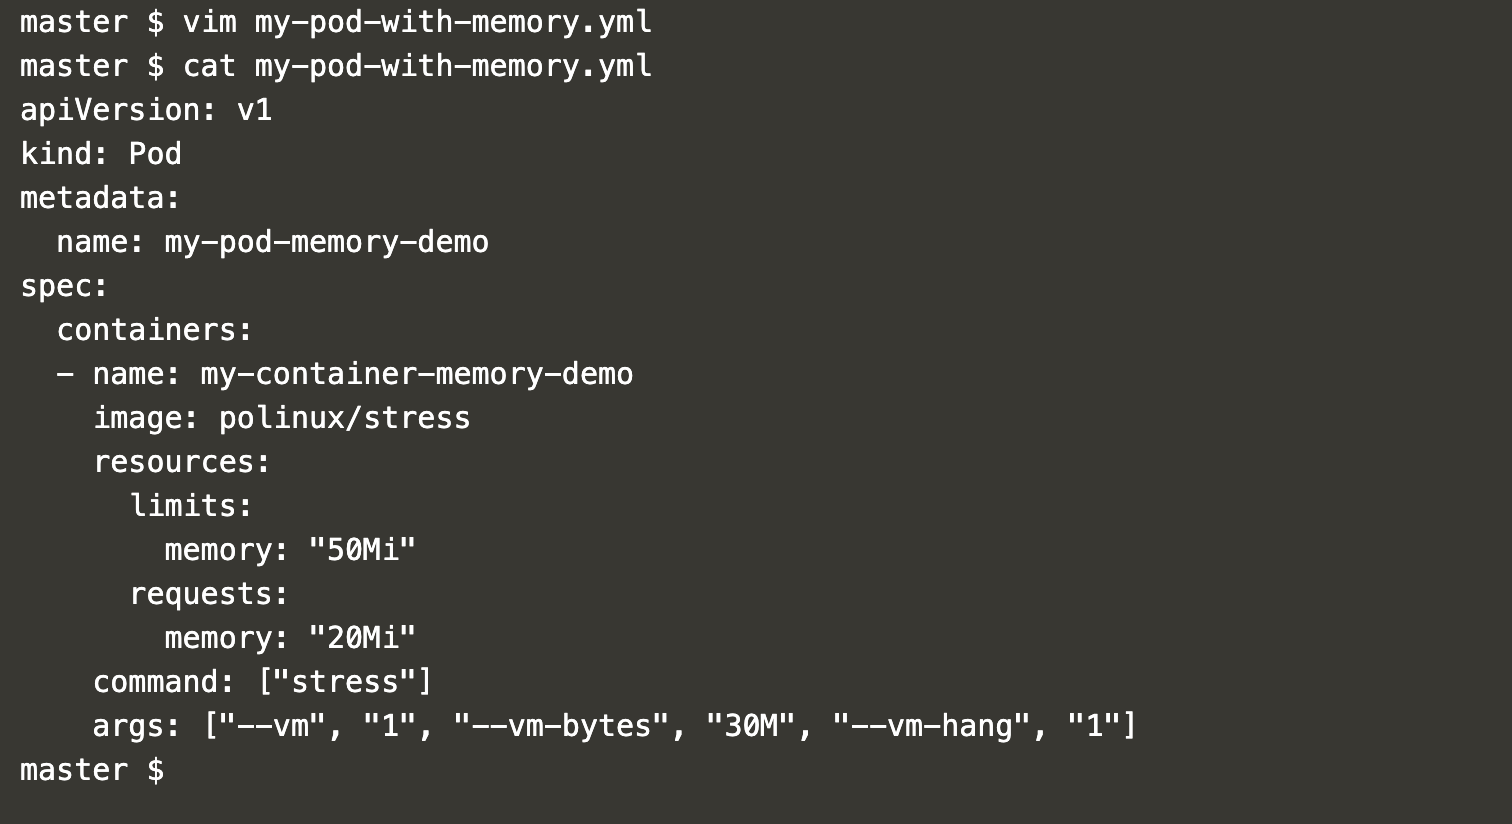
You can find “resources” property in which we have specified the memory limit as 50Mi and memory request as 20Mi
Check the existing pods on the cluster.
kubectl get pods #Get pods from the default namespaceCreate a pod using the pod definition created in the above step.
kubectl create -f my-pod-with-memory.yml #Create a podkubectl get pods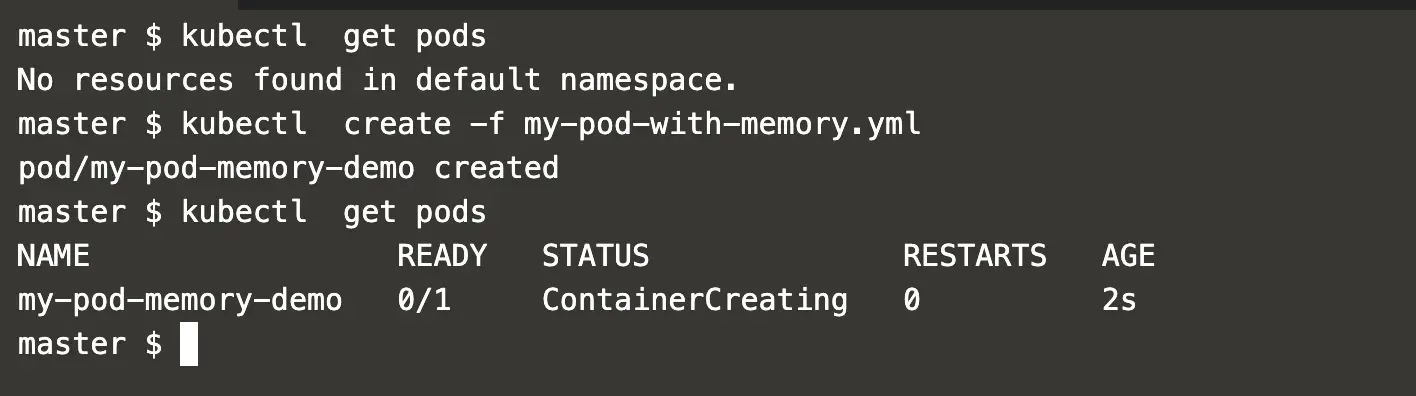
Now, if you get details of the Pod you can see that the Pod is requesting for 20Mi memory and has a limit of 50Mi memory.
kubectl get podskubectl describe pod my-pod-memory-demo #Describe the pod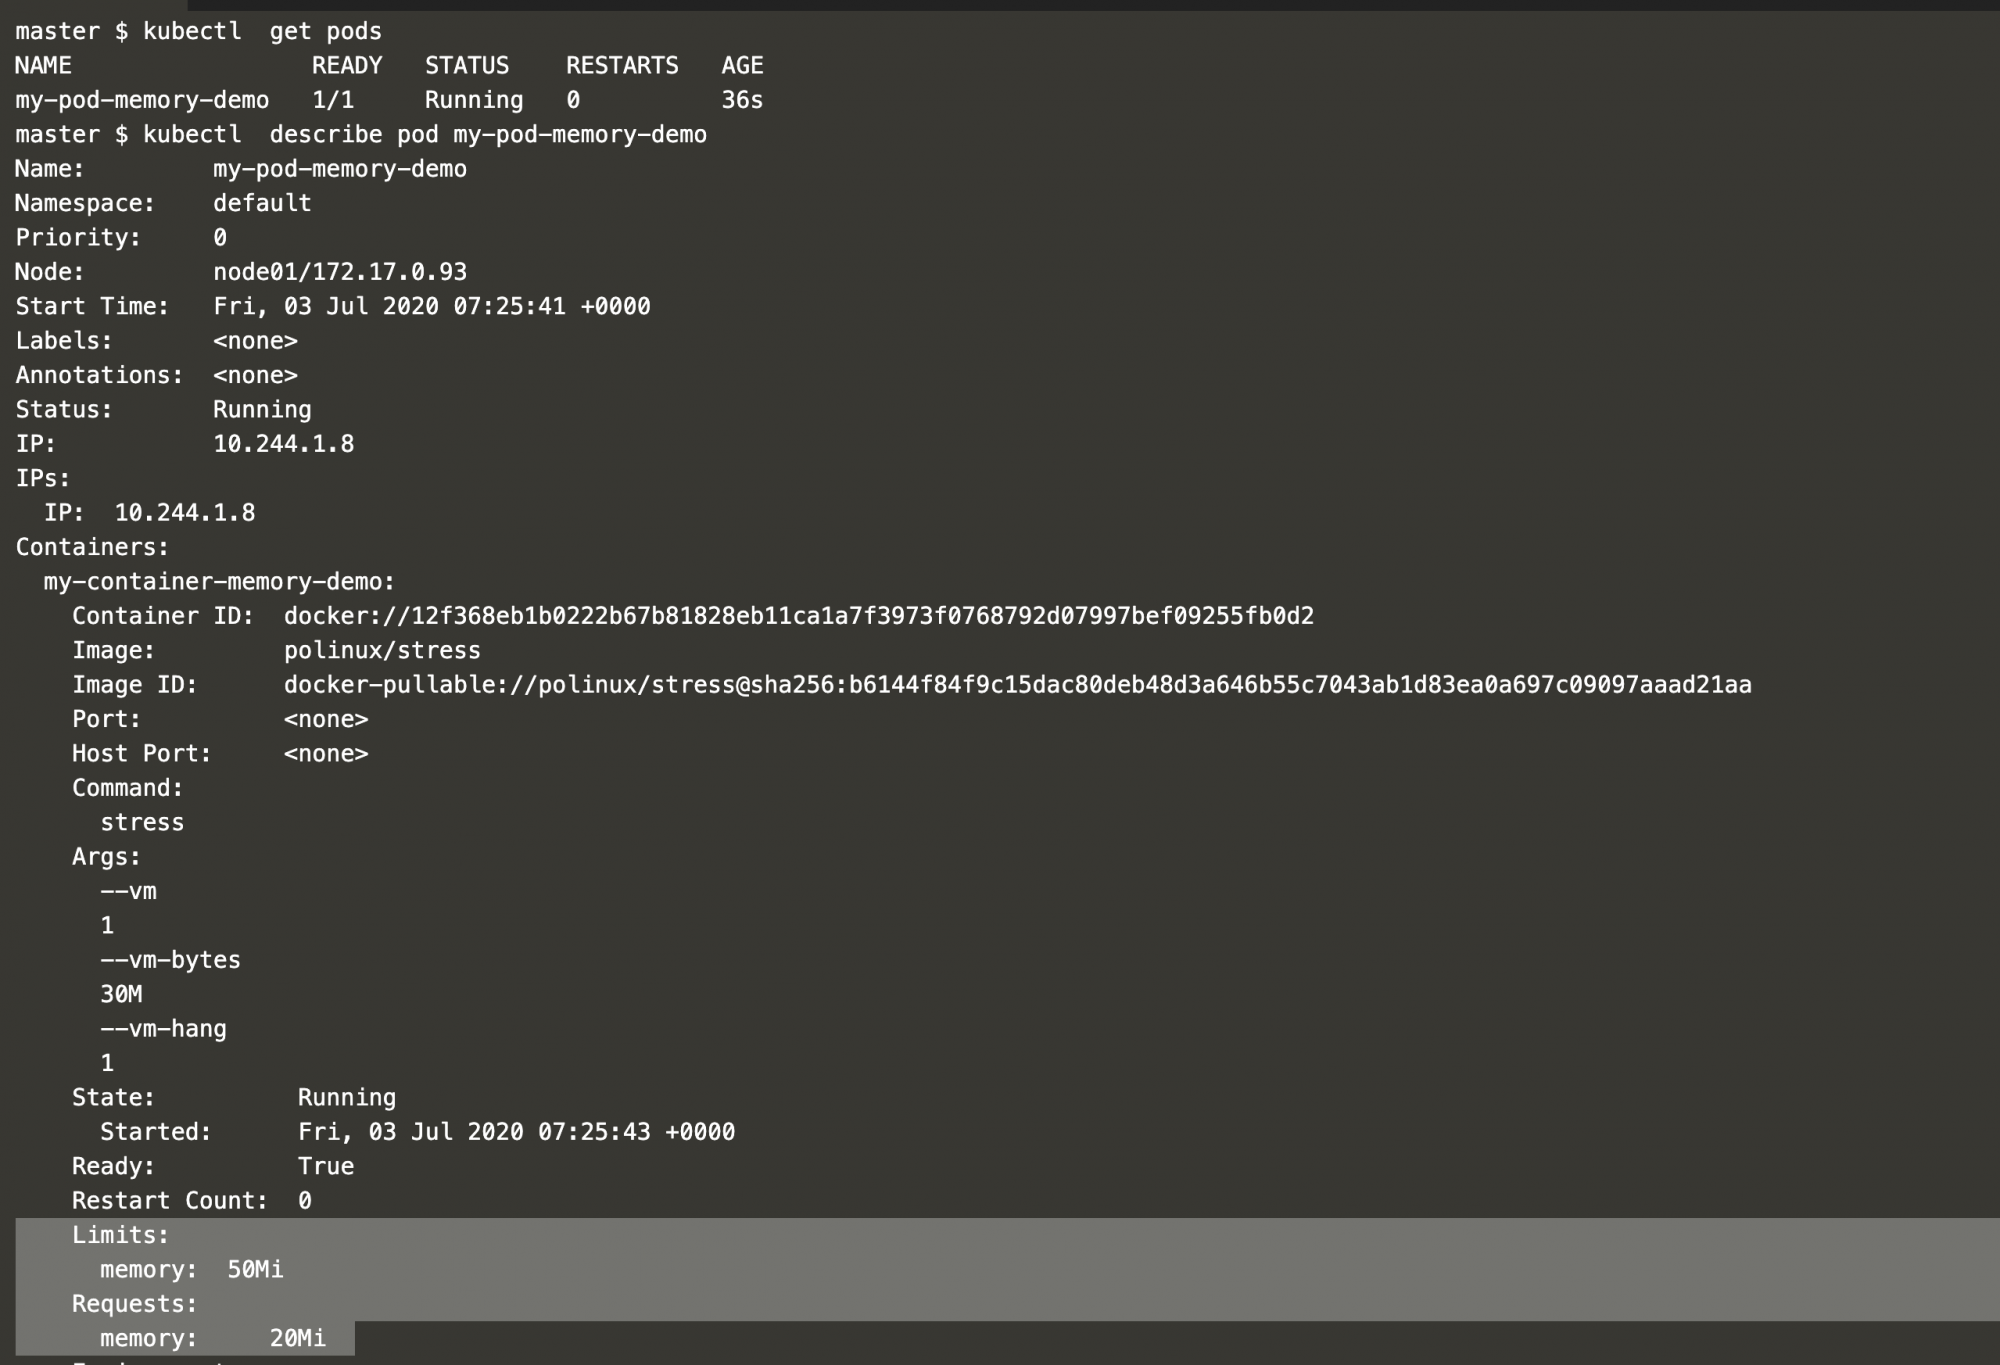
Pod usage can be checked using the following command.
kubectl top pods #Check resource consumption by the pod
Now, create a pod definition with CPU request and limit.
vim my-pod-with-cpu.ymlapiVersion: v1
kind: Pod
metadata:
name: my-pod-cpu-demo
spec:
containers:
- name: my-container-cpu-demo image: vish/stress
resources:
limits: cpu: "1"
requests:
cpu: "0.5"
args:
- -cpus
- "2"
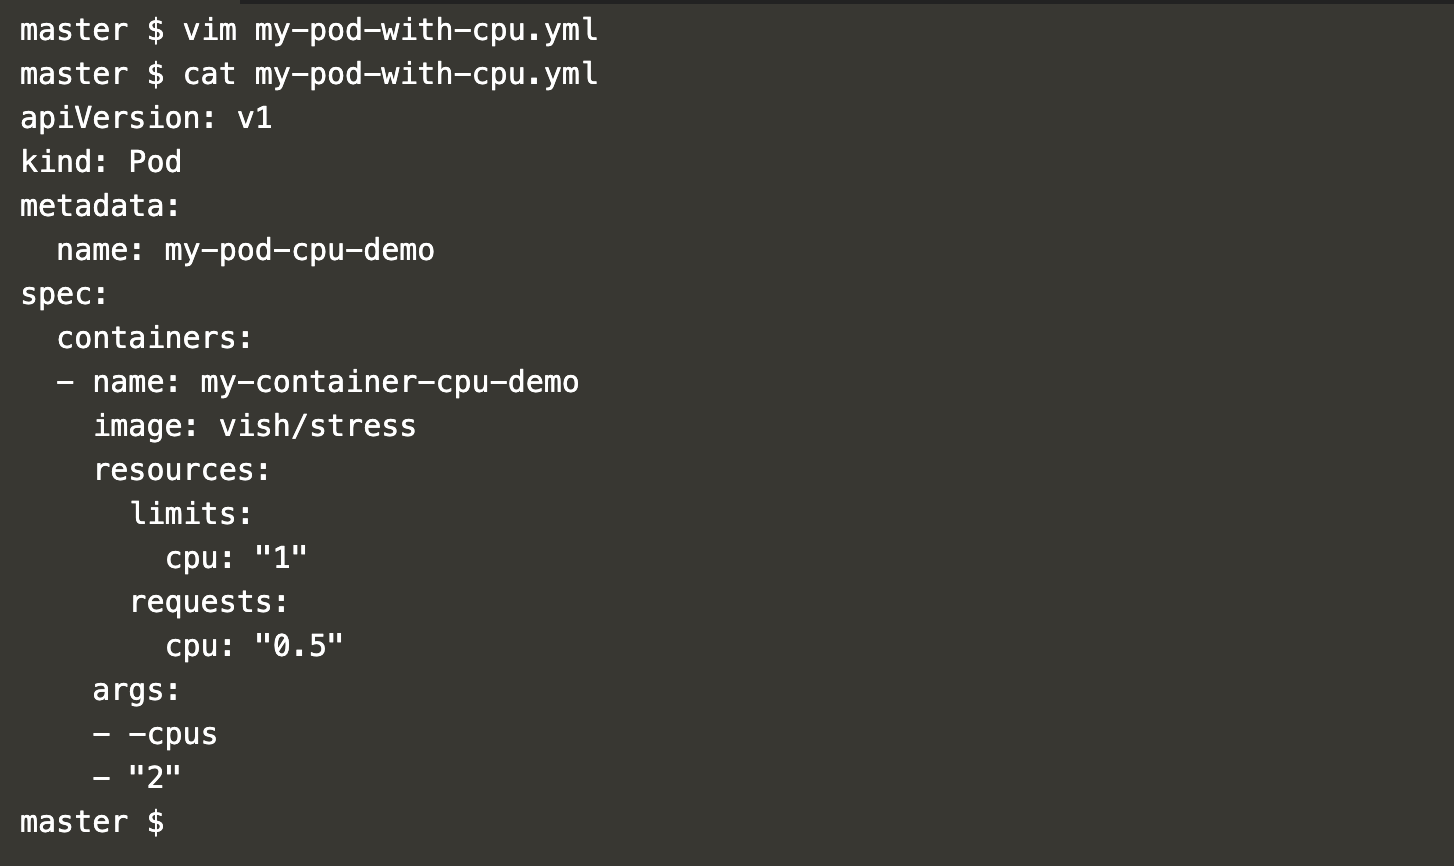
In the above file, you can see that the definition has a “resource” property with CPU request as 0.5 and limit as 1. Also note that we are passing 2 CPUs as our requirement which is more than the limit.
Now, let’s create a pod with CPU request and limit using the following command.
kubectl apply -f my-pod-with-cpu.yml #Create a podkubectl get pods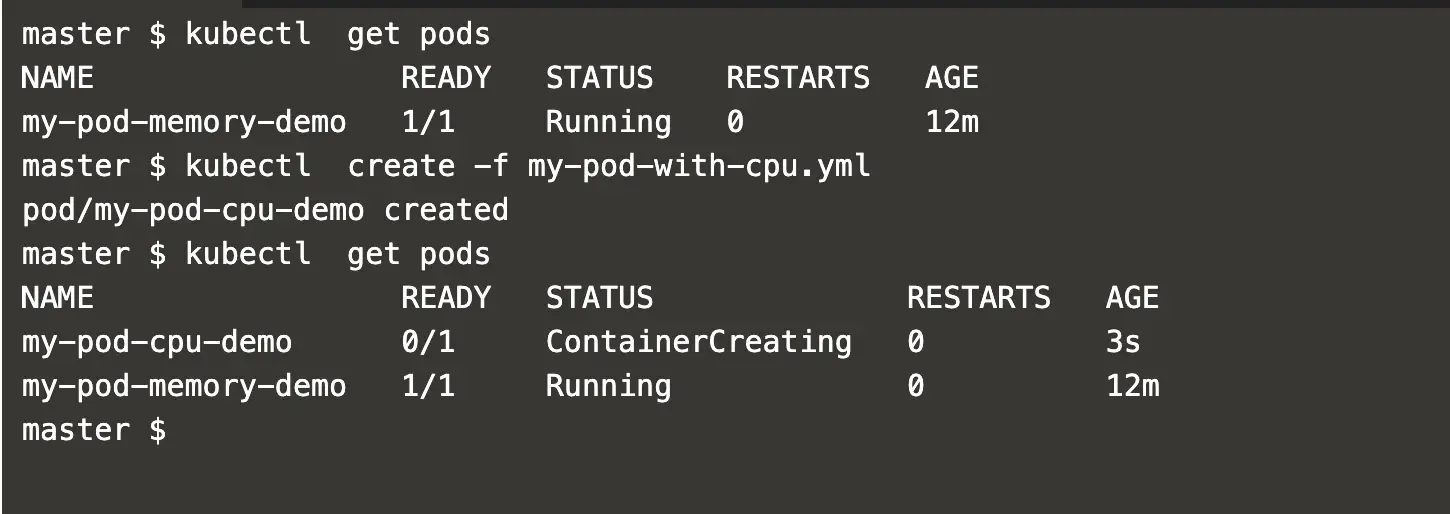
Get details of the pod we created.
kubectl get podskubectl describe pod my-pod-cpu-demo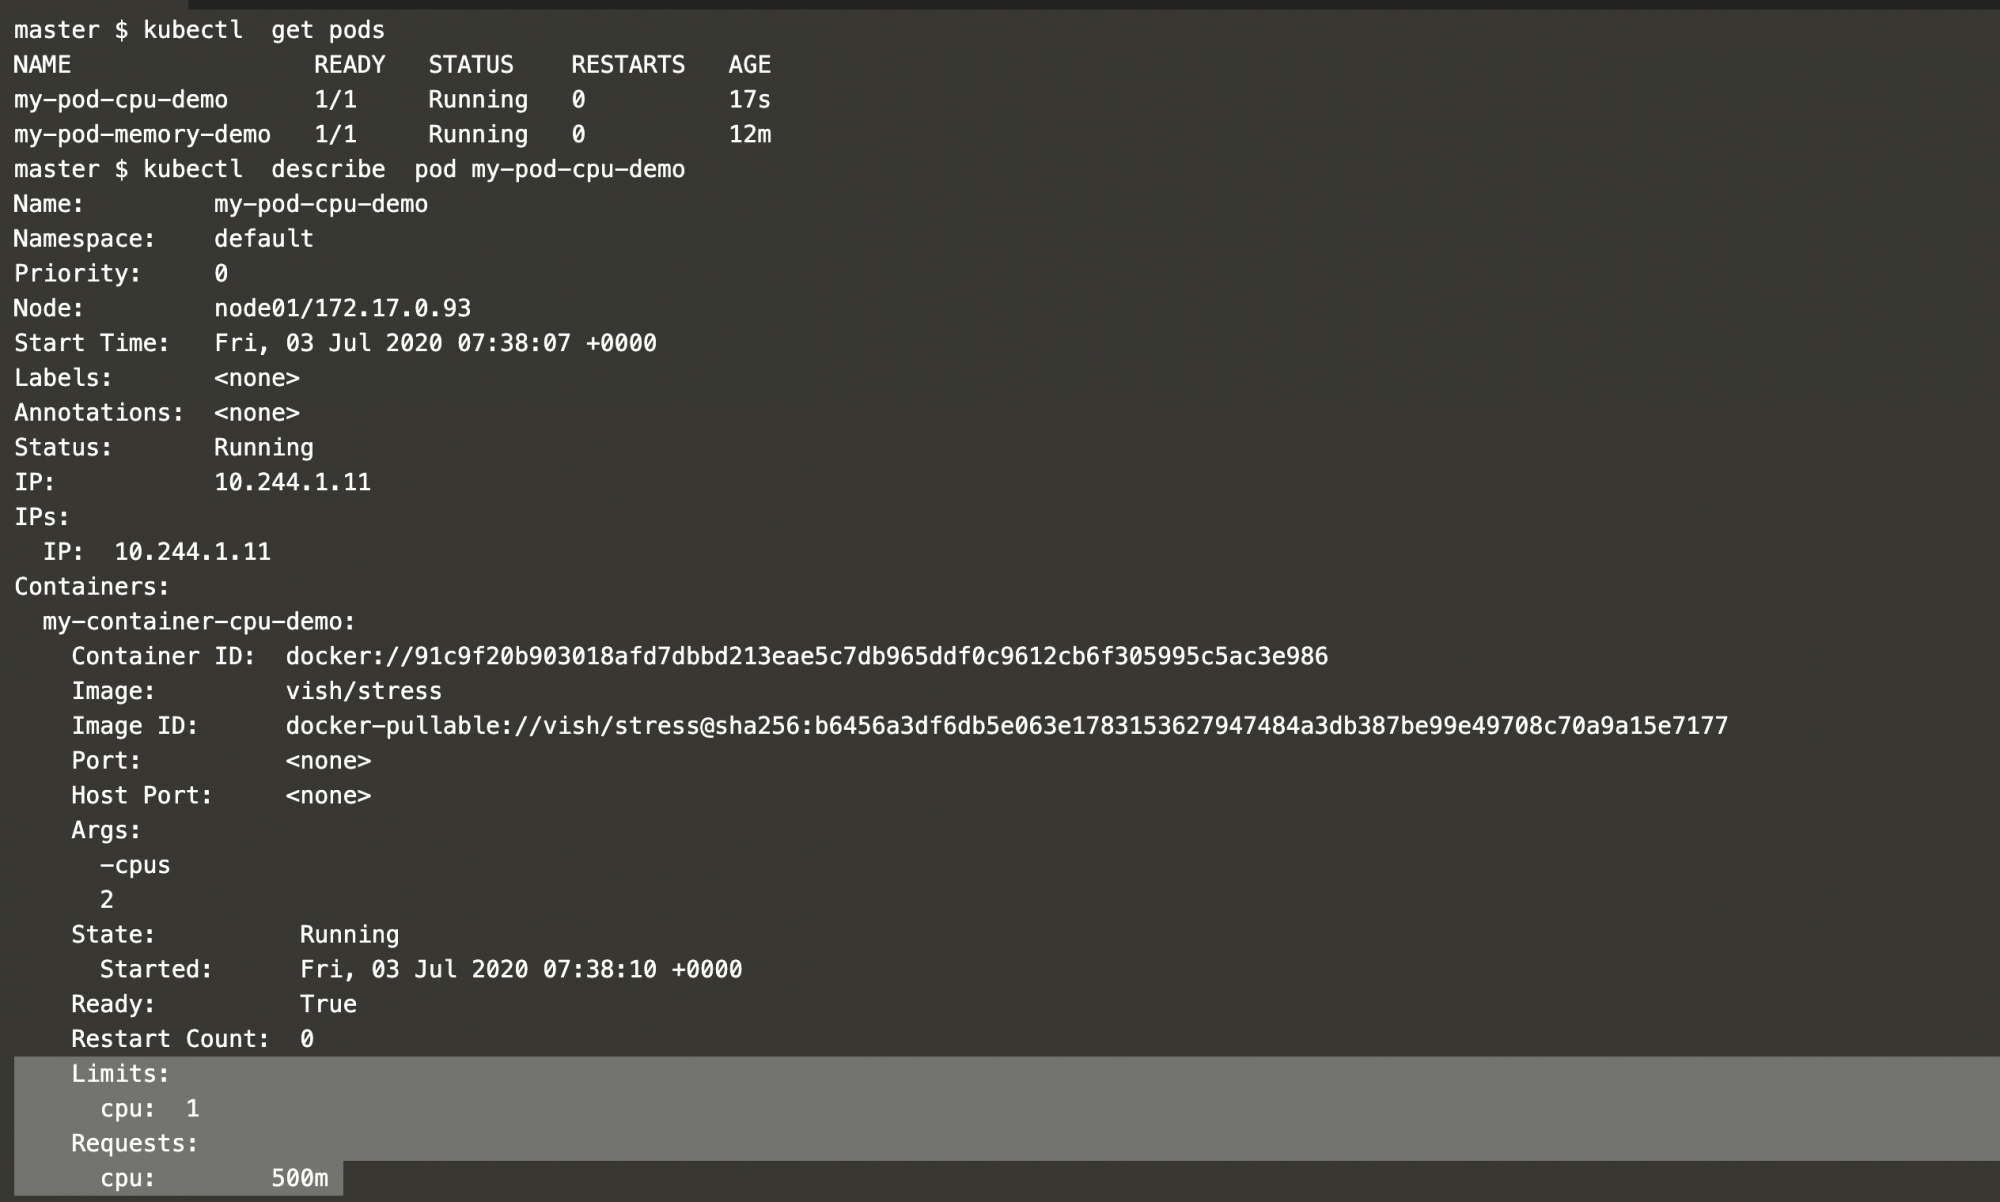
You can see that the Pod has requested for .5 or 500m CPU with a limit of 1 CPU
To check the CPU usage, use the following command.
kubectl top pod #Check resource consumption by the pod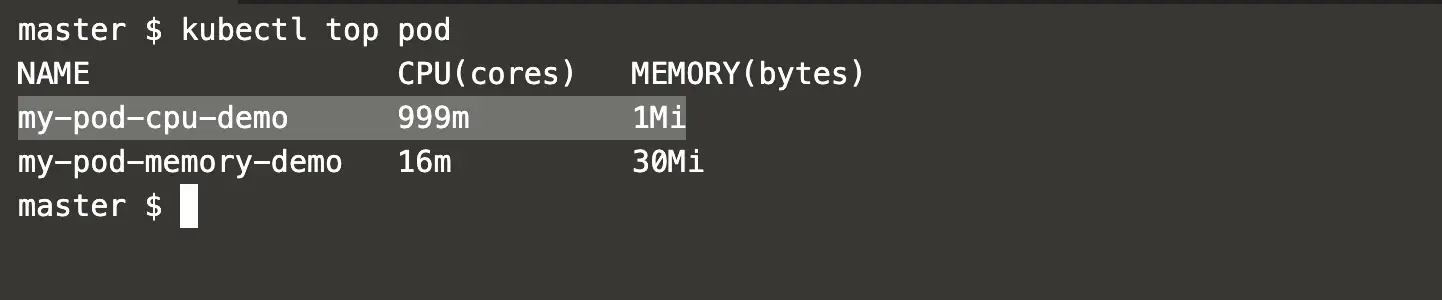
In the above screenshot you can see that even after passing 2 CPUs in the pod definition as an argument, it can not consume more than the limit, i.e. 1 CPU. Here the pod “my-pod-cpu-demo” could consume 999m CPU which is equivalent to 1 CPU and it could not increase its consumption.
Conclusion
In this article, we saw the steps to enable monitoring in the cluster using the Metric Server. We saw how a pod can request for CPU and memory and consume resources not beyond the limit specified.

Add Comment