


Introduction
In the previous installment, we set up the Checkmk server on CentOS 7 and Ubuntu. This guide shows you how to install the Checkmk agent on your Linux clients so metric data can be sent to the server.
Prerequisites
- A working Checkmk server (see Getting Started with Checkmk Monitoring (Part 1))
- One or more Linux client hosts (CentOS or Ubuntu) for monitoring
1. Installing the Agent on CentOS 7
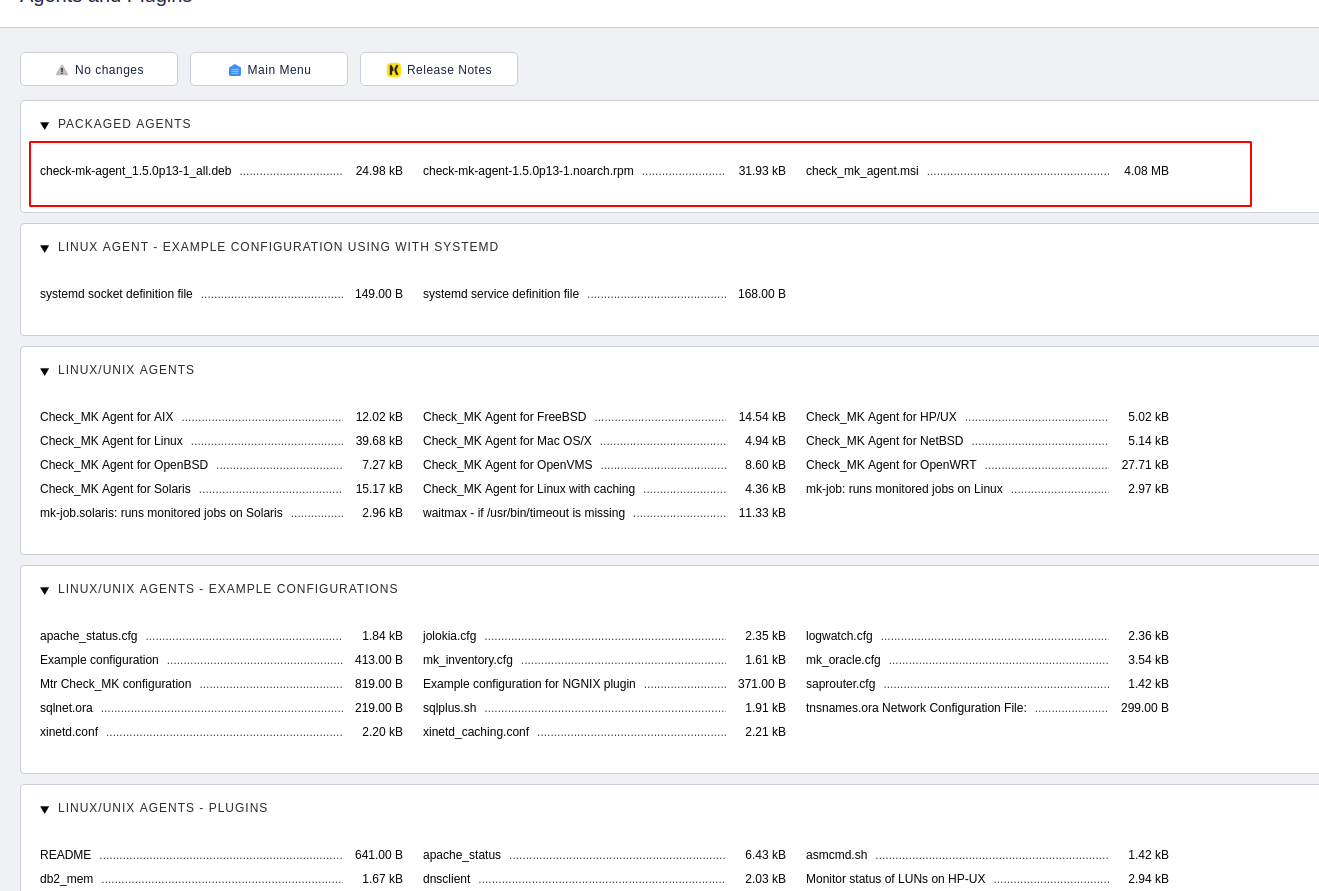
- Download the Checkmk agent via the Web UI under WATO → Monitoring Agent, choosing the .rpm package for RHEL-based clients.

yum install wget -y
wget http://<checkmk_server>/site/check_mk/agents/check-mk-agent-1.5.0p13-1.noarch.rpm- Install and start xinetd:
yum install xinetd -y
systemctl start xinetd
systemctl enable xinetd- Install the agent:
rpm -ivh check-mk-agent-*.rpm- Configure xinetd at /etc/xinetd.d/check_mk (e.g., restrict access to the Checkmk server IP).

- Restart the service:
systemctl restart xinetd5. Add the client host in Checkmk via WATO → Hosts → Create new host, then Save & Test.
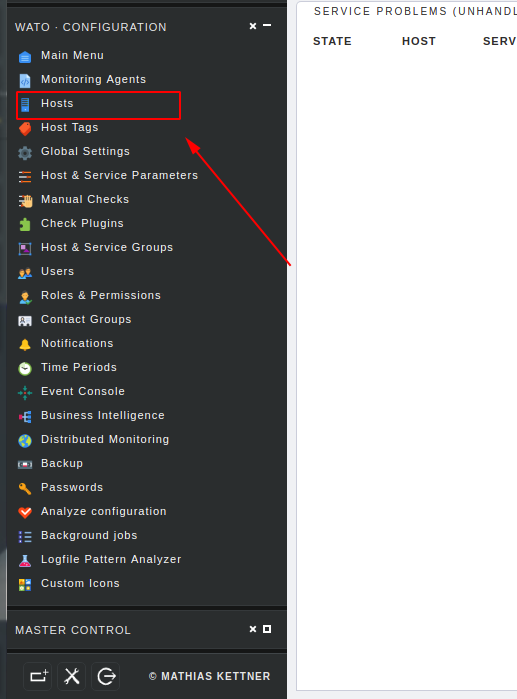


- On success, Save & Exit, then Save & Go to Services → click Fix all missing, then Activate Changes to enable service discovery across the agent. Monitor service status through Views → Hosts → All hosts.

2. Installing the Agent on Ubuntu
- In the Web UI, download the .deb agent package for Debian-based systems.
2. Use wget to fetch it:
wget http://<checkmk_server>/site/check_mk/agents/check-mk-agent_1.5.0p13-1_all.deb3. Install the agent:
dpkg -i check-mk-agent_*.deb4. Follow the same steps as CentOS: configure xinetd, restart it, and add the host in Checkmk.
Summary
You’ve successfully installed Checkmk agents on both CentOS and Ubuntu clients, enabling them to send metrics to the Checkmk server. In the next article, we’ll explore active checks to monitor services more proactively.
Top 10 VPN Services in 2025: Secure, Fast & Feature-Rich
Hướng dẫn cài đặt Cluster Kafka trên Ubuntu
https://forum.congdonglinux.com
Add Comment