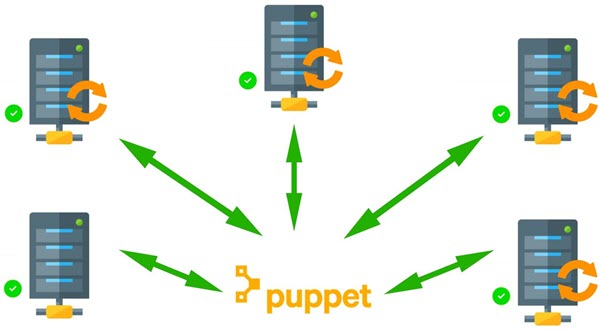
Puppet is a free and open-source automated administrative engine for Linux, Unix, and Windows operating systems. It is used for deploying, configuring, and managing servers and performs administrative tasks such as adding users, installing packages, and many more. It helps system admins to free up time and mental space by automating tasks on thousands of physical and virtual machines. It uses a client-server model. Where Puppet master controls configuration information for Puppet agents while Puppet agents talk to and pull down configuration profiles from the Puppet master.
In this tutorial, we will explain how to install a Puppet server and agent on Ubuntu 20.04 server.
Prerequisites
- Two server running Ubuntu 20.04.
- A root password is configured on both servers.
Getting Started
First, you will need to update all packages on Puppet master and Puppet client systems. You can update them by running the following command:
apt-get update -yOnce all the packages are up-to-date, you can proceed to the next step.
Setup Hostname Resolution
Next, you will need to setup hostname on both nodes. So each node can communicate with each other by hostname. You can do it by editing /etc/hosts file on both node:
nano /etc/hostsAdd the following lines on both node:
puppet-master-ip puppetmaster puppet
puppet-client-ip puppetclient
Save and close the file when you are finished. Then, you can proceed to the next step.
Install Puppet Server
First, you will need to install the Puppet server on the master node. By default, the Puppet package is not available in the Ubuntu 20.04 default repository. So you will need to install the Puppet repository in your server.
First, download the latest version of Puppet with the following command:
wget https://apt.puppetlabs.com/puppet6-release-focal.debOnce the package is downloaded, install it by running the following command:
dpkg -i puppet6-release-focal.debOnce the installation is completed, update the repository and install the Puppet server by running the following command:
apt-get update -y
apt-get install puppetserver -y
After installing Puppet server, you will need to change Puppet Java process memory allocation size. You can do it by editing /etc/default/puppetserver file:
nano /etc/default/puppetserverChange memory size to 1g as shown below:
JAVA_ARGS="-Xms1g -Xmx1g -Djruby.logger.class=com.puppetlabs.jruby_utils.jruby.Slf4jLogger"
Save and close the file when you are finished. Then, start the Puppet service and enable it to start at system reboot with the following command:
systemctl start puppetserver
systemctl enable puppetserver
Next, you can verify the status of the Puppet service with the following command:
systemctl status puppetserverYou should see the following command:
? puppetserver.service - puppetserver Service
     Loaded: loaded (/lib/systemd/system/puppetserver.service; disabled; vendor preset: enabled)
     Active: active (running) since Sat 2020-09-05 09:33:55 UTC; 3s ago
    Process: 3673 ExecStart=/opt/puppetlabs/server/apps/puppetserver/bin/puppetserver start (code=exited, status=0/SUCCESS)
   Main PID: 3715 (java)
      Tasks: 42 (limit: 4915)
     Memory: 962.3M
     CGroup: /system.slice/puppetserver.service
             ??3715 /usr/bin/java -Xms2g -Xmx2g -Djruby.logger.class=com.puppetlabs.jruby_utils.jruby.Slf4jLogger -XX:OnOutOfMemoryError="kill>

Sep 05 09:33:08 puppetmaster systemd[1]: Starting puppetserver Service...
Sep 05 09:33:55 puppetmaster systemd[1]: Started puppetserver Service.
Once you are finished, you can proceed to the next step.
Install and Configure Puppet Agent
At this point, the Puppet server is installed and configure. Now, you will need to install the Puppet agent on the client node.
First, download and install the Puppet repository with the following command:
wget https://apt.puppetlabs.com/puppet6-release-focal.deb
dpkg -i puppet6-release-focal.deb
Next, update the repository and install the Puppet agent by running the following command:
apt-get update -y
apt-get install puppet-agent -y
After installing Puppet agent, you will need to edit the Puppet configuration file and define the Puppet master information:
nano /etc/puppetlabs/puppet/puppet.confAdd the following lines:
[main]
certname = puppetclient
server = puppetmaster
Save and close the file when you are finished. Then, start the Puppet agent service and enable it to start at boot with the following command:
systemctl start puppet
systemctl enable puppet
Next, verify the status of the Puppet with the following command:
systemctl status puppetYou should get the following output:
? puppet.service - Puppet agent
     Loaded: loaded (/lib/systemd/system/puppet.service; enabled; vendor preset: enabled)
     Active: active (running) since Sat 2020-09-05 09:43:15 UTC; 22s ago
   Main PID: 1435 (puppet)
      Tasks: 2 (limit: 2353)
     Memory: 52.8M
     CGroup: /system.slice/puppet.service
             ??1435 /opt/puppetlabs/puppet/bin/ruby /opt/puppetlabs/puppet/bin/puppet agent --no-daemonize

Sep 05 09:43:15 puppetagent systemd[1]: Started Puppet agent.
At this point, the Puppet agent is installed and configured. Now, you can proceed to the next step.
Sign Puppet Agent Certificate
Puppet uses a client-server architecture so you will need to approve a certificate request for each agent node before it can configure it.
On the Puppet master node, run the following command to list all certificate:
/opt/puppetlabs/bin/puppetserver ca listYou should see the following output:
Requested Certificates:
    puppetclient       (SHA256)  A4:9A:E9:87:8B:54:0A:4F:A0:78:65:1A:3C:99:B5:EC:31:9E:BB:4C:17:8A:50:16:E9:1E:3D:D6:27:74:89:85
    puppetmaster       (SHA256)  E9:25:4C:51:4E:47:D7:44:11:1F:C5:A9:4E:96:D9:E8:3A:EB:A0:01:48:06:B5:EF:3F:C4:09:03:90:3E:D8:2D
Now, sign all the certificate with the following command:
/opt/puppetlabs/bin/puppetserver ca sign --allYou should get the following output:
Successfully signed certificate request for puppetclient
Successfully signed certificate request for puppetmaster
Now, Puppet master can able to communicate and control the agent node.
On the Puppet agent node, test the Puppet master and agent communication with the following command:
/opt/puppetlabs/bin/puppet agent --testIf everything is fine, you should get the following output:
Info: Using configured environment 'production'
Info: Retrieving pluginfacts
Info: Retrieving plugin
Info: Retrieving locales
Info: Caching catalog for puppetclient
Info: Applying configuration version '1599300398'
Notice: Applied catalog in 0.02 seconds
Conclusion
Congratulations! you have successfully installed and configured Puppet master and agent on Ubuntu 20.04 server. You can now easily add multiple agents and manage them easily with Puppet.
Đăng ký liền tay Nhận Ngay Bài Mới
Subscribe ngay
Cám ơn bạn đã đăng ký !
Lỗi đăng ký !


Add Comment