


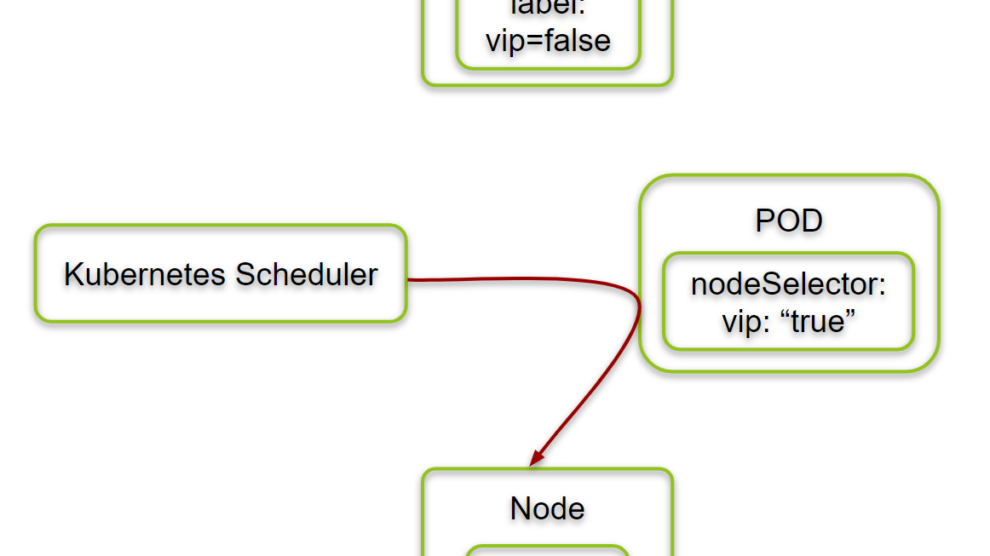
We can restrict a Pod to only be able to run on a particular Node. There can be some situations where we may want more control on a node where a pod lands.
nodeSelector is one of the forms of node selection constraint. nodeSelector is a field of PodSpec. This is a simple Pod scheduling feature that allows scheduling a Pod onto a node whose labels match the nodeSelector labels specified by the user.
To know more about Node Selects, click here to go to the official page of the Kubernetes.
In this article, we will have no taint on the master node so that pods can get deployed on the master node as well. Then we will create pods to see them get deployed on the worker as well as the master node. We will then attach a label to the master node and point pods to get deployed on the master node only using the nodeSelector.
Pre-requisites
- Kubernetes Cluster with at least 1 worker node.
If you want to learn to create a Kubernetes Cluster, click here. This guide will help you create a Kubernetes cluster with 1 Master and 2 Nodes on AWS Ubuntu 18.04 EC2 Instances.
What we will do
- Configure Node-Selectors
Configure Node-Selectors
First, let’s extract details of nodes in the cluster using the following command.
kubectl get nodes #Get nodes available in the clusterkubectl describe nodes node01 | grep Taint #Describe node1 node to extract details regarding Taintskubectl describe nodes master | grep Taint #Describe master node to extract details regarding Taints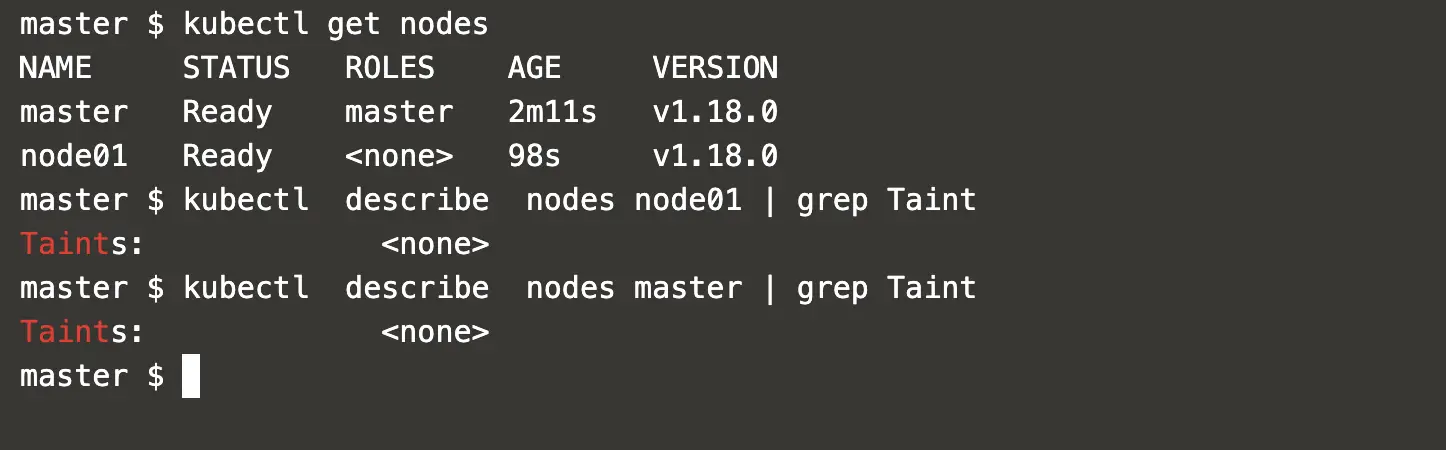
The above shows that the nodes do not have taints, this means Pods can be placed on any of the nodes, either on master or node01.
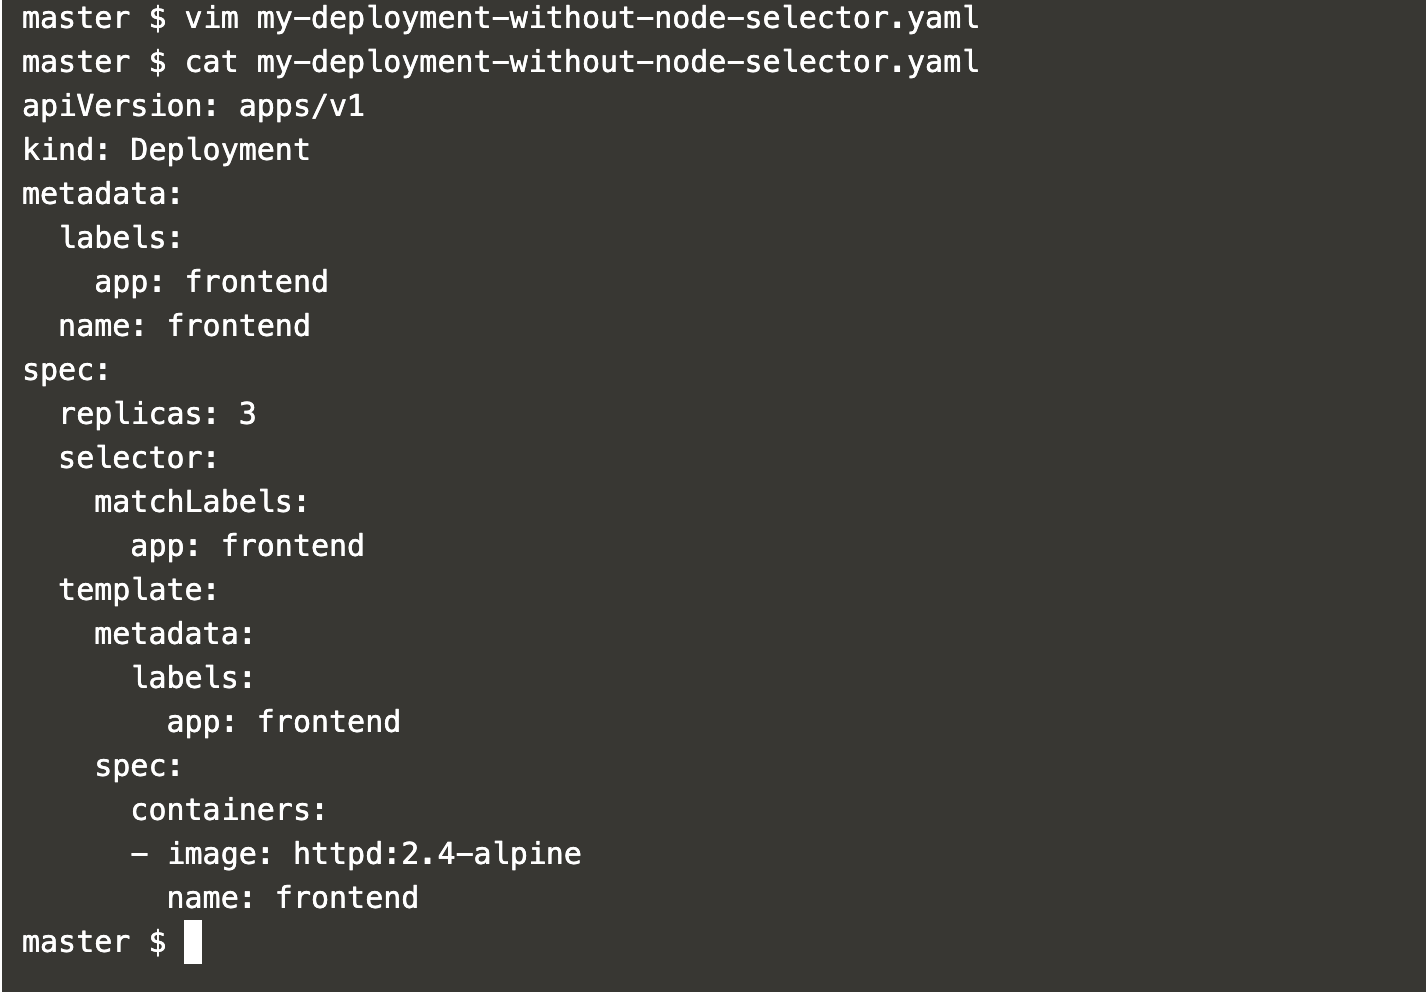
Now, let’s create a deployment that does not have any node selector in it.
vim my-deployment-without-node-selector.yaml #Create a deployment definitionapiVersion: apps/v1
kind: Deployment
metadata:
labels:
app: frontend
name: frontend
spec:
replicas: 3
selector:
matchLabels:
app: frontend
template:
metadata:
labels:
app: frontend
spec:
containers:
- image: httpd:2.4-alpine
name: frontend
Now, we are ready to create a deployment using the following command.
kubectl get pods #Get pods available in the clusterkubectl create -f my-deployment-without-node-selector.yaml #Create a deploymentkubectl get pods ##Get nodes available in the cluster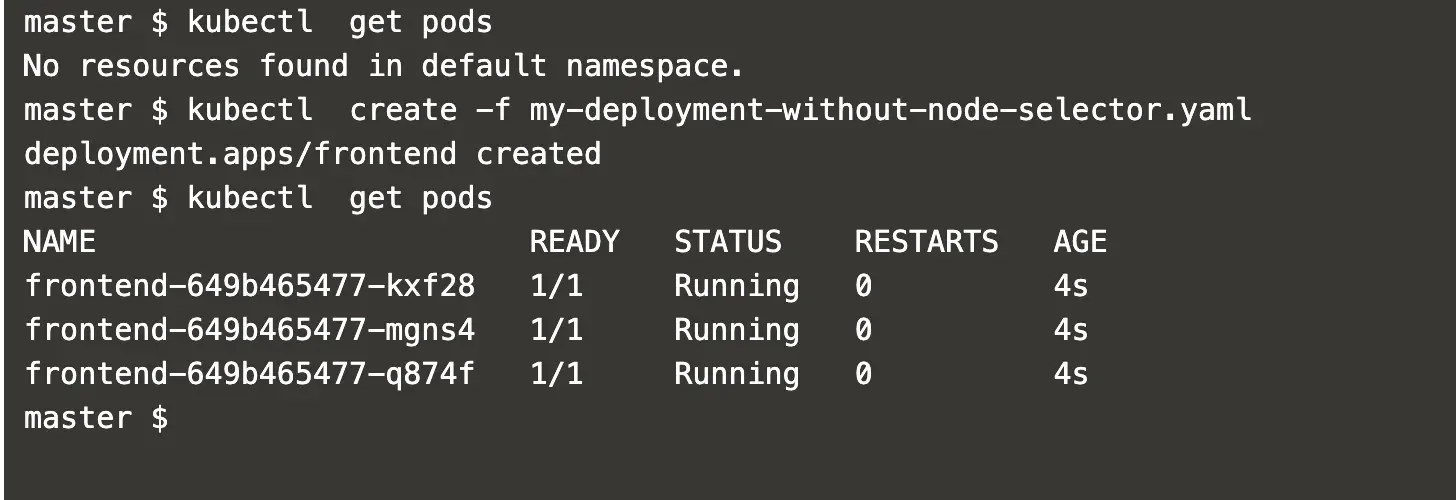
Now, change the replica count in the deployment by editing the file and apply changes.
kubectl apply -f my-deployment-without-node-selector.yaml #Apply changes made in the deployment definition filekubectl get pods -o wide # Get more details regarding pods using -o wide option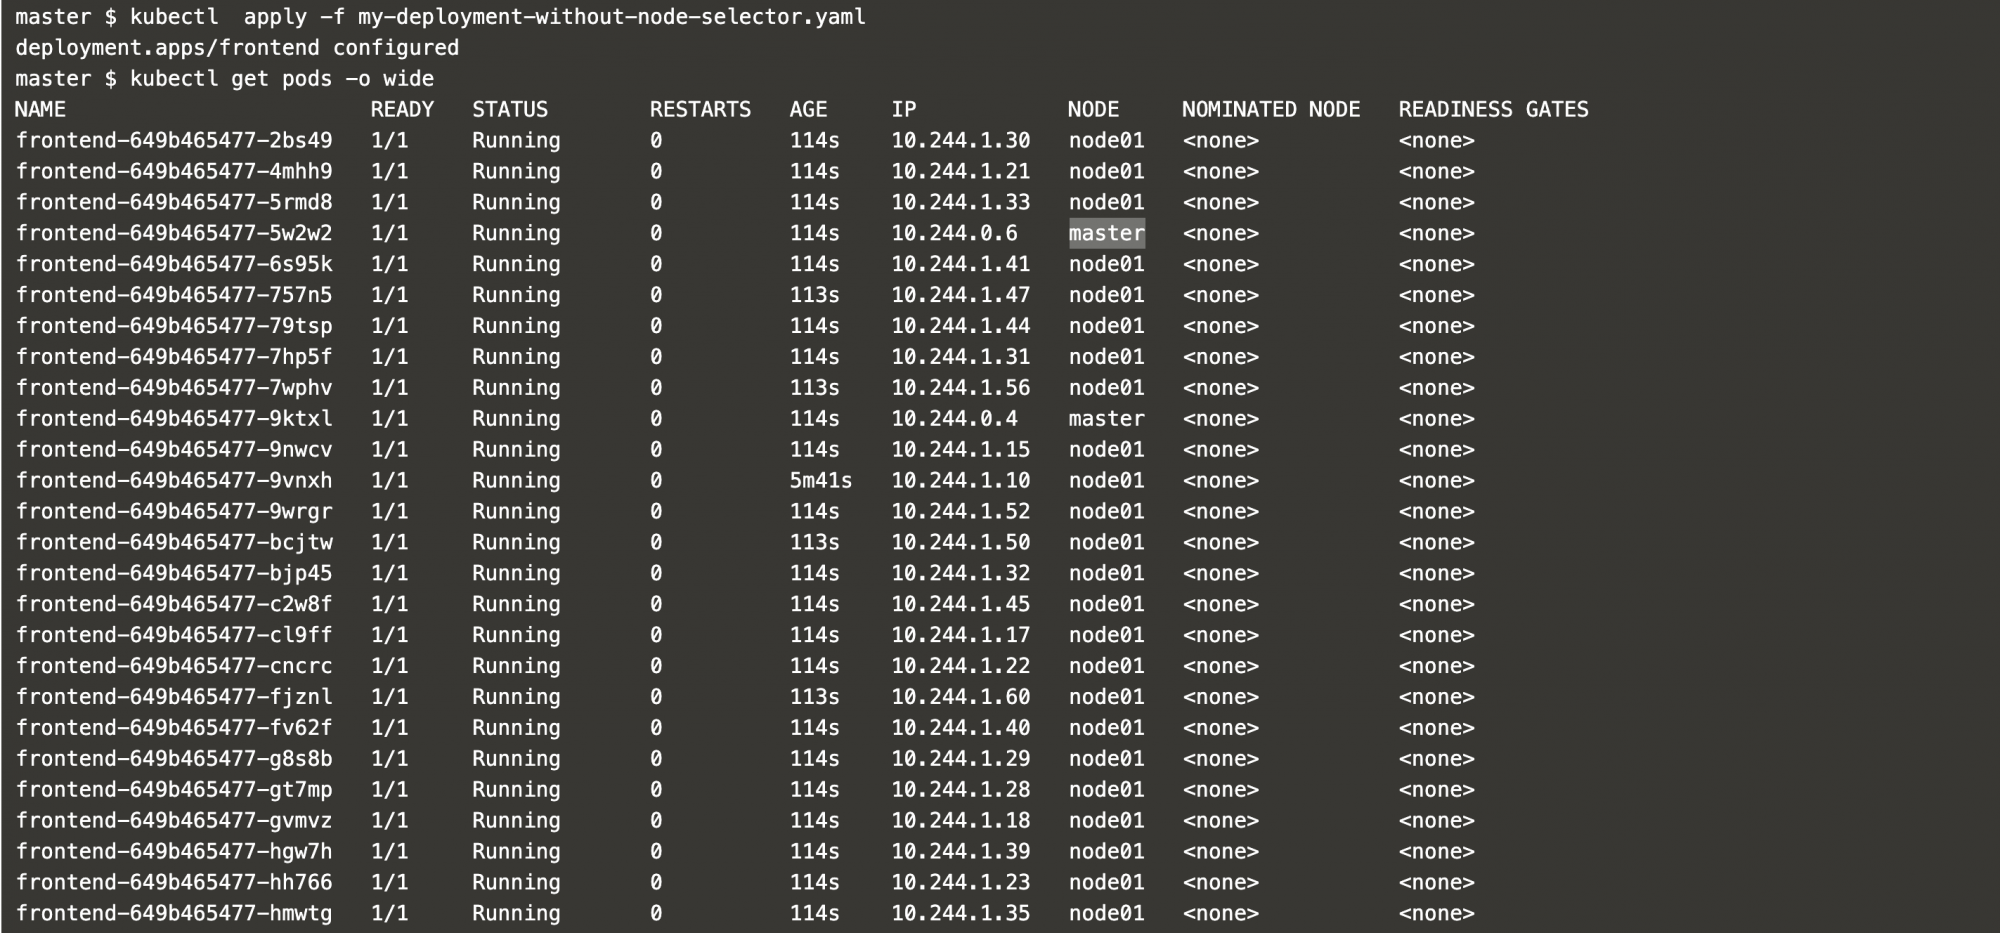
In the above screenshot, it can be seen that new pods are getting created and they are being scheduled on the master node as well.
The reason for this is, both the nodes, the master and node01, do not have taints.
SO, to restrict the scheduling and to make sure pods get places on the master node only, let’s create a label on the master node.
kubectl label nodes master on-master=true #Create a label on the master nodekubectl describe node master #Get more details regarding the master node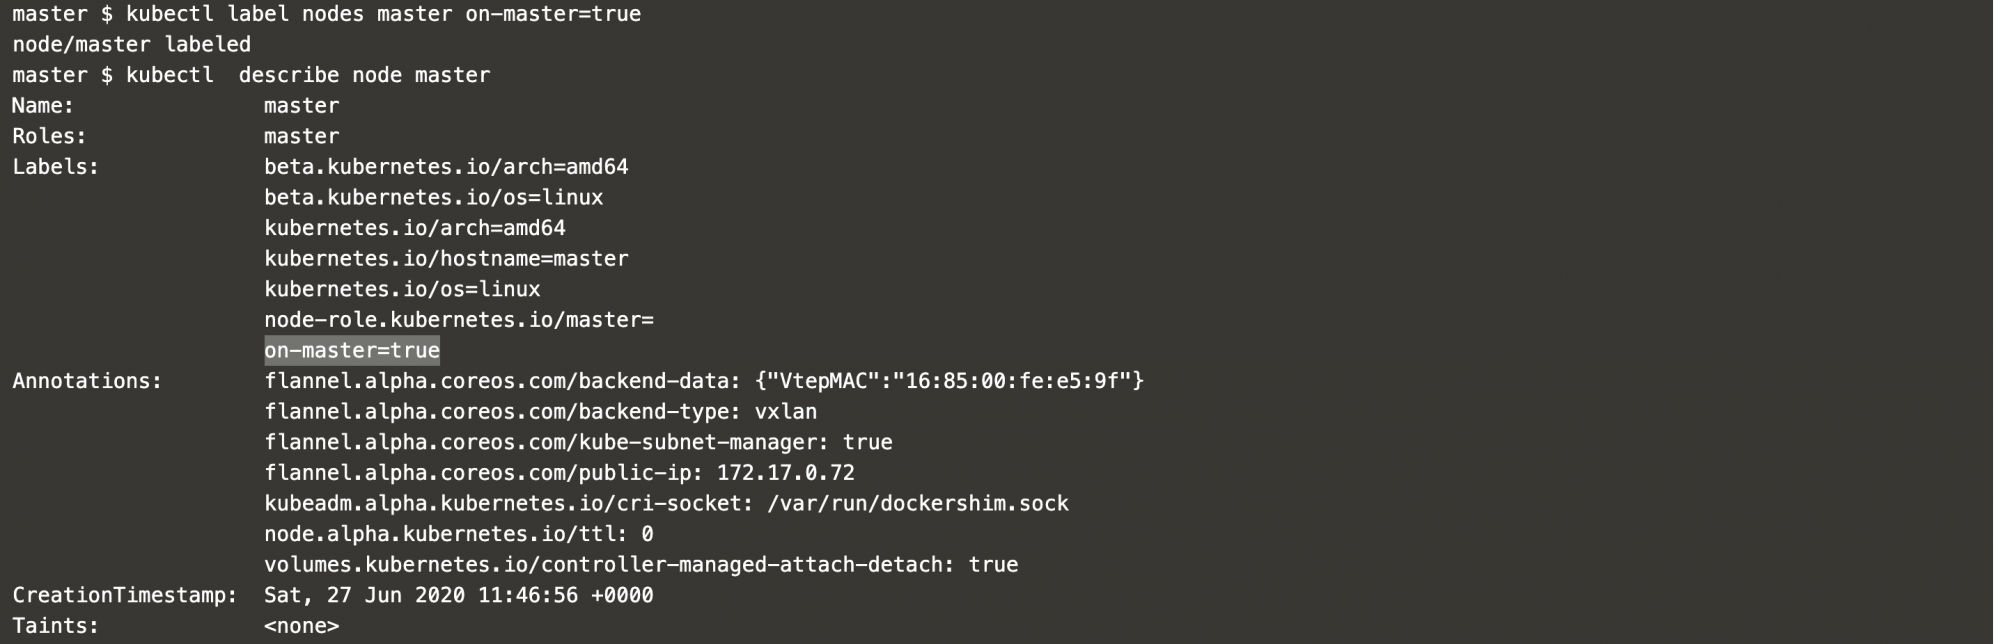
In the above screenshot, it can be seen that the master node has a label to it as “on-master=true”
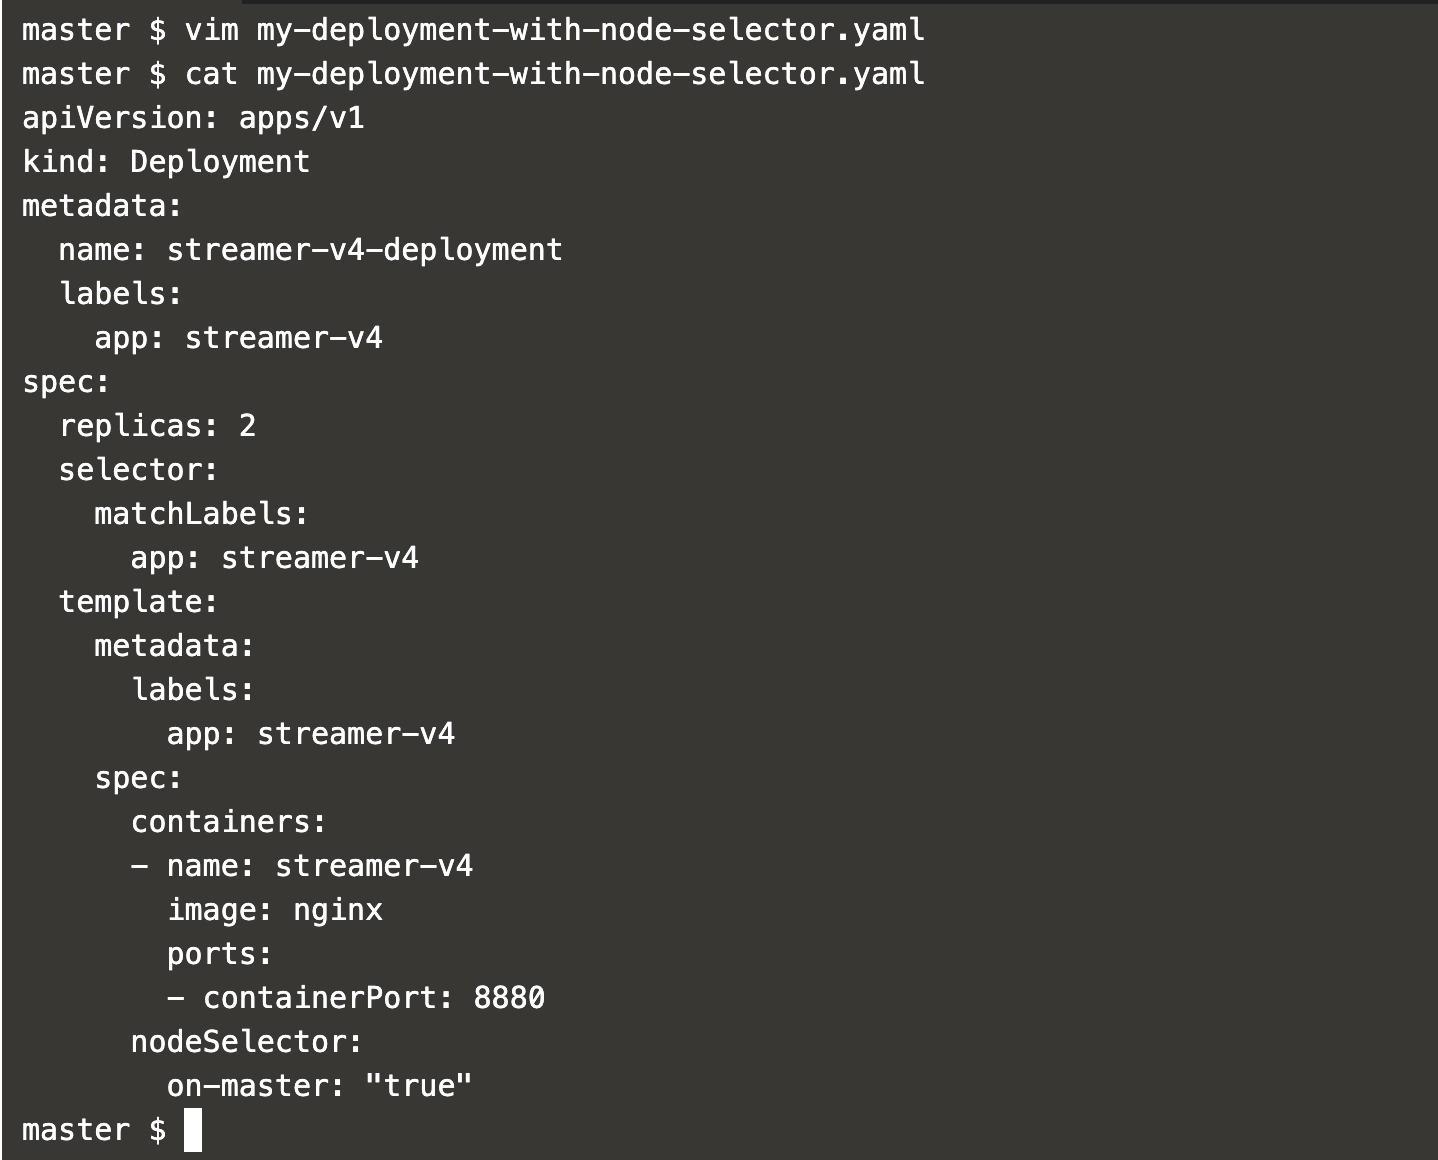
Now, let’s create a new deployment with nodeSelector:on-master=true in it to make sure that the Pods get deployed on the master node only.
vim my-deployment-with-node-selector.yaml #Create a deployment definition file apiVersion: apps/v1
kind: Deployment
metadata:
name: streamer-v4-deployment
labels:
app: streamer-v4
spec:
replicas: 2
selector:
matchLabels:
app: streamer-v4
template:
metadata:
labels:
app: streamer-v4
spec:
containers:
- name: streamer-v4
image: nginx
ports:
- containerPort: 8880
nodeSelector:
on-master: "true"
A new deployment with nodeSelector can now be created with the following command.
kubectl create -f my-deployment-with-node-selector.yaml #Create a deploymentkubectl get pods -o wide | grep streamer-v4-deployment #Get more details of the pods
In the above screenshot, it can be seen that the Pods got deployed on the master node only.
Now, let’s change “replica=50” to see where the pods will get deployed.
vim my-deployment-with-node-selector.yaml #Change a deployment definition
Apply the latest changes with a command mentioned below.
kubectl apply -f my-deployment-with-node-selector.yaml #Apply changes to the deployment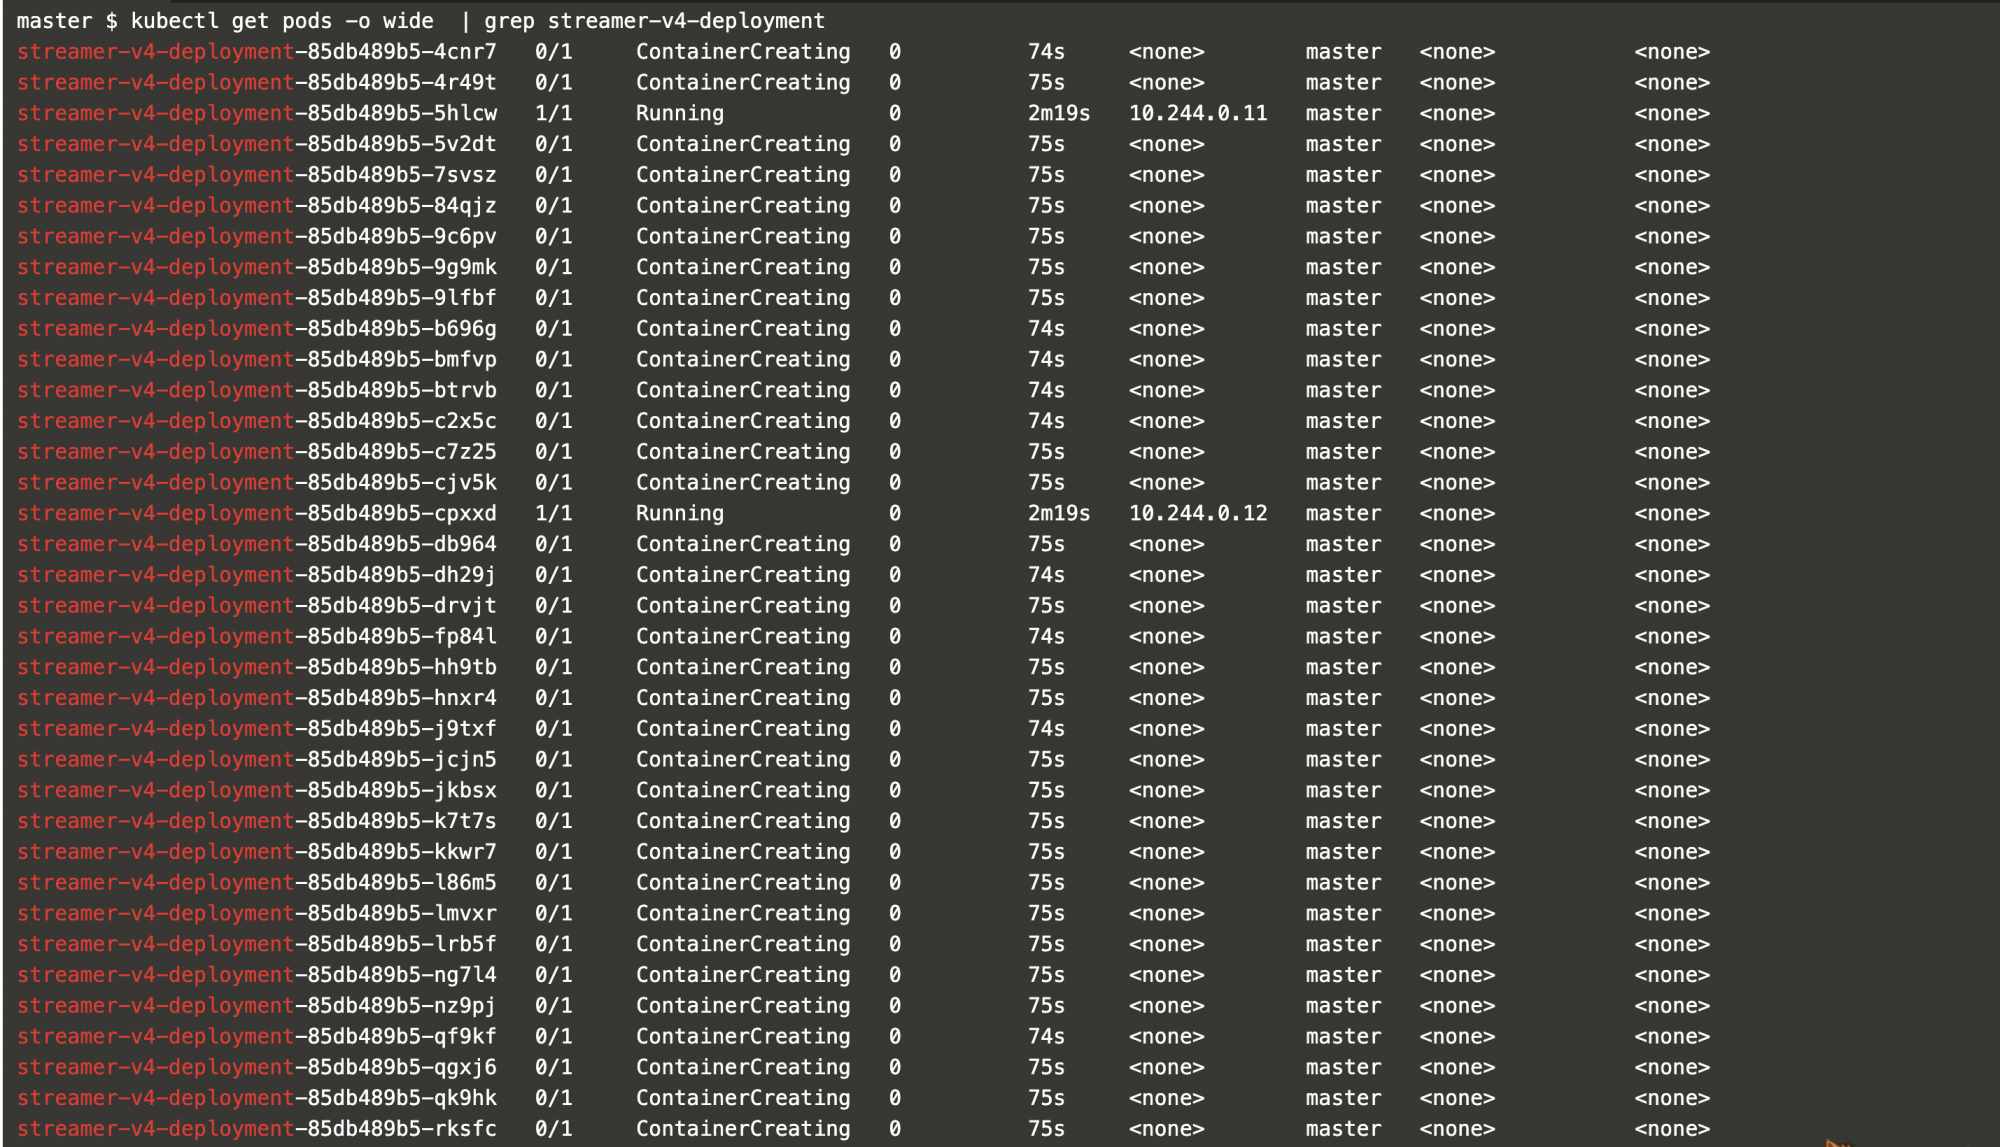
Here, you can see that all the pods are being created and deployed on the “master” node only.
Conclusion
In this article, we saw how pods can be restricted to get deployed on the specific node only using label and nodeSelector.
We also saw that if the master node does not have Taints then pods can get deployed on it.

Add Comment