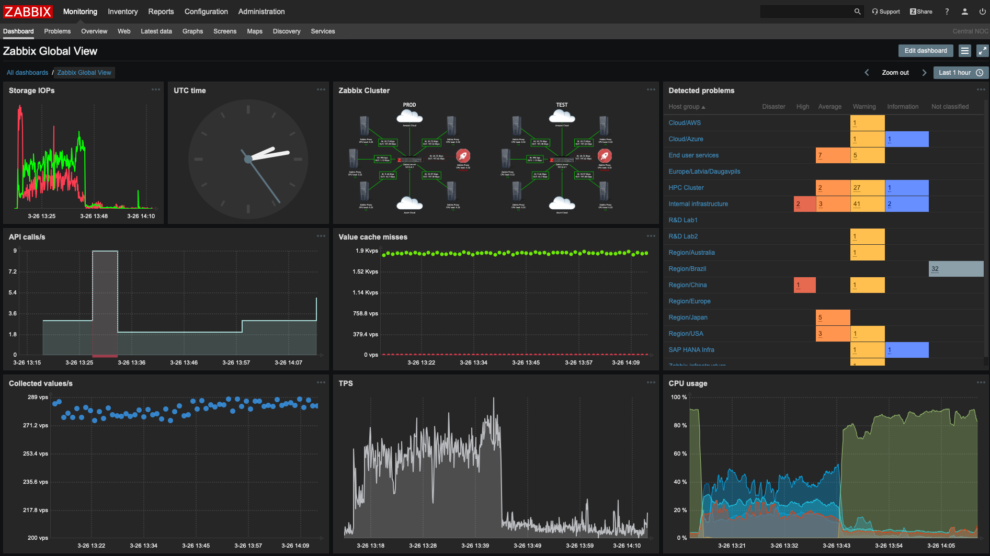
Zabbix is an open-source monitoring tool for network services, network hardware, servers and applications. It is designed to track and monitor the status of your system and servers. Zabbix provides support for many database systems – including MySQL, PostgreSQL, SQLite and IBM DB2 – for storing data. The Zabbix backend is written in C and the frontend is written in PHP.
In this tutorial, we show you how to install Zabbix 4.4 on the Ubuntu 18.04 server. We will install Zabbix with Apache web server, PHP and MariaDB server on the current Ubuntu 18.04 server.
Requirements
For this guide, we will install Zabbix on Ubuntu 18.04 Bionic Beaver with 4 GB RAM and 50 GB disk space with 4 CPUs. You will also need to have root privileges on the server.
What we will do?
- Install Apache Webserver
- Install and Configure PHP Packages
- Install and COnfigure MariaDB Server
- Install and COnfigure Zabbix
- Zabbix Frontend Post-Installation
Step 1 – Install Apache Webserver
First, we will install the Apache webserver to the ubuntu 18.04.
Update all Ubuntu repository lists and install Apache packages using the apt command below.
sudo apt update
sudo apt install apache2
After that, start the Apache service and add it to the system boot.
systemctl start apache2
systemctl enable apache2
And the Apache service is up and running, check it using the following command.
systemctl status apache2As a result, the Apache web server installation on Ubuntu 18.04 has been completed.
Step 2 – Install PHP Packages
In this step, we will install and configure PHP as Zabbix requirements. We will install and use the default PHP version provided by the Ubuntu repository, the PHP 7.2.
Install PHP packages using the apt command below.
sudo apt install php-cli php-common php-dev php-pear php-gd php-mbstring php-mysql php-xml php-bcmath libapache2-mod-phpOnce the installation is complete, go to the PHP configuration directory and edit the ‘php.ini’ file.
Go to the “/etc/php/7.2” directory.
cd /etc/php/7.2/Edit the “php.ini” configuration file for both PHP Apache2 and CLI.
vim apache2/php.ini
vim cli/php.ini
Change details configuration as below.
date.timezone = Asia/Jakarta
max_execution_time = 600
max_input_time = 600
memory_limit = 256M
post_max_size = 32M
upload_max_filesize = 16M
Save and close.
Next, restart the Apache service to apply a new PHP configuration.
systemctl restart apache2Make sure there is no error, and as a result, the PHP installation and configuration for Zabbix has been completed.
Step 3 – Install and Configure MariaDB Server
In this step, we will install the MariaDB packages, set up the MariaDB root password, and create a new user and database for Zabbix.
Install MariaDB Server packages using the apt command below.
sudo apt install mariadb-server mariadb-clientAfter that, start the MariaDB service and add it to the system boot.
systemctl start mariadb
systemctl enable mariadb
The MariaDB service is up and running, now run the ‘mysql_secure_installation’ command below to set up the MariaDB root password.
mysql_secure_installationAnd you will be asked for the new MariaDB root password, type your strong password and type ‘y’ for all questions.
Set a root password? [Y/n] Y
Remove anonymous users? [Y/n] Y
Disallow root login remotely? [Y/n] Y
Remove test database and access to it? [Y/n] Y
Reload privilege tables now? [Y/n] Y
Now you’ve set up the MariaDB root password.
Next, log in to the MySQL shell and create a new database and user for Zabbix.
Login to the MySQL Shell using the command below.
mysql -u root -pNOw create a new database and user named ‘zabbix’ with the password ‘hakase-labs@’ using the following queries.
create database zabbix character set utf8 collate utf8_bin;
grant all privileges on zabbix.* to zabbix@'localhost' identified by 'hakase-labs@';
grant all privileges on zabbix.* to zabbix@'%' identified by 'hakase-labs@';
flush privileges;
Type ‘exit’ to logout from the MySQL shell, and as a result, the installation and configuration of the MariaDB server have been completed. And you’ve set up the MariaDB root password and created the database for the Zabbix installation.
Step 4 – Install and Configure Zabbix
Now we’ve installed the LAMP Stack on the Ubuntu system, and we’ve created the database and user for Zabbix. For this step, we will install Zabbix to the Ubuntu 18.04 Server.
Add Repository and Install Zabbix
First, we will add the Zabbix Repository for Ubuntu 18.04 Bionic Beever, then install Zabbix packages to the system.
Download and install the Zabbix repository using the command below
wget https://repo.zabbix.com/zabbix/4.4/ubuntu/pool/main/z/zabbix-release/zabbix-release_4.4-1+bionic_all.deb
dpkg -i zabbix-release_4.4-1+bionic_all.deb
Next, update the Ubuntu repository lists and install Zabbix packages using the following apt command.
sudo apt update
sudo apt install zabbix-server-mysql zabbix-frontend-php zabbix-apache-conf zabbix-agent
As a result, Zabbix packages for Ubuntu 18.04 has been installed.
Import Zabbix Database Scheme
After installing Zabbix packages, we will import the sample of the Zabbix database scheme to the ‘zabbix’ database.
Import Zabbix database scheme to the ‘zabbix’ database using the command below.
zcat /usr/share/doc/zabbix-server-mysql*/create.sql.gz | mysql -uzabbix -p zabbixType the password for ‘zabbix’ user (For this guide, we’re using password ‘hakase-labs@’).
And the Zabbix database scheme has been imported to the database ‘zabbix’.
Configure Zabbix Server
Edit the Zabbix Server configuration ‘/etc/zabbix/zabbix_server.conf’ using vim editor.
vim /etc/zabbix/zabbix_server.confUncomment the following options for the database and change the password with your own.
DBHost = localhost
DBPassword = hakase-labs@
Save and close.
Next, start the Zabbix Server service and add it to the system boot.
systemctl start zabbix-server
systemctl enable zabbix-server
After that, check the Zabbix Server status using the command below.
systemctl status zabbix-serverAs a result, the Zabbix Server is up and running on the Ubuntu 18.04.
Configure Zabbix Agent
In this section, we will set up the Zabbix agent.
Edit the Zabbix Agent configuration ‘/etc/zabbix/zabbix_agentd.conf’ using vim editor.
vim /etc/zabbix/zabbix_agentd.confUncomment and change the following values as below.
Server = 127.0.0.1
ServerActive = 127.0.0.1

Hostname = zabbix18
Save and close.
Next, start the Zabbix Agent service and add it to the system boot.
systemctl start zabbix-agent
systemctl enable zabbix-agent
After that, check the Zabbix Agent service using the command below.
systemctl status zabbix-agentAs a result, the Zabbix Agent service is up and running on the Ubuntu System.
Restart Apache2 Webserver
After configuring the Zabbix Server and Agent, we must restart the Apache service.
systemctl restart apache2As a result, the installation and configuration of Zabbix on Ubuntu 18.04 has been completed.
Step 5 – Zabbix Frontend Post-Installation
Open your web browser and type the server IP address following the URL path ‘/zabbix’.
http://10.5.5.30/zabbix/
Now you will get the welcome message for Zabbix installation.
Click the ‘Next step‘ button to continue.
Now the Zabbix will check all requirements for the Zabbix Frontend installation. Make sure all requirements have a green ‘OK‘ indication.
Click the ‘Next step button‘ to continue.
For database configuration, choose the MySQL database and type the password for database and user ‘zabbix‘.
Click the ‘Next step‘ button again.
For the Zabbix Server details, type your server IP address and hostname, then click the ‘Next step‘ button again.
Now click the ‘Next step‘ button again to confirm all configurations to install the Zabbix Frontend.
Once the installation is complete, you will get the ‘Congratulations‘ message as below.
Click the ‘Finish‘ button and you will be redirected to the Zabbix login page.
Type the Zabbix default user as ‘Admin‘ with password ‘zabbix‘, then click the ‘Sign In‘ button.
Now you will get the Zabbix Dashboard as below.
As a result, the installation of Zabbix 4.4 on Ubuntu 18.04 Server has been completed successfully.
Reference
Đăng ký liền tay Nhận Ngay Bài Mới
Subscribe ngay
Cám ơn bạn đã đăng ký !
Lỗi đăng ký !


Add Comment