


Redmine is a free, open-source, popular project management and issue-tracking system. It supports PostgreSQL and MariaDB databases and is built on the Ruby on Rails framework. It has built-in third-party plugin support, allowing you to set up multiple projects, wikis, and forums. It offers a wide range of features, including Email and Feeds notifications, Multiple language support, Role-based access control, File management, and more.
This tutorial will explain how to install the Redmine project management system on CentOS.
Prerequisites
- A server running CentOS 8.
- A root password is configured on the server.
Install Required Dependencies
Before starting, you will need to install some dependencies on your server. You can install all of them using the following command:
dnf group install "Development Tools"
dnf install zlib-devel curl-devel openssl-devel -y
Once all the packages are installed, you can proceed to the next step.
Install and Configure MariaDB Database
Redmine uses MariaDB as a database backend so you will need to install the MariaDB database server in your server. You can install it using the following command:
dnf install mariadb-server mariadb-devel -y
Once the MariaDB server is installed, start the MariaDB service and enable it to start at system reboot:
systemctl start mariadb
systemctl enable mariadb
Next, log in to the MariaDB shell with the following command:
mysql
Once you are log in, create a database and user for Redmine with the following command:
MariaDB [(none)]> CREATE DATABASE redmine CHARACTER SET utf8mb4;
MariaDB [(none)]> GRANT ALL PRIVILEGES ON redmine.* TO 'redmine'@'localhost' IDENTIFIED BY 'password';
Next, flush the privileges and exit from the MariaDB with the following command:
MariaDB [(none)]> FLUSH PRIVILEGES;
MariaDB [(none)]> EXIT;
Once you are finished, you can proceed to the next step.
Install Ruby and Passenger
Next, you will need to install Ruby and Passenger to your system.
First, install and enable the EPEL repo with the following command:
dnf install epel-release -y
dnf config-manager --enable epel -y
Next, install the Ruby and Passenger using the following command:
dnf install mod_passenger passenger passenger-devel ruby ruby-devel -y
Once all the packages are installed, you can proceed to the next step.
Install Redmine
First, you will need to create a separate user for Redmine. You can create it with the following command:
useradd -m -U -r -d /opt/redmine redmine
Next, log in to Redmine user and download the latest version of Redmine with the following command:
su - redmine
wget --no-check-certificate https://www.redmine.org/releases/redmine-4.2.1.zip
Once the download is completed, unzip the downloaded file with the following command:
unzip redmine-4.2.1.zip
Next, rename the extracted directory with the following command:
mv redmine-4.2.1 redmine
Next, change the directory to redmine and copy the sample database configuration file:
cd redmine
cp config/database.yml.example config/database.yml
Next, edit the database configuration file and define your database settings:Advertisement
nano config/database.yml
Change the following lines that match your database:
production:
  adapter: mysql2
  database: redmine
  host: localhost
  username: redmine
  password: "password"
  encoding: utf8mb4
Save and close the file then install the Bundler with the following command:
gem install bundler --no-rdoc --no-ri
Next, install other dependencies with the following command:
bundle install --without development test postgresql sqlite --path vendor/bundle
Next, generate a secret token with the following command:
bundle exec rake generate_secret_token
Next, generate the database objects needed by the application using the following command:
RAILS_ENV=production bundle exec rake db:migrate
Finally, start the application with the following command:
bundle exec rails server webrick -e production
You should see the following output:
/usr/bin/ruby: warning: shebang line ending with \r may cause problems
=> Booting WEBrick
=> Rails 5.2.5 application starting in production on http://0.0.0.0:3000
=> Run `rails server -h` for more startup options
[2021-06-24 00:40:15] INFO  WEBrick 1.4.2
[2021-06-24 00:40:15] INFO  ruby 2.5.5 (2019-03-15) [x86_64-linux]
[2021-06-24 00:40:15] INFO  WEBrick::HTTPServer#start: pid=43076 port=3000
Press CTRL + C to stop the application.
Next, exit from the Redmine user with the following command:
exit
Create a Systemd Service File for Redmine
Next, you will need to create a systemd service file to manage the Redmine application. You can create it with the following command:
nano /usr/lib/systemd/system/redmine.service
Add the following lines:
[Unit]
Description=Redmine server
After=syslog.target
After=network.target

[Service]
Type=simple
User=redmine
Group=redmine
ExecStart=/bin/ruby /opt/redmine/redmine/bin/rails server webrick -e production

# Give a reasonable amount of time for the server to start up/shut down
TimeoutSec=300

[Install]
WantedBy=multi-user.target
Save and close the file then reload the systemd daemon with the following command:
systemctl daemon-reload
Next, start the Redmine service and enable it to start at system reboot:
systemctl start redmine
systemctl enable redmine
Now, check the status of the Redmine with the following command:
systemctl status redmine
You should see the following output:
? redmine.service - Redmine server
   Loaded: loaded (/usr/lib/systemd/system/redmine.service; disabled; vendor preset: disabled)
   Active: active (running) since Thu 2021-06-24 04:26:51 EDT; 1min 37s ago
 Main PID: 44044 (ruby)
    Tasks: 3 (limit: 25014)
   Memory: 121.6M
   CGroup: /system.slice/redmine.service
           ??44044 /bin/ruby /opt/redmine/redmine/bin/rails server webrick -e production

Jun 24 04:26:51 centos8 systemd[1]: Started Redmine server.
Jun 24 04:26:52 centos8 ruby[44044]: /bin/ruby: warning: shebang line ending with \r may cause problems
Jun 24 04:26:56 centos8 ruby[44044]: [2021-06-24 04:26:56] INFO  WEBrick 1.4.2
Jun 24 04:26:56 centos8 ruby[44044]: [2021-06-24 04:26:56] INFO  ruby 2.5.5 (2019-03-15) [x86_64-linux]
Jun 24 04:26:56 centos8 ruby[44044]: [2021-06-24 04:26:56] INFO  WEBrick::HTTPServer#start: pid=44044 port=3000
At this point, Redmine is started and listening on port 3000. You can check it with the following command:
ss -antpl | grep 3000
You should get the following output:
LISTEN 0 128 0.0.0.0:3000 0.0.0.0:* users:(("ruby",pid=44044,fd=9))
Configure Nginx as a Reverse Proxy for Redmine
Next, you will need to install and configure Nginx as a reverse proxy for Redmine. First, install the Nginx server with the following command:
dnf install nginx -y
Next, create an Nginx virtual host configuration file with the following command:
nano /etc/nginx/conf.d/redmine.conf
Add the following lines:
upstream backend {
  server 127.0.0.1:3000;
}

server {
    listen 80;
    server_name redmine.example.com;
    access_log /var/log/nginx/redmine.example.com-access.log;
    error_log /var/log/nginx/redmine.example.com-error.log;

    location / {
        proxy_pass http://backend/;
        proxy_http_version 1.1;
        proxy_set_header Upgrade $http_upgrade;
        proxy_set_header Connection "upgrade";
        proxy_set_header Host $http_host;

        proxy_set_header X-Real-IP $remote_addr;
        proxy_set_header X-Forward-For $proxy_add_x_forwarded_for;
        proxy_set_header X-Forward-Proto http;
        proxy_set_header X-Nginx-Proxy true;
        proxy_redirect off;
    }
}
Save and close the file then verify the Nginx for any syntax error with the following command:
nginx -t
You should get the following output:
nginx: the configuration file /etc/nginx/nginx.conf syntax is ok
nginx: configuration file /etc/nginx/nginx.conf test is successful
Next, start the Nginx service and enable it to start at system reboot:
systemctl start nginx
systemctl enable nginx
You can also check the status of the Nginx with the following command:
systemctl status nginx
You should get the following output:
? nginx.service - The nginx HTTP and reverse proxy server
   Loaded: loaded (/usr/lib/systemd/system/nginx.service; disabled; vendor preset: disabled)
  Drop-In: /usr/lib/systemd/system/nginx.service.d
           ??php-fpm.conf
   Active: active (running) since Thu 2021-06-24 04:33:48 EDT; 25s ago
  Process: 45832 ExecStart=/usr/sbin/nginx (code=exited, status=0/SUCCESS)
  Process: 45830 ExecStartPre=/usr/sbin/nginx -t (code=exited, status=0/SUCCESS)
  Process: 45828 ExecStartPre=/usr/bin/rm -f /run/nginx.pid (code=exited, status=0/SUCCESS)
 Main PID: 45833 (nginx)
    Tasks: 3 (limit: 25014)
   Memory: 5.3M
   CGroup: /system.slice/nginx.service
           ??45833 nginx: master process /usr/sbin/nginx
           ??45834 nginx: worker process
           ??45835 nginx: worker process

Jun 24 04:33:48 centos8 systemd[1]: Starting The nginx HTTP and reverse proxy server...
Jun 24 04:33:48 centos8 nginx[45830]: nginx: the configuration file /etc/nginx/nginx.conf syntax is ok
Jun 24 04:33:48 centos8 nginx[45830]: nginx: configuration file /etc/nginx/nginx.conf test is successful
Jun 24 04:33:48 centos8 systemd[1]: Started The nginx HTTP and reverse proxy server.
Access Redmine
Now, you can access the Redmine web interface using the URL http://redmine.example.com. You should see the following page:

Click on the Sign in button. You should see the Redmine login page:

Provide the default user and password as admin then clicks on the Login button. You will be redirected to the change password screen:
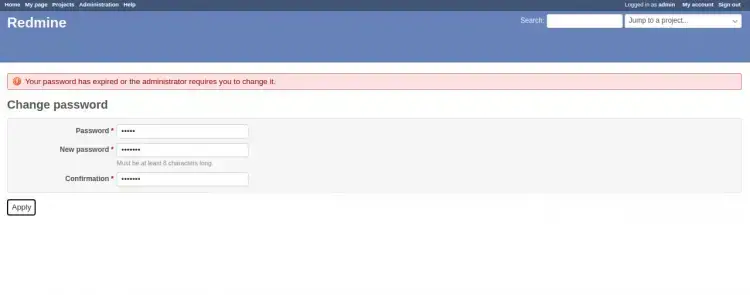
Set your new admin password and click on the Save button to save the changes.
Conclusion
Congratulations! You have successfully installed Redmine on CentOS 8 with Nginx. You can now use Redmine in your organization and manage your project from the central location.
Add Comment