


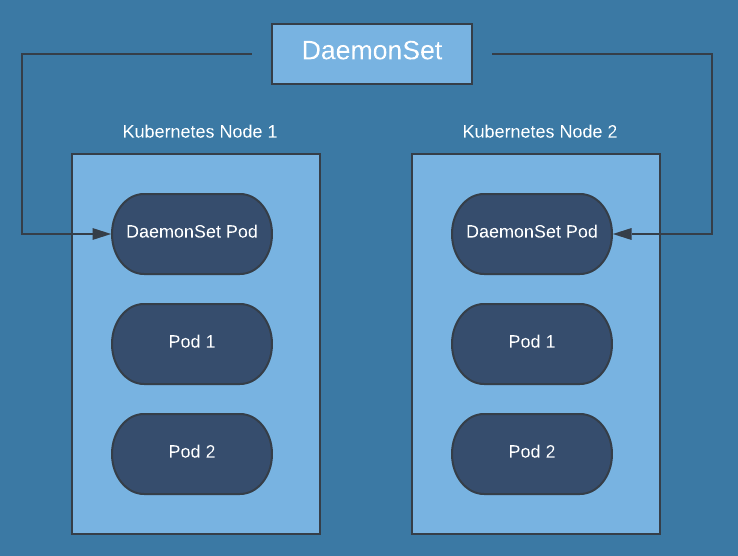
A DaemonSet makes sure that all of the Nodes in the Kubernetes Cluster run a copy of a Pod. Every node will have a copy of the pod. When nodes are added to the cluster, Pods are added to them and when nodes are removed from the cluster, the Pods are removed. If we delete a DaemonSet it will clean up the Pods it created.
A DaemonSet ensures that all nodes run a copy of a Pod. Normally, the node that a Pod runs on is selected by the scheduler but DaemonSet pods are created and scheduled by the DaemonSet controller.
Daemonset can be used:
- To run cluster storage on each node, such as: glusterd, ceph
- To run logs collection on each node, such as: fluentd, logstash
- To run node monitoring on ever note, such as: Prometheus Node Exporter, collectd, Datadog agent
To know more about Daemonset, visit kubernetes.io the official documentation of Kubernetes.
In this article, we will create a Daemonset of “fluentd_elasticsearch”. This will create Pods of “fluentd_elasticsearch” on each node in the cluster. Our Daemonset definition file will have Toleration for Taint of the master nodes to allow Pod to get scheduled on the master node as well.
Pre-requisites
- Kubernetes Cluster with at least 1 worker node.
If you want to learn to create a Kubernetes Cluster, click here. This guide will help you create a Kubernetes cluster with 1 Master and 2 Nodes on AWS Ubuntu 18.04 EC2 Instances.
What will we do?
- Create a Daemonset
Create a Daemonset
Check if there exists any daemonset on the default namespace and all the namespaces.
kubectl get daemonsets #Get daemonsets from the default namespacekubectl get daemonsets --all-namespaces #Get daemonsets from all namespace using --all-namespace option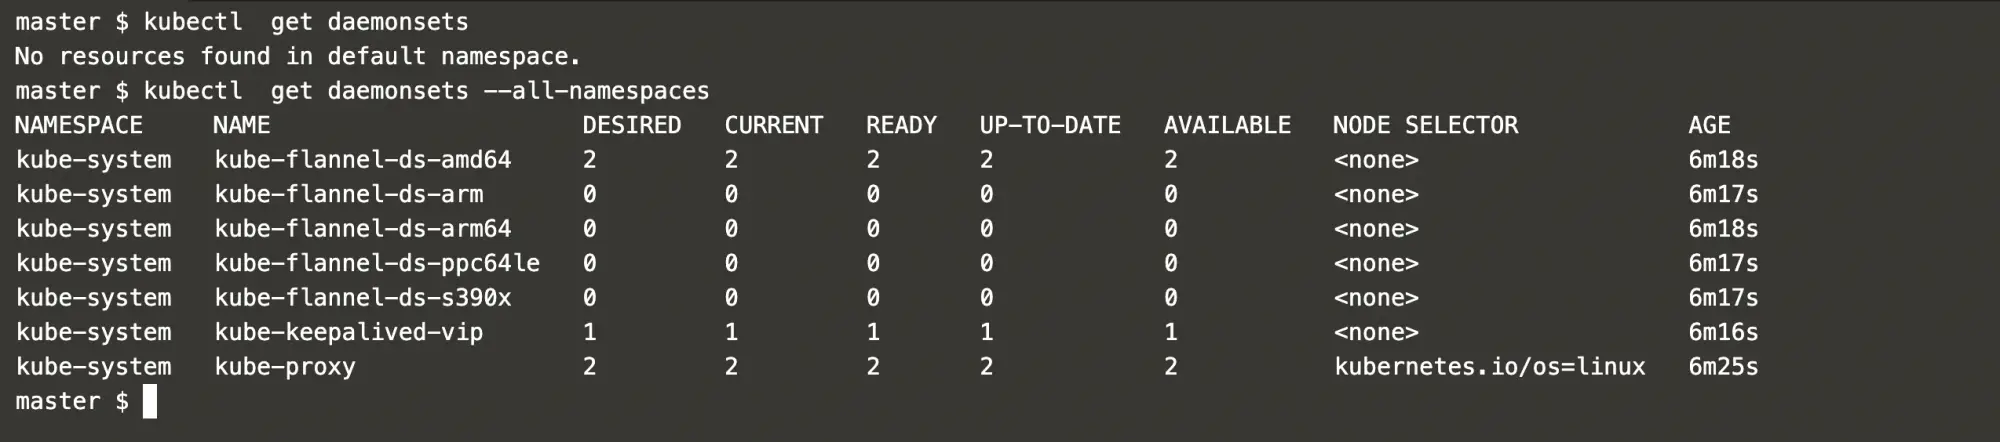
In the above screenshot, you can see that there are a few Daemonset available. All these Daemonset are for Cluster components.
Now, get pods that belong to “kube-system” namespace.
kubectl get pods -n kube-system #Get pods from the "kube-system" namespace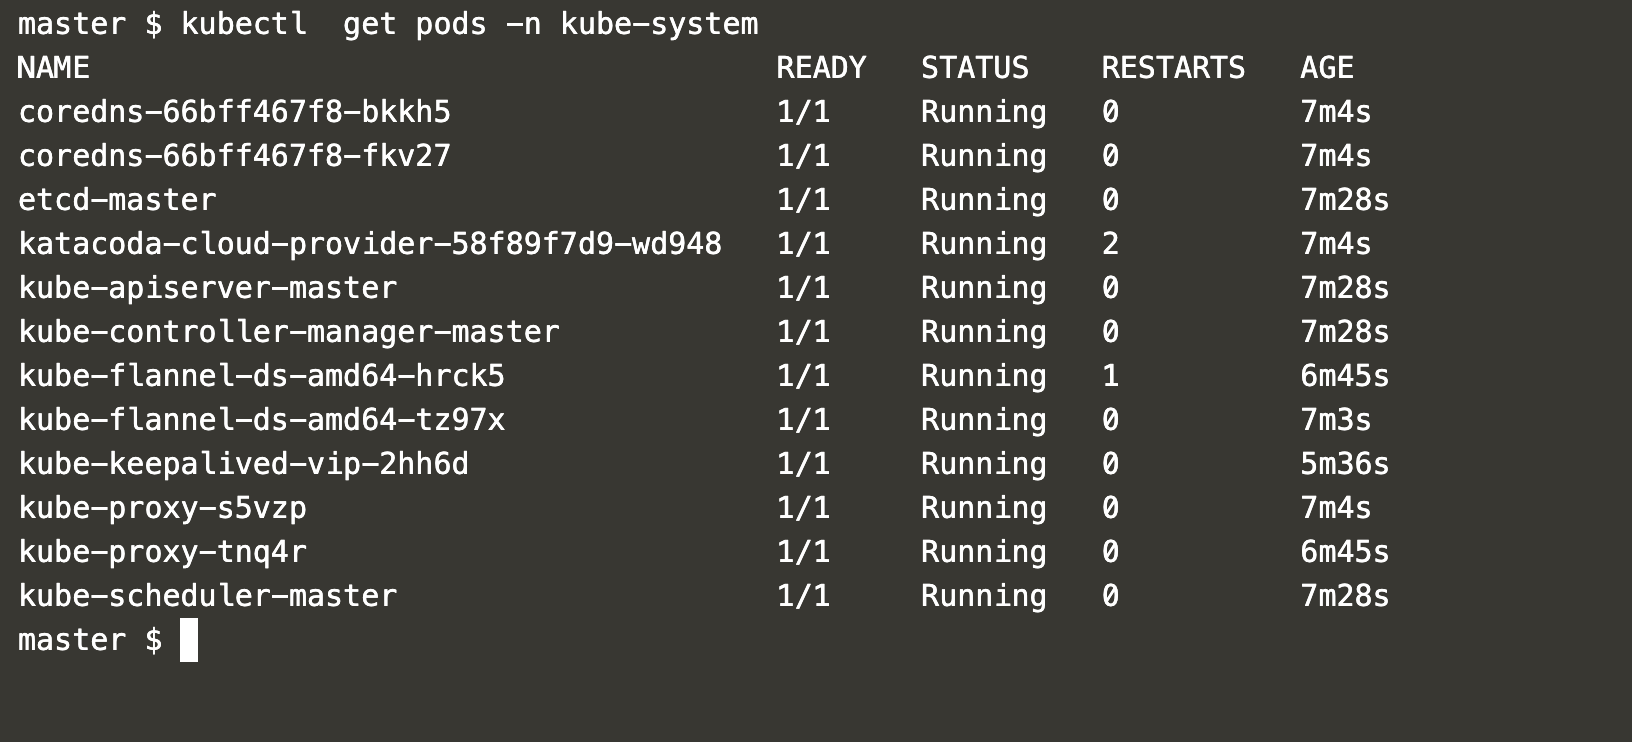
All these pods seen in the above screenshot belong to the Daemonset of cluster components.
Get a list of proxy pods.
kubectl get pods -n kube-system | grep proxy #Get pods from the "kube-system" namespace and grep for proxyCheck what controls proxy pods.
kubectl describe pod kube-proxy-s5vzp -n kube-system #Describe the pod from the "kube-system" namespaceGet details of the daemonset that controls the proxy pods.
kubectl describe daemonset kube-proxy -n kube-system #Describe the daemonset from the "kube-system" namespace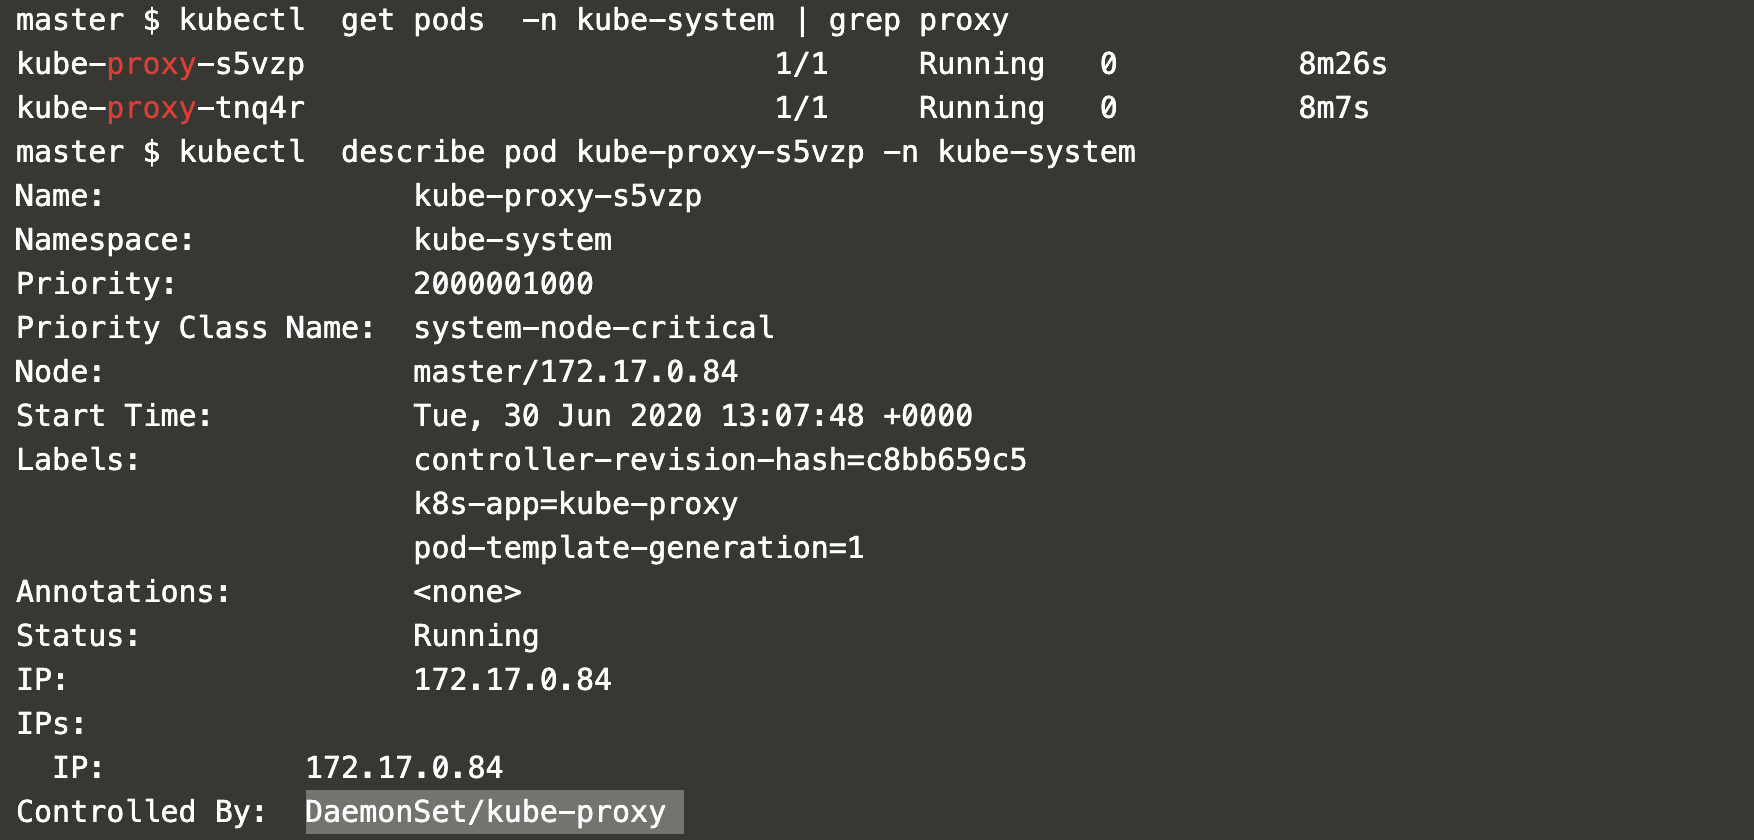
Create a file with the following daemonset definition in it.
vim my-daemonset.ymlapiVersion: apps/v1
kind: DaemonSet
metadata:
name: my-fluentd-elasticsearch-daemonset
namespace: kube-system
labels:
k8s-app: fluentd-logging
spec:
selector:
matchLabels:
name: fluentd-elasticsearch
template:
metadata:
labels:
name: fluentd-elasticsearch
spec:
tolerations:
- key: node-role.kubernetes.io/master
effect: NoSchedule
containers:
- name: fluentd-elasticsearch
image: quay.io/fluentd_elasticsearch/fluentd:v2.5.2
resources:
limits:
memory: 200Mi
requests:
cpu: 100m
memory: 200Mi
volumeMounts:
- name: varlog
mountPath: /var/log
- name: varlibdockercontainers
mountPath: /var/lib/docker/containers
readOnly: true
terminationGracePeriodSeconds: 30
volumes:
- name: varlog
hostPath:
path: /var/log
- name: varlibdockercontainers
hostPath:
path: /var/lib/docker/containers
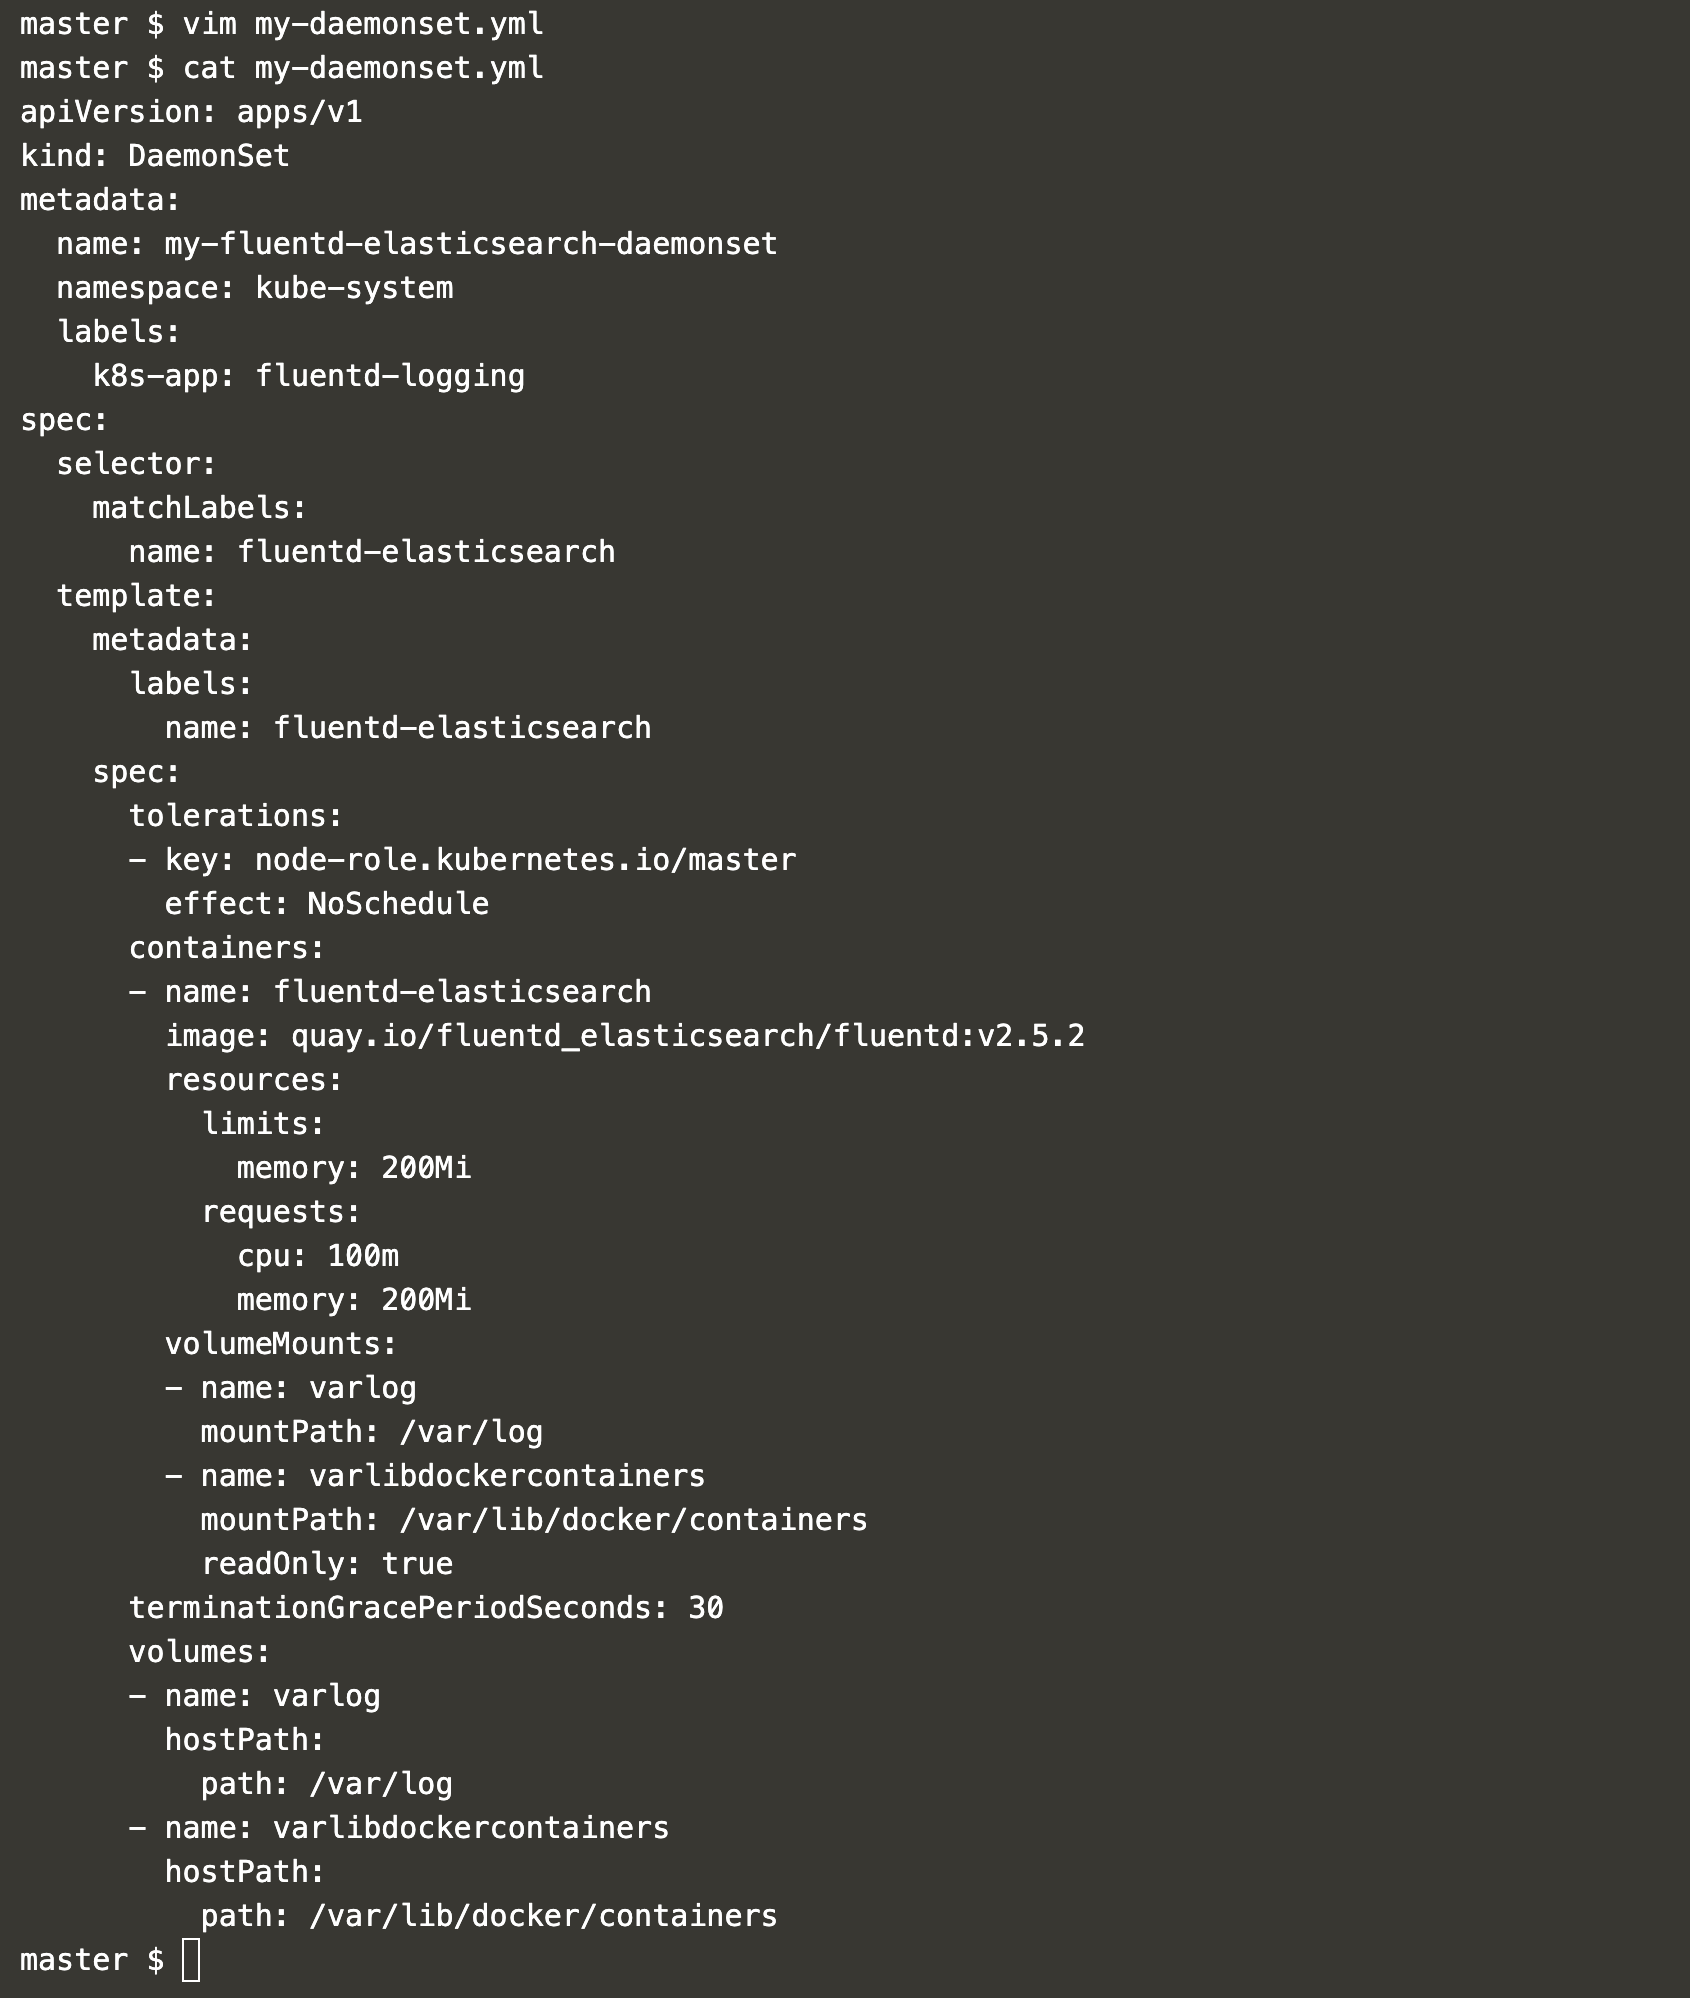
In the above definition, we have a Toleration to the Taint of the master node. This will let the pod get placed on the master node also.
Create a daemonset using the definition file created in the above step.
kubectl create -f my-daemonset.yml #Create a daemonset kubectl get daemonset -n kube-system #Get daemonset from the "kube-system" namespace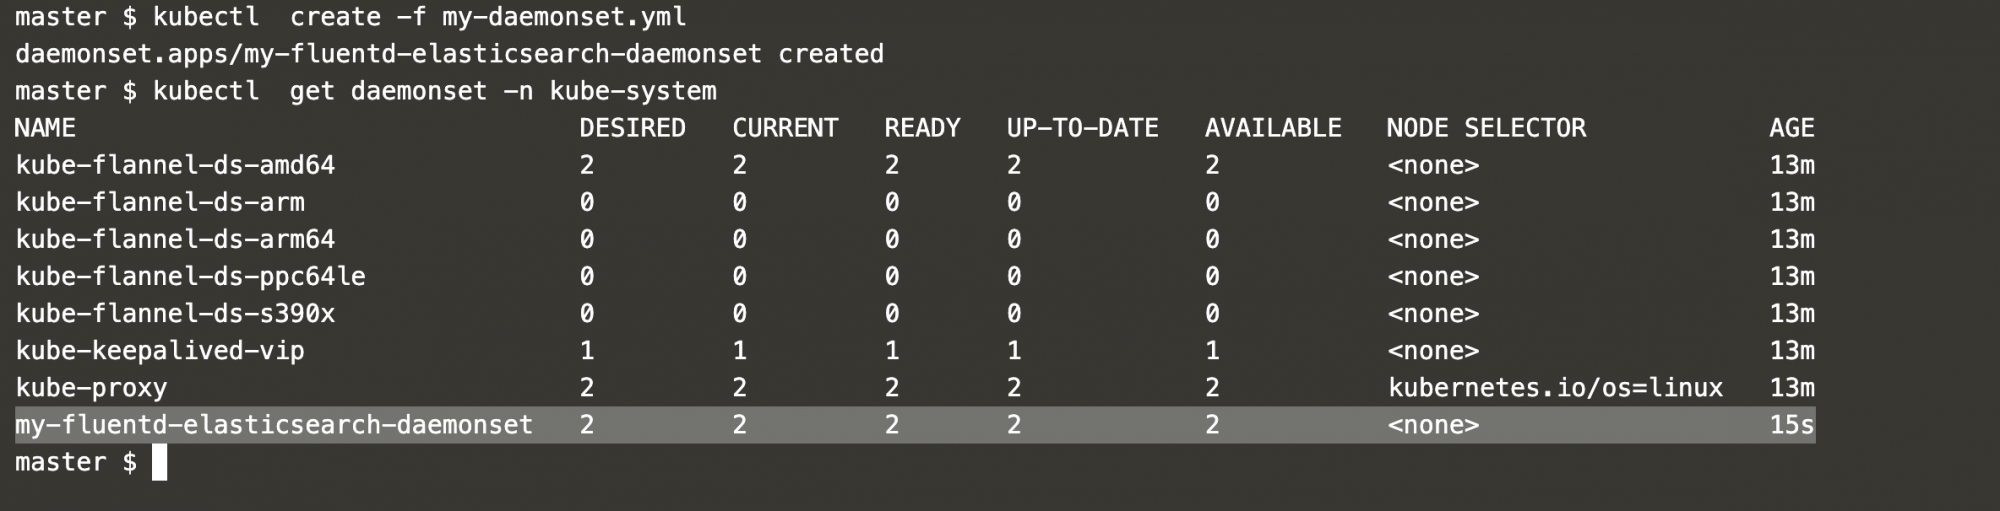
This deamont set has been created in the “kube-system” namespace.
Describe the daemonset we just created in the “kube-system” namespace.
kubectl describe daemonset my-fluentd-elasticsearch-daemonset -n kube-system #Describe the daemonset from the "kube-system" namespace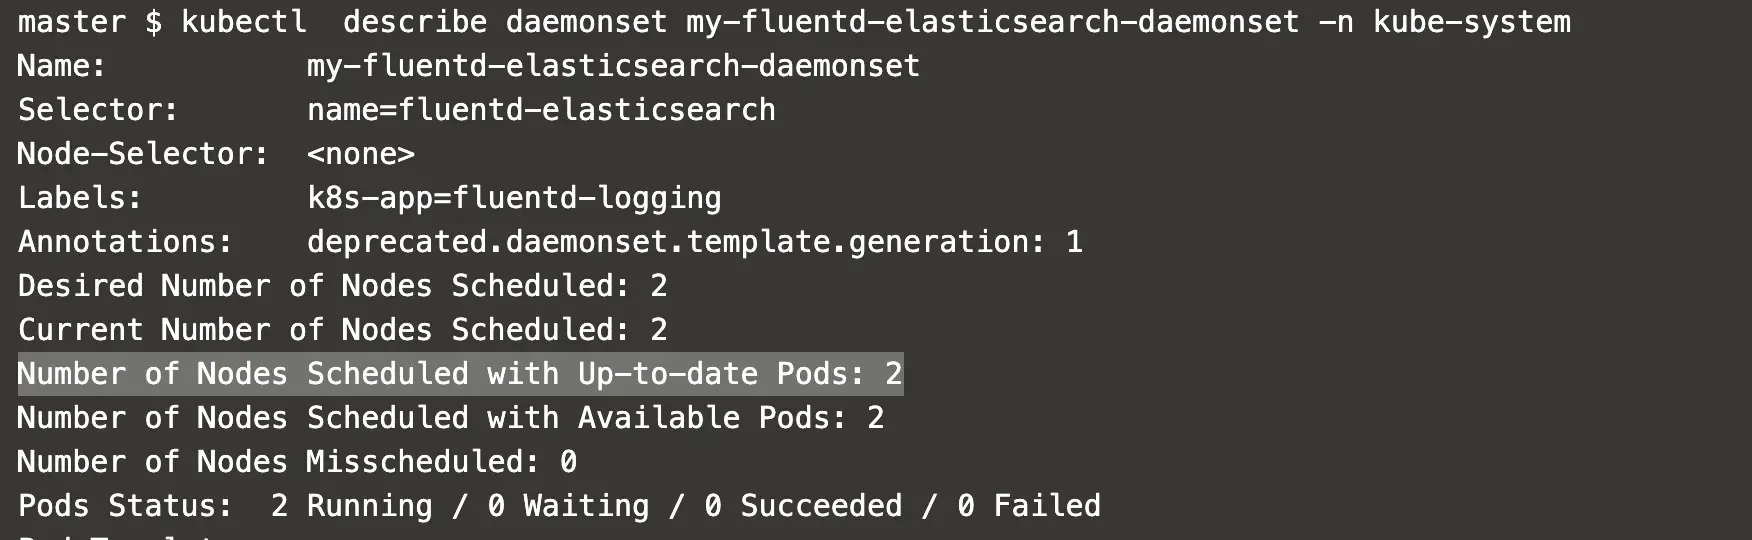
In the above screenshot, it can be seen that the Pods have been deployed on 2 nodes.
Now, we can get details of the pods which are deployed as daemonsets on 2 nodes.
kubectl get pods -n kube-system | grep my-fluentd-elasticsearch-daemonset #Get pods from the "kube-system" namespace and grep kubectl describe pod my-fluentd-elasticsearch-daemonset-4t9vs -n kube-system | grep Node #Describe the pods from the "kube-system" namespace and grepkubectl describe pod my-fluentd-elasticsearch-daemonset-kxfjj -n kube-system | grep Node #Describe the pod from the "kube-system" namespace and grep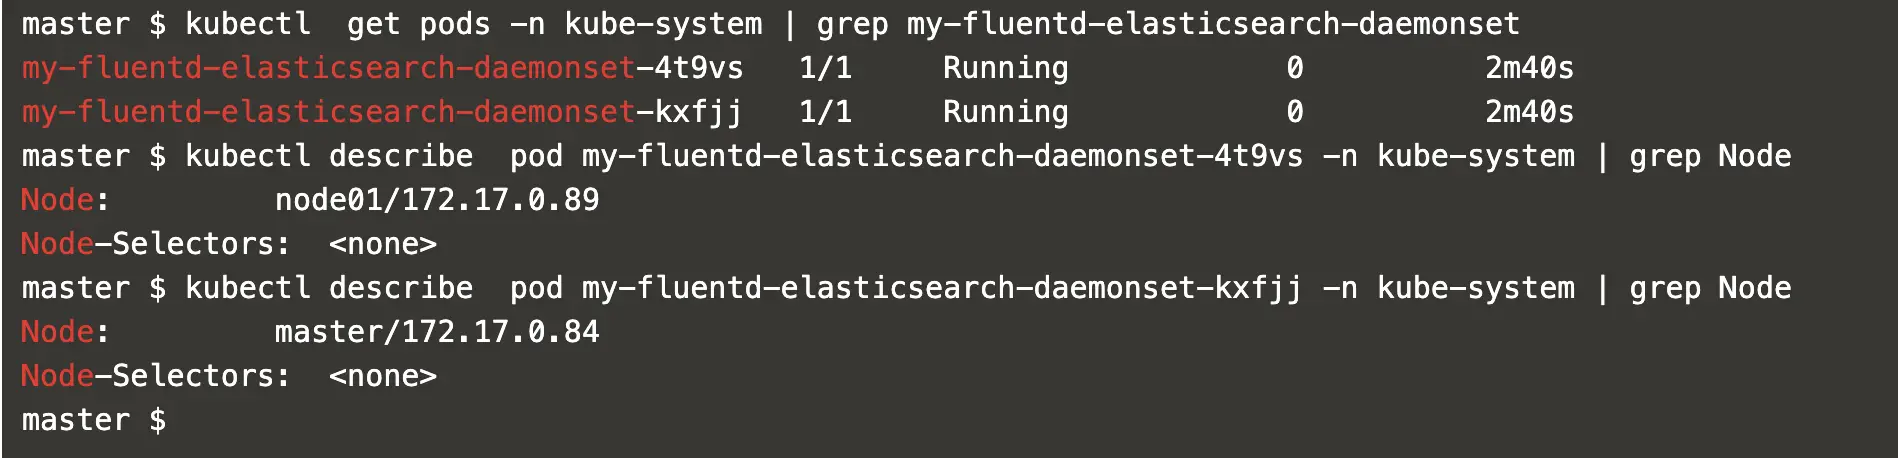
In the above screenshot, it can be seen that the Pods got deployed on worker node “node01” and master node “master”. The reason for getting the pod scheduled on the master node is Toleration to the Taint of the master node.
Conclusion
In this article, we saw the steps to create a daemonset and saw how the pods in daemonset get deployed on each node in the Kubernetes cluster.

Add Comment