


Lab 1: Introduction to IAM
© 2023 Amazon Web Services, Inc. or its affiliates. All rights reserved. This work may not be reproduced or redistributed, in whole or in part, without prior written permission from Amazon Web Services, Inc. Commercial copying, lending, or selling is prohibited. All trademarks are the property of their owners.
Note: Do not include any personal, identifying, or confidential information into the lab environment. Information entered may be visible to others.
Corrections, feedback, or other questions? Contact us at AWS Training and Certification.
Objectives
After completing this lab, you will be able to:
- Explore IAM Users and Groups
- Inspect IAM policies applied to groups
- Follow a real-world scenario that adds users to groups and explores group permissions
- Locate and use the IAM sign-in URL
- Experiment with policies and service access
PREREQUISITES
This lab requires:
- Notebook computer with Wi-Fi and Microsoft Windows, macOS, or Linux (Ubuntu, SuSE, or Red Hat). Tablet devices cannot access the lab environment, but they can display the student guide.
- Administrator access (Microsoft Windows users)
- Internet browser, such as Chrome, Firefox, or Edge
DURATION
This lab requires 30 minutes to complete.
Video hướng dẫn: Thực hành AWS – Lab 1 Introduction to AWS IAM
LAB OVERVIEW
This lab provisions the following IAM resources for you to explore:
- Three users:
user-1 , user-2 , and user-3
- Three groups: with the following policies:
- S3 Support: Read-Only access to Amazon Simple Storage Service (Amazon S3).
- EC2 Support: Read-Only access to Amazon Elastic Compute Cloud (Amazon EC2).
- EC2 Admin: Ability to View, Start , and Stop EC2 instances.

You might receive error messages when performing actions beyond the steps provided in this lab guide. The lab relies on IAM, which limits your access to the services authorized for use in the lab. The error messages will not impact your ability to complete the lab.
ICON KEY
Various icons are used throughout this lab to call attention to different types of instructions and notes. The following list explains the purpose for each icon:
- Expected output: A sample output that you can use to verify the output of a command or edited file.
- Note: A note, tip, or important guidance.
- Additional information: Where to find more information.
- Consider: A moment to pause to consider how you might apply a concept in your own environment or to initiate a conversation about the topic at hand.
- Copy/Paste: A code block that displays the contents of a script or file you need to copy and paste that has been pre-created for you. When you need to copy only a certain part of a code block, there are numbered TODO comments in the code.
Start lab
- To launch the lab, at the top of the page, choose Start lab.
You must wait for the provisioned AWS services to be ready before you can continue.
- To open the lab, choose Open Console.
You are automatically signed in to the AWS Management Console in a new web browser tab.
Do not change the Region unless instructed.
COMMON SIGN-IN ERRORS
Error: You must first sign out
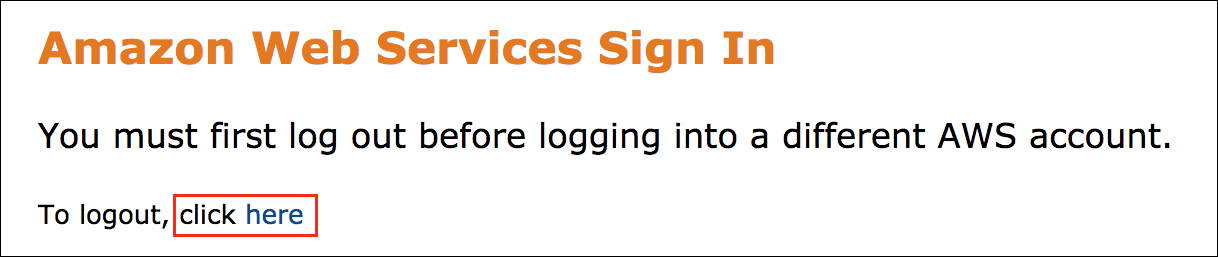
If you see the message, You must first log out before logging into a different AWS account:
- Choose the click here link.
- Close your Amazon Web Services Sign In web browser tab and return to your initial lab page.
- Choose Open Console again.
Error: Choosing Start Lab has no effect
In some cases, certain pop-up or script blocker web browser extensions might prevent the Start Lab button from working as intended. If you experience an issue starting the lab:
- Add the lab domain name to your pop-up or script blocker’s allow list or turn it off.
- Refresh the page and try again.
Task 1: Explore IAM
In this task, you access the IAM dashboard and explore the existing groups, users, roles, and policies. You learn how to manage users and groups. Lastly, you learn how to add users to groups, allowing users to inherit specific group permissions.
Note: You must use the same Region throughout the entire lab.
TASK 1.1: EXPLORE IAM USERS, GROUPS, AND POLICIES
In this task, you explore the IAM users and groups that we created for you.
- At the top of the AWS Management Console, in the search bar, search for and choose IAM.
- In the left navigation pane, choose Users.
The list below containers the existing users:
- user-1
- user-2
- user-3
- Choose the user-1 link.
The summary page for user-1 opens, with the Permissions tab displayed. Notice that user-1 does not have any permissions.
- Choose the Groups tab.
Notice that user-1 does not belong to any groups.
- Choose the Security credentials tab.
In the Sign-In credentials section, note that user-1’s Console password is enabled.
- In the left navigation pane, choose User groups.
The list below contains the existing groups:
- EC2-Admin
- EC2-Support
- S3-Support
- Choose the EC2-Support group name link.
- In the summary page for the EC2-Support group, choose the Permissions tab.
This group has a managed policy associated with it – AmazonEC2ReadOnlyAccess. Managed policies are pre-built policies (built either by AWS or by your administrators) that can be attached to IAM users and groups. When updated, all users and groups associated with the policy inhereit the changes to that policy.
- Expand the Plus icon to expand the contents of AmazonEC2ReadOnlyAccess.
A policy defines the actions allowed or denied for specific AWS resources. This policy grants permission to list and describe information about EC2, Elastic Load Balancing, Amazon CloudWatch, and Auto Scaling. Support role policies commonly restrict access to a read-only level, without the ability to modify AWS resources.
The list below outlines the basic structure of an IAM policy:
- Effect indicates whether to Allow or Deny the permissions.
- Action specifies the API calls allowed to an AWS service (such as cloudwatch:ListMetrics).
- Resource defines the scope of entities covered by the policy rule (i.e., a specific Amazon S3 bucket, Amazon EC2 instance, or \* , which indicates any resource).
- In the left navigation pane, choose User groups.
- Choose the S3-Support group name link.
- Choose the Permissions tab.
- Expand the Plus icon to expand the contents of AmazonS3ReadOnlyPolicy.
The S3-Support group has the AmazonS3ReadOnlyAccess policy attached. This policy has permissions to get and list resources from Amazon S3.
- In the left navigation pane, choose User groups.
- Choose the EC2-Admin group name link.
This group differs slightly from the other two groups. Instead of a managed policy, it has an inline policy, a policy assigned to one discrete user or group, and typically used to apply permissions for one-off situations.
- Choose the Permissions tab.
- Expand the Plus icon to expand the contents of EC2-Admin-Policy.
This policy grants permission to view (describe) information about Amazon EC2 resources, start and stop instances, and describe CloudWatch alarms.
TASK 1.2: MANAGE USERS AND GROUPS
In this task, you work with the users and groups, enabling permissions to support a business scenario.
You can ignore any “not authorized” errors that appear during this task caused by limited permissions in your lab account. The error messages will not impact your ability to complete the lab.
BUSINESS SCENARIO
Your company’s use of Amazon Web Services grows over time. The company uses many Amazon EC2 instances and a siginificant amount of Amazon S3 storage. You want to grant access to new staff members based on their job functions, as shown in the table.
| User | Group | Permissions |
|---|---|---|
| user-1 | S3-Support | Read-Only access to Amazon S3 |
| user-2 | EC2-Support | Read-Only access to Amazon EC2 |
| user-3 | EC2-Admin | View, Start, and Stop Amazon EC2 instances |
ADD USER-1 TO THE S3-SUPPORT GROUP
You recently hired user-1 into a role to provide support for Amazon S3. You want to add them to the S3-Support group to inherit the necessary permissions in the attached AmazonS3ReadOnlyAccess policy.
- In the left navigation pane, choose User groups.
- Choose the S3-Support group name link.
- In the Users tab, choose Add users.
- Select user-1.
- At the bottom of the screen, choose Add users.
Expected output: Users added to this group
In the Users tab, under the Users in this group section, the list should now include user-1.
ADD USER-2 TO THE EC2-SUPPORT GROUP
You hired user-2 for a role to provide support for Amazon EC2.
- Repeat the steps you used for user-1 to add user-2 to the EC2-Support group.
- Confirm user-2 is part of the EC2-Support group.
ADD USER-3 TO THE EC2-ADMIN GROUP
You hired user-3 as your Amazon EC2 administrator.
- Repeat the steps you used for user-1 to add user-3 to the EC2-Admin group.
- Confirm user-3 is part of the EC2-Admin group.
REVIEW USER AND GROUP ASSIGNMENTS
- In the left navigation pane, choose User groups.
Each Group should have a 1 in the Users column to denote the number of users in each group.
If you do not have a 1 beside each group, revisit the preceding instructions to ensure that each user belongs to a group, as shown in the table in the Business Scenario section.
Congratulations! You have successfully explored and managed IAM users, groups, and policies.
Task 2: Use the IAM sign-in URL
In this task, you test the permissions of each IAM user.
TASK 2.1: LOCATE AND ACCESS THE IAM SIGN-IN URL
- In the left navigation pane, choose Dashboard.
In the AWS Account section, on right side of the dashboard, locate the Sign-in URL for IAM users in this account URL. The URL format appears as follows:
- Use this link to sign in to the AWS account you are currently using.
- Copy the IAM users sign-in link to a text editor.
You will need this link to sign in later, testing each user.
TASK 2.2: LOG IN WITH DIFFERENT IAM USERS
- In your browser, open a private window, as follows:
If you are using Firefox, do the following:
- In the upper-right corner, choose the Open application menu icon and choose New Private Window.
If you are using Chrome, do the following:
- In the upper-right corner, choose the Customize and Control Google Chrome ellipsis icon and choose New incognito window.
If you are using Edge, do the following:
- In the upper-right corner, choose the Settings and more ellipsis icon and choose New InPrivate window.
If you are using Internet Explorer, do the following:
- On the Tools menu, choose InPrivate Browsing.
- Paste the IAM users sign-in link you copied earlier into the private window, and press Enter.
You will now sign in as user-1, your new Amazon S3 storage support person.
SIGN IN AS USER-1
- In the sign-in screen, use the following information:
- IAM user name: user-1
- Password: Paste the value of AdministratorPassword located to the left of these instructions.
- Press Enter.
- At the top of the AWS Management Console, in the search bar, search for and choose S3.
- From the S3 dashboard, choose the link for the bucket that has s3bucket in its name.
To the left of these instructions, you can also find the name of your S3 bucket. A bucket with awslabs-resources in its name might also be present, along with an error. This is normal. You do not have access to this bucket.
Because your user is part of the S3-Support group in IAM, the user has permission to view a list of Amazon S3 buckets and the contents of the s3bucket.
Next, test whether user-1 has access to Amazon EC2.
- At the top of the AWS Management Console, in the search bar, search for and choose EC2.
- Locate your current region in the upper right side of the EC2 console. Verify this region is the same as the Region value in the left side pane of these instructions. If not, navigate to the Region where your lab launched, as follows:
- Choose the drop-down arrow at the top of the screen, to the left of user-1 drop-down in the top bar.
- Select the Region value that matches the value of Region to the left of these instructions.
- In the left navigation pane, in the Instances section, choose Instances.
You should receive an error message: You are not authorized to perform this operation.
You cannot see any instances. This is because your user has not been assigned any permissions to use Amazon EC2.
Next, you sign in as user-2, your Amazon EC2 support person.
- In the AWS Management Console, sign out user-1 by following these steps:
- At the top of the screen, choose user-1.
- Choose Sign Out.
SIGN IN AS USER-2
- Paste the IAM users sign-in link (the one you copied to your text editor earlier) into your private window and press Enter.
- In the sign-in screen, use the following information:
- IAM user name: user-2
- Password: Paste the value of AdministratorPassword located to the left of these instructions
- Press Enter.
- At the top of the AWS Management Console, in the search bar, search for and choose EC2.
- Navigate to the Region where your lab launched (if you are not currently in that Region), as follows:
- Choose the drop-down arrow at the top of the screen, to the left of user-2 drop-down in the top bar.
- Select the Region value that matches the value of Region to the left of these instructions.
- In the left navigation pane, in the Instances section, choose Instances.
You can view an Amazon EC2 instance because you have read-only permissions. However, you cannot make any changes to Amazon EC2 resources. You should see a single running EC2 instance.
- Make sure that the EC2 instance is selected, by choosing the checkbox beside the instance.
- On the Instance state menu, choose Stop instance.
- In the Stop instance? window, choose Stop.
You should receive an error stating that You are not authorized to perform this operation. This demonstrates that the policy only allows you to view the information, without making changes.
- Close the error message by clicking the X in the top of the red error window, on the right side.
Next, check to see if user-2 can access Amazon S3.
- At the top of the AWS Management Console, in the search bar, search for and choose S3.
The S3 console should return an empty list of buckets because user-2 does not have permission to use Amazon S3. Note that the Copy ARN, Empty, Delete, and Create options provide no access to those features.
SIGN IN AS USER-3
- Sign in as user-3, your Amazon EC2 administrator.
- In the AWS Management Console, sign out user-2, as follows:
- At the top of the screen, choose user-2.
- Choose Sign Out.
- Paste the IAM users sign-in link into your private window and press Enter.
- Sign in with the following:
- IAM user name: user-3
- Password: Paste the value of AdministratorPassword located to the left of these instructions
- Press Enter.
- At the top of the AWS Management Console, in the search bar, search for and choose EC2.
- Navigate to the Region where your lab launched (if you are not currently in that Region), as follows:
- Choose the drop-down arrow at the top of the screen, to the left of to the left of user-3 drop-down in the top bar.
- Select the Region value that matches the value of Region to the left of these instructions.
- In the left navigation pane, in the Instances section, choose Instances.
As an EC2 administrator, you should have permission to stop the Amazon EC2 instance.
- Make sure that the EC2 instance is selected.
- On the Instance state menu, choose Stop instance.
- In the Stop instance? window, choose Stop.
The instance will enter the stopping state and shut down.
- Close your private window.
Congratulations! You have successfully used the IAM sign-in URL, logged in with different users, and tested the access level of each user. Your newly hired employees are ready to start!
Lab complete
Congratulations! You can now:
- Explore IAM Users and Groups
- Inspect IAM policies applied to groups
- Follow a real-world scenario that adds users to groups and explores group permissions
- Locate and use the IAM sign-in URL
- Experiment with policies and service access
End lab
Follow these steps to close the console and end your lab.
- Return to the AWS Management Console.
- At the upper-right corner of the page, choose AWSLabsUser, and then choose Sign out.
- Choose End lab and then confirm that you want to end your lab.
Additional resources
- For more information about IAM , see AWS Identity and Access Management Documentation.
- For more information about AWS Training and Certification, see http://aws.amazon.com/training/.

Add Comment