


With Limit Range, we can restrict resource consumption and creation as by default containers run with unbounded computing resources on a Kubernetes cluster. A Pod can consume as much CPU and memory as defined by the Limit Range.
A Limit Range provides constraints on:
- Minimum and maximum resources
- Minimum and maximum storage request per PersistentVolumeClaim
- A ratio between request and limit for a resource in a namespace.
- Set default request/limit for computing resources
To know more about Limit Ranges visit the official documentation of Kubernetes here.
In this article, we will create a limit range and see how to set minimum and maximum values for the CPU resources used by Containers and Pods. We will see different scenarios with Limit and Request on the CPU.
Pre-requisites
- Kubernetes Cluster with at least 1 worker node.
If you want to learn to create a Kubernetes Cluster, click here. This guide will help you create a Kubernetes cluster with 1 Master and 2 Nodes on AWS Ubuntu 18.04 EC2 Instances.
What will we do?
- Create a LimitRange in the default namespace.
- Create Pods with CPU Limit and Range in the default namespace
Create a LimitRange in the default namespace
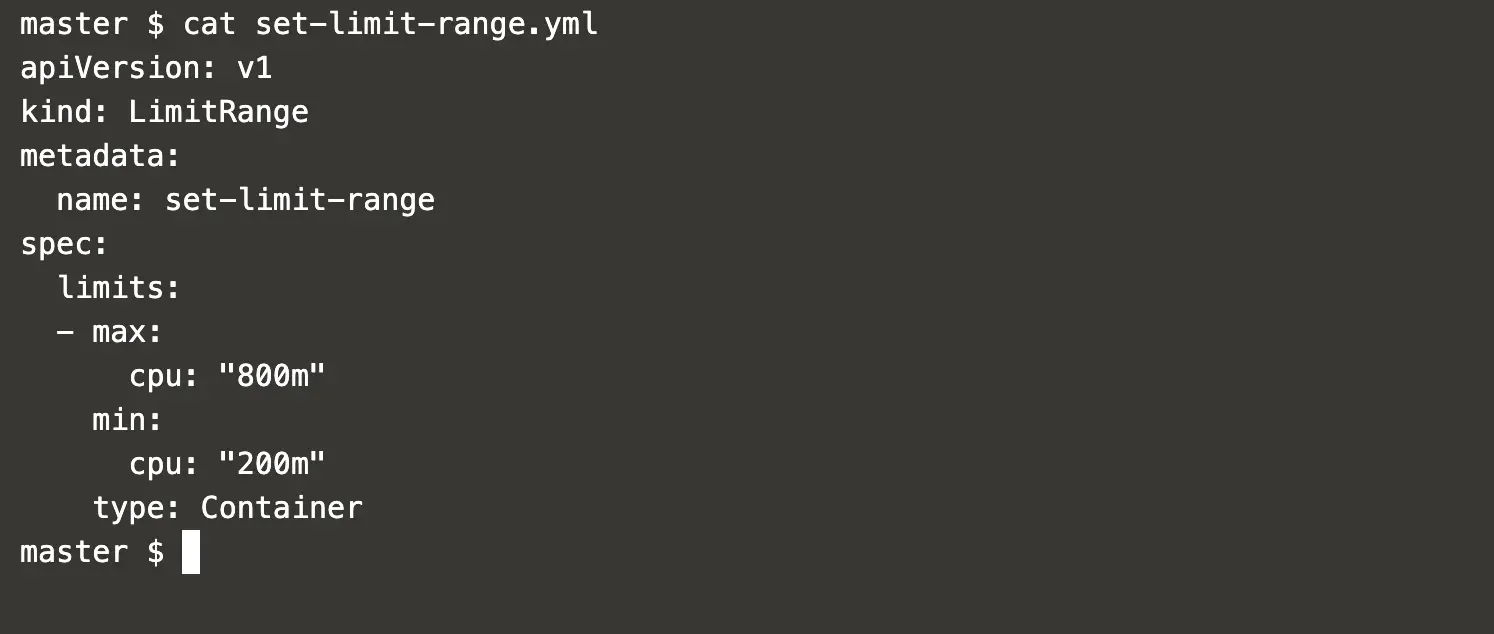
Create a file to define a limit range in the default namespace.
vim set-limit-range.ymlapiVersion: v1
kind: LimitRange
metadata:
name: set-limit-range
spec:
limits:
- max:
cpu: "800m"
min:
cpu: "200m"
type: Container
Get a list of existing limit ranges in the default namespace and create the one using the file created in the above step.
kubectl get limitrangekubectl create -f set-limit-range.ymlkubectl get limitrangekubectl describe limitrange set-limit-range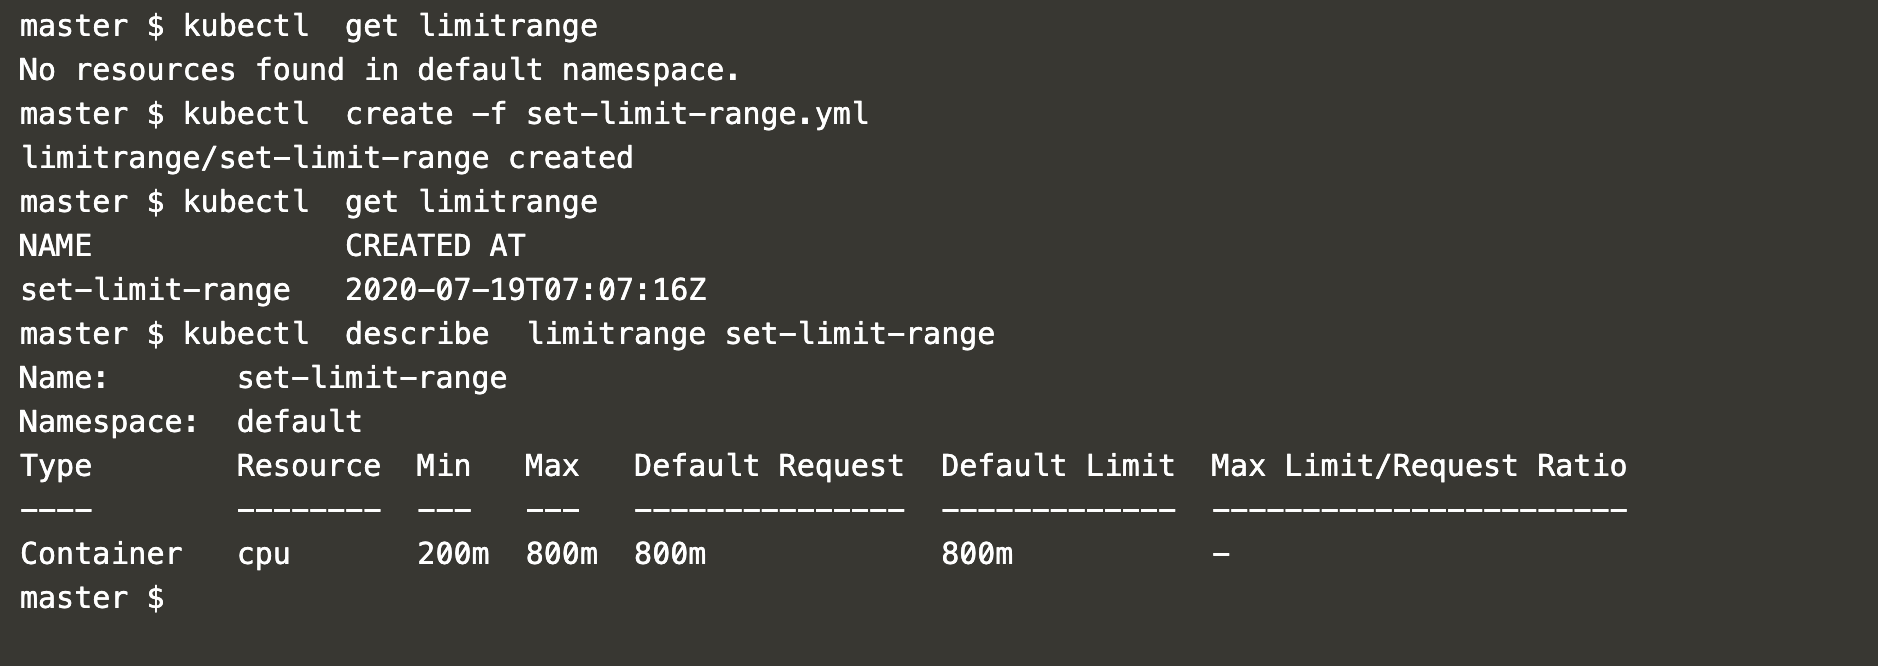
In the above screenshot, it can be seen that we have created a limit range that defines CPU as “Min=200m” and “Max=800m”.
This means that pods in the default namespace cannot have CPU “less than Min=200m” and “more than Max=800m”.
Create Pods with CPU Limit and Range in the default namespace
Pod with limit
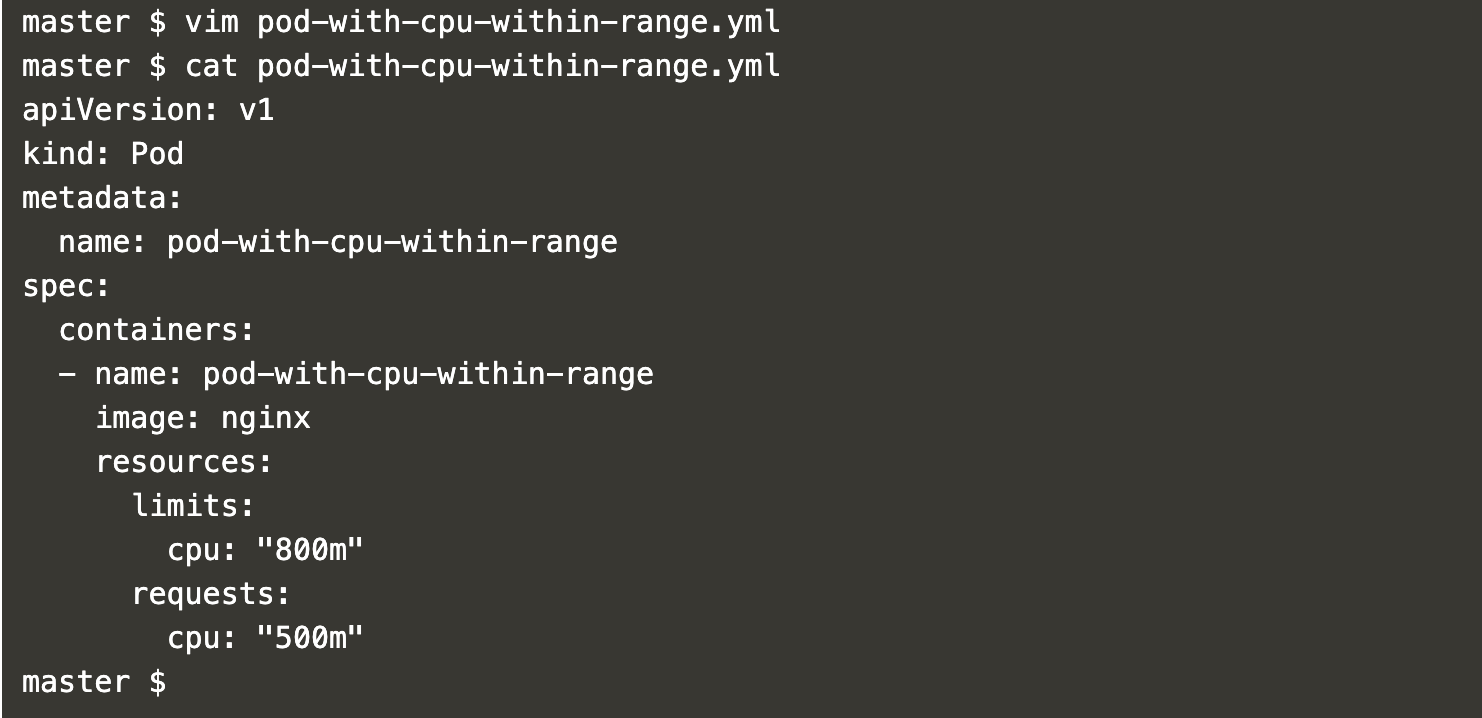
Create a pod definition which requests for CPU more than 200m and less than 800m
vim pod-with-cpu-within-range.ymlapiVersion: v1
kind: Pod
metadata:
name: pod-with-cpu-within-range
spec:
containers:
- name: pod-with-cpu-within-range
image: nginx
resources:
limits:
cpu: "800m"
requests:
cpu: "500m"
List the existing pods and create a new pod with the file created in the above step.
kubectl get podskubectl create -f pod-with-cpu-within-range.ymlkubectl get podskubectl describe pod pod-with-cpu-within-range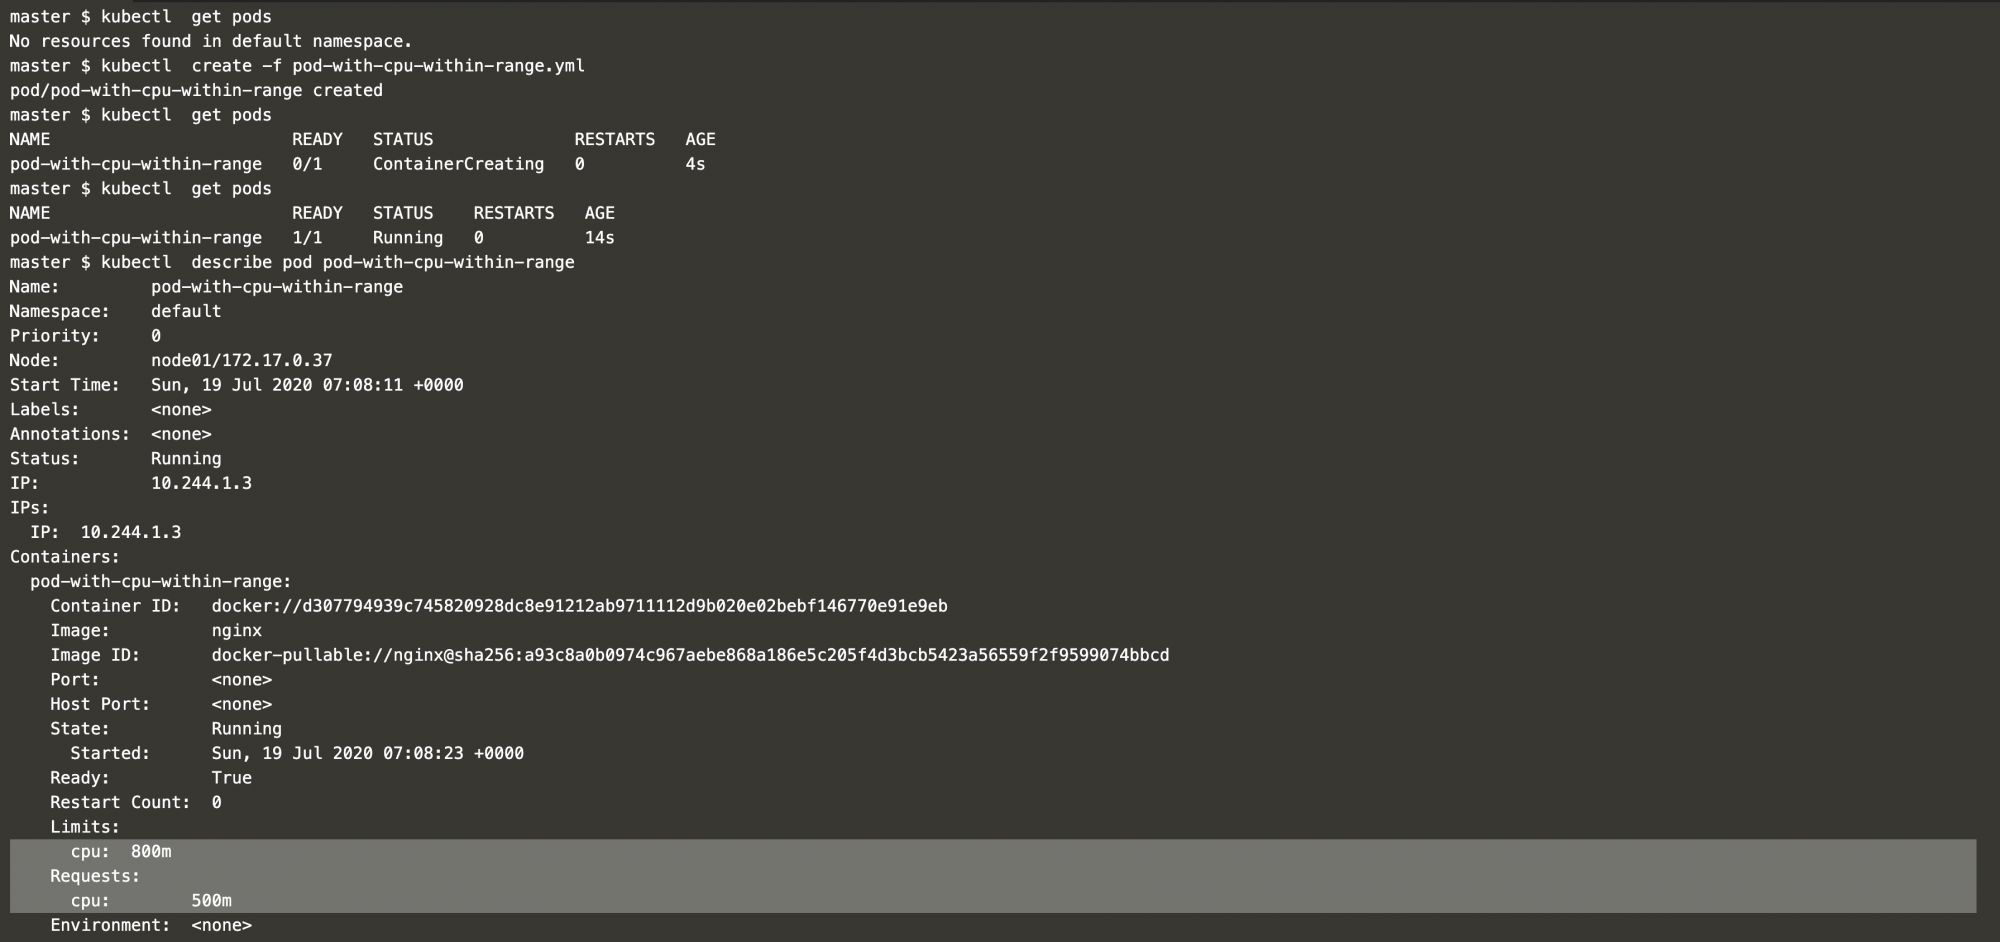
In the above screenshot, it can be seen that the pod has been created with defined CPU request and limit.
Pod with more CPU:
This time let’s create a pod with CPU limit 1.5 i.e. more than 800m.
vim pod-with-cpu-more-than-limit.ymlapiVersion: v1
kind: Pod
metadata:
name: pod-with-cpu-more-than-limit
spec:
containers:
- name: pod-with-cpu-more-than-limit
image: nginx
resources:
limits:
cpu: "1.5"
requests:
cpu: "500m"

Get a list of existing pod and try to create a new pod which has CPU limit “1.5” more than “800m” what we have defined in the limit range.
kubectl get podskubectl create -f pod-with-cpu-more-than-limit.yml
In the above screenshot, it can be seen that the pod has not been created.
Pod with less CPU:
Now let’s try to create a pod that requests “CPU=100m” that is less than “200m” which we have defined in the limit range.
vim pod-with-cpu-less-than-limit.ymlapiVersion: v1
kind: Pod
metadata:
name: pod-with-cpu-less-than-limit
spec:
containers:
- name: pod-with-cpu-less-than-limit
image: nginx
resources:
limits:
cpu: "800m"
requests:
cpu: "100m"
Now get a list of the existing pods and try to create a pod with the above definition file.
kubectl get podskubectl create -f pod-with-cpu-less-than-limit.ymlThis time also the pod creation will fail as we have requested CPU=100m less than 200m that we have defined the limit range.
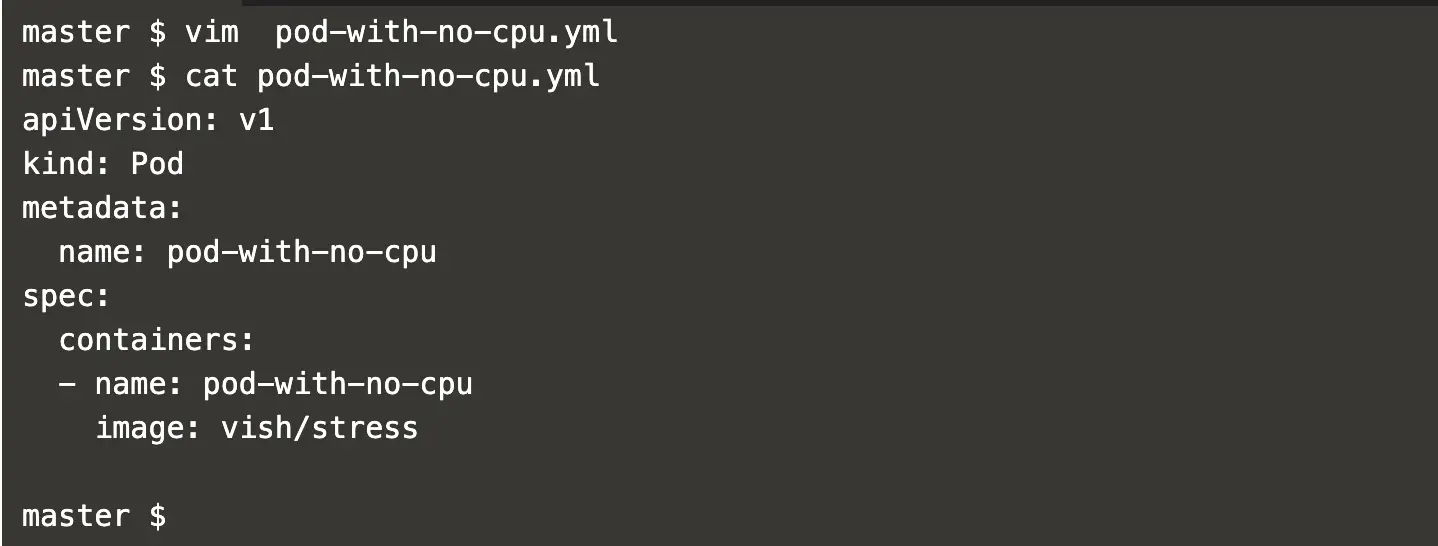
Pod with No CPU:
In this scenario let’s not define any request or limit for the CPU.
vim pod-with-no-cpu.ymlapiVersion: v1
kind: Pod
metadata:
name: pod-with-no-cpu
spec:
containers:
- name: pod-with-no-cpu
image: vish/stress
Now let’s try to create a pod and see its description.
kubectl get podskubectl create -f pod-with-no-cpu.ymlkubectl describe pods pod-with-no-cpu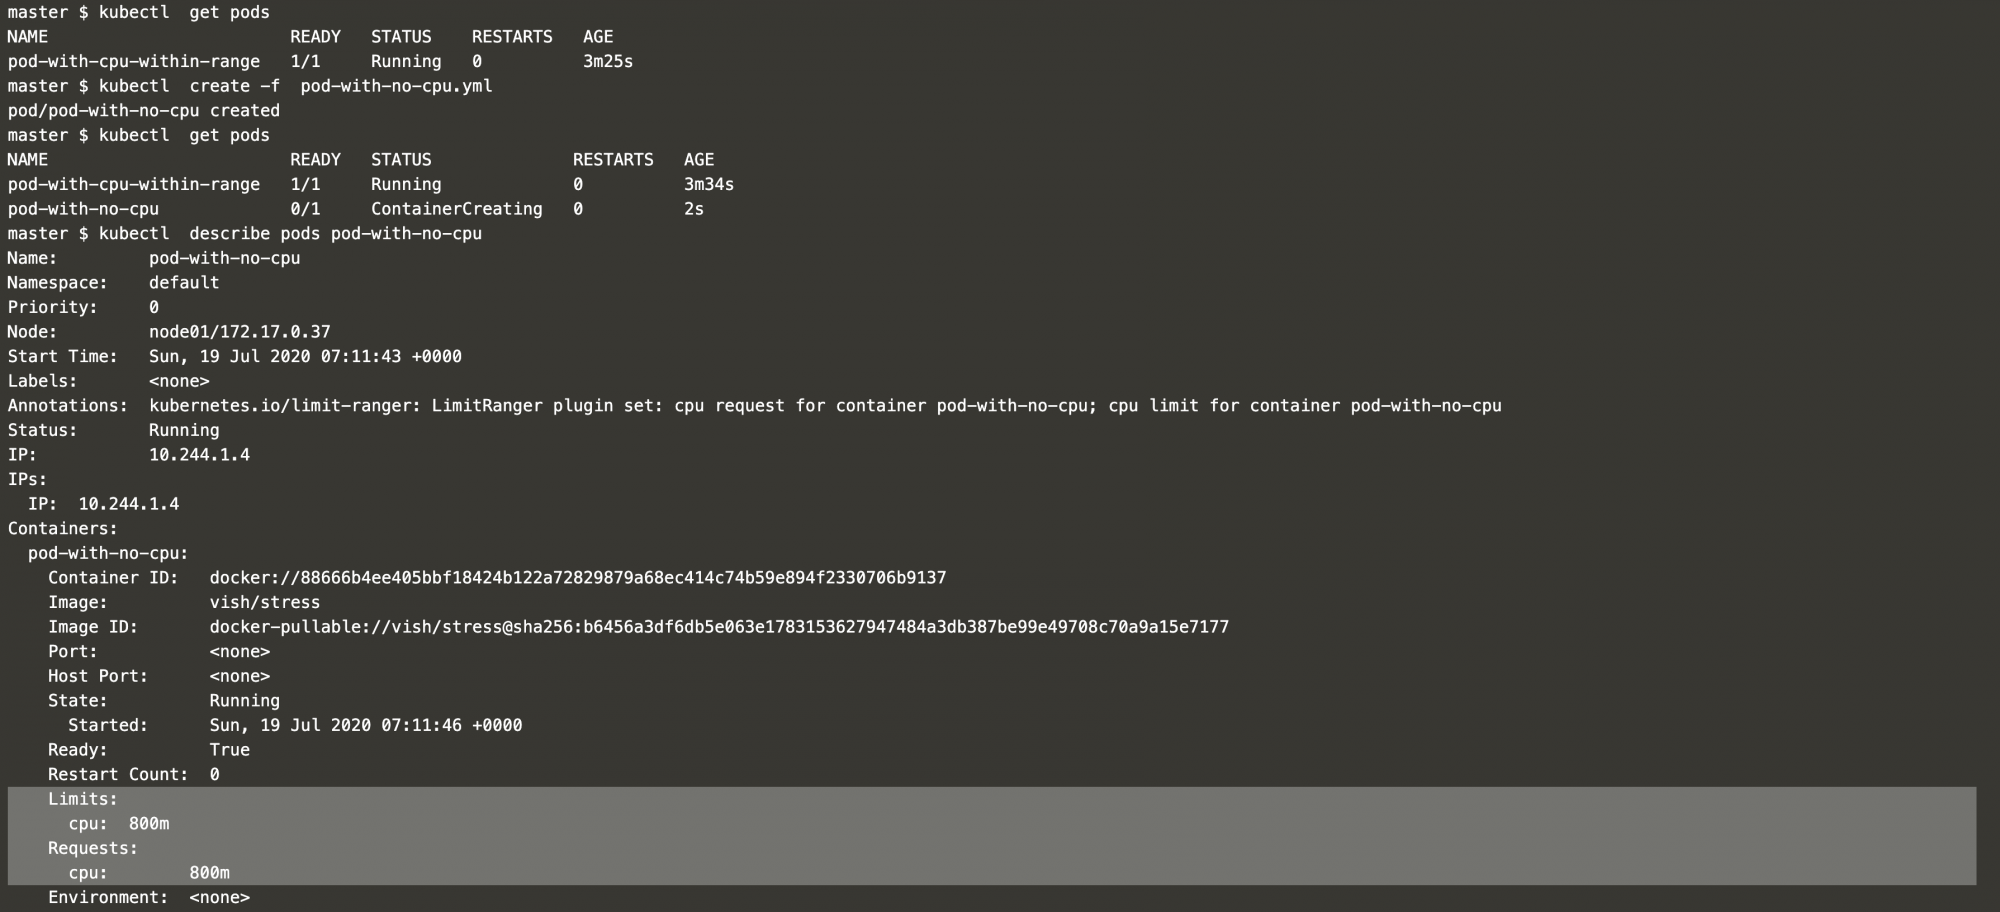
In the above screenshot, it can be seen that if we do not specify any request or limit for the CPU then the POD gets allocated CPU equal to the limit specified in the limit range, i.e. In this example, the pod got CPU limit and request equal to 800m which the limit specified in the limit range
Conclusion
In this article, we saw the steps to create a limit range in the default namespace. We then tried different scenarios for the CPU limit and request in the pod.

Add Comment