


Mở đầu
Wazuh server là một chương trình miễn phí, mã nguồn mở, đây là một công cụ giám sát các hoạt động bảo mật dựa trên nền tảng Elastic stack (ELK). Nó thường được dùng để giám sát các hoạt động liên quan tới bảo mật thông tin ở tầng ứng dụng và tầng OS. Do đó, bạn có thể lấy được các thông tin về việc phát hiện mối đe dọa ( threat detection), phản ứng khi có sự cố và giám sát các hoạt động của hệ thống để đảm bảo tính toàn vẹn. Trong hướng dẫn này, chúng tôi sẽ triển khai Wazuh trên một server Ubuntu 20.04|18.04 duy nhất.
Bạn có thể sử dụng Wazuh cho các ứng dụng sau:
- Phân tích vấn đề liên quan bảo mật
- Phân tích Log
- Phát hiện lỗ hỏng bảo mật
- Bảo mật Container
- Bảo mật các nền tảng Cloud
Điều Kiện
Yêu cầu tài nguyên tối thiểu như sau:
- 4 GB of RAM
- 2 CPU cores
Tuy nhiên, tài nguyên khuyến khích được sử dụng là:
- 16 GB of RAM
- 8 CPU cores
Cài đặt các gói cần thiết sau để có thể chạy Wazuh manager.
sudo apt update
sudo apt install vim curl apt-transport-https unzip wget libcap2-bin software-properties-common lsb-release gnupg2
Cài đặt
Cách 1: Cài đặt tự động Wazuh Server trên Ubuntu 20.04|18.04 bằng script
Đây là cách nhanh nhất để cài đặt Wazuh trên một node duy nhất, bằng việc sử dụng một script tự động xác định loại OS và thực hiện kiểm tra, xác nhận các tài nguyên thích hợp để cài đặt.
Tải script cài đặt theo câu lệnh sau:
curl -sO https://packages.wazuh.com/4.3/wazuh-install.shTiến hành thực thi scripts, sau khi đã tải xong:
sudo bash ./wazuh-install.sh -aQuá trình cài đặt sẽ hoàn tất sau vài phút:
23/05/2022 11:36:11 INFO: Starting Wazuh installation assistant. Wazuh version: 4.3.1
23/05/2022 11:36:11 INFO: Verbose logging redirected to /var/log/wazuh-install.log
23/05/2022 11:36:13 ERROR: Wazuh manager already installed.
23/05/2022 11:36:13 ERROR: Wazuh indexer already installed.
23/05/2022 11:36:14 ERROR: Wazuh dashboard already installed.
23/05/2022 11:36:14 ERROR: Filebeat already installed.
23/05/2022 11:36:14 INFO: If you want to overwrite the current installation, run this script adding the option -o/--overwrite. This will erase all the existing configuration and data.
root@ubuntu-01:~# sudo bash ./wazuh-install.sh -a -o
23/05/2022 11:36:21 INFO: Starting Wazuh installation assistant. Wazuh version: 4.3.1
23/05/2022 11:36:21 INFO: Verbose logging redirected to /var/log/wazuh-install.log
23/05/2022 11:36:23 INFO: --- Removing existing Wazuh installation ---
23/05/2022 11:36:23 INFO: Removing Wazuh manager.
23/05/2022 11:36:37 INFO: Wazuh manager removed.
23/05/2022 11:36:37 INFO: Removing Wazuh indexer.
23/05/2022 11:36:45 INFO: Wazuh indexer removed.
23/05/2022 11:36:45 INFO: Removing Filebeat.
23/05/2022 11:36:51 INFO: Filebeat removed.
23/05/2022 11:36:51 INFO: Removing Wazuh dashboard.
23/05/2022 11:37:07 INFO: Wazuh dashboard removed.
23/05/2022 11:37:07 INFO: Installation cleaned.
23/05/2022 11:37:19 INFO: Wazuh repository added.
23/05/2022 11:37:19 INFO: --- Configuration files ---
23/05/2022 11:37:19 INFO: Generating configuration files.
23/05/2022 11:37:20 INFO: Created wazuh-install-files.tar. It contains the Wazuh cluster key, certificates, and passwords necessary for installation.
23/05/2022 11:37:20 INFO: --- Wazuh indexer ---
23/05/2022 11:37:20 INFO: Starting Wazuh indexer installation.
23/05/2022 11:38:23 INFO: Wazuh indexer installation finished.
23/05/2022 11:38:24 INFO: Wazuh indexer post-install configuration finished.
23/05/2022 11:38:24 INFO: Starting service wazuh-indexer.
23/05/2022 11:38:45 INFO: wazuh-indexer service started.
23/05/2022 11:38:45 INFO: Initializing Wazuh indexer cluster security settings.
23/05/2022 11:38:58 INFO: Wazuh indexer cluster initialized.
23/05/2022 11:38:58 INFO: --- Wazuh server ---
23/05/2022 11:38:58 INFO: Starting the Wazuh manager installation.
23/05/2022 11:40:18 INFO: Wazuh manager installation finished.
23/05/2022 11:40:18 INFO: Starting service wazuh-manager.
23/05/2022 11:40:38 INFO: wazuh-manager service started.
23/05/2022 11:40:38 INFO: Starting Filebeat installation.
23/05/2022 11:40:47 INFO: Filebeat installation finished.
23/05/2022 11:40:47 INFO: Filebeat post-install configuration finished.
23/05/2022 11:40:47 INFO: Starting service filebeat.
23/05/2022 11:40:49 INFO: filebeat service started.
23/05/2022 11:40:49 INFO: --- Wazuh dashboard ---
23/05/2022 11:40:49 INFO: Starting Wazuh dashboard installation.
23/05/2022 11:41:39 INFO: Wazuh dashboard installation finished.
23/05/2022 11:41:39 INFO: Wazuh dashboard post-install configuration finished.
23/05/2022 11:41:39 INFO: Starting service wazuh-dashboard.
23/05/2022 11:41:40 INFO: wazuh-dashboard service started.
23/05/2022 11:42:08 INFO: Initializing Wazuh dashboard web application.
23/05/2022 11:42:19 INFO: Wazuh dashboard web application initialized.
23/05/2022 11:42:19 INFO: --- Summary ---
23/05/2022 11:42:19 INFO: You can access the web interface https://<wazuh-dashboard-ip>
User: admin
Password: PRPdOq0eQ23v5huwAdkB1ukBBqfGeCfu
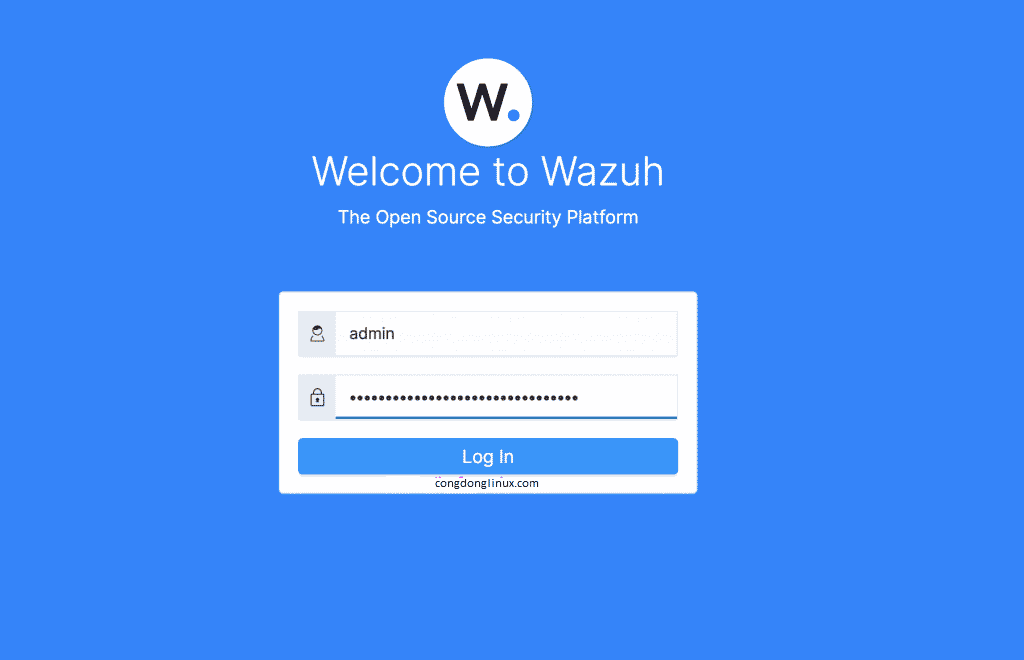
23/05/2022 11:42:19 INFO: Installation finished.Lấy thông tin đăng nhập:
23/05/2022 11:42:19 INFO: You can access the web interface https://<wazuh-dashboard-ip>
User: admin
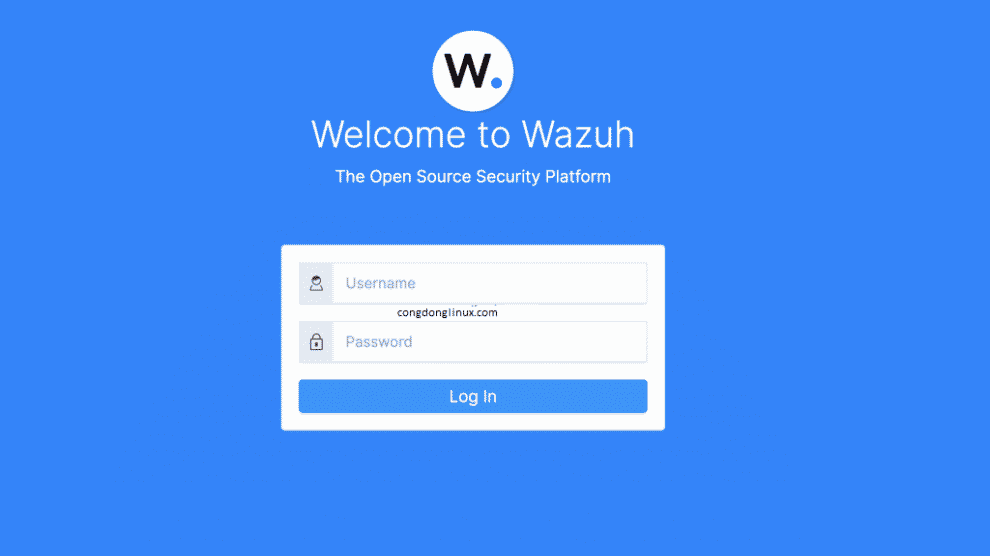
Password: PRPdOq0eQ23v5huwAdkB1ukBBqfGeCfuTruy cập vào portal tại: https://<serverip> và đăng nhập
Nhập vào username và password
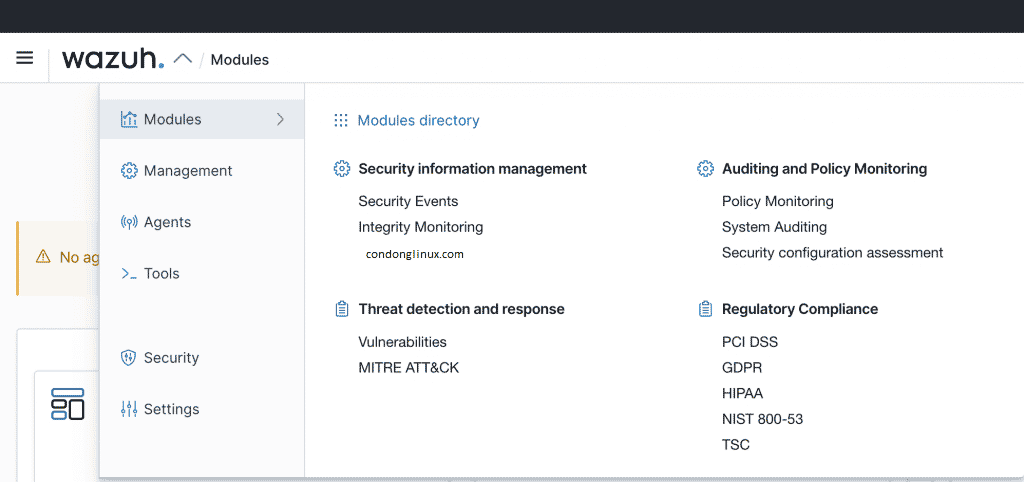
Chúng ta có thể thấy Dashboard như sau:
Cách 2: Cài đặt Wazuh Server bằng các bước thủ công
Những bước sau sẽ hướng dẫn chúng ta cách để có thể cài đặt Wazuh server trên Ubuntu 20.04|18.04.
- Thêm GPG key
curl -fsSL https://packages.wazuh.com/key/GPG-KEY-WAZUH|sudo gpg --dearmor -o /etc/apt/trusted.gpg.d/wazuh.gpg2. Thêm Wazuh repository
echo "deb https://packages.wazuh.com/4.x/apt/ stable main" | sudo tee /etc/apt/sources.list.d/wazuh.list3. Cập nhật hệ thống
sudo apt update4. Cài đặt Wazuh Manager
sudo apt install wazuh-manager5. Start và enable service
sudo systemctl daemon-reload
sudo systemctl enable --now wazuh-manager
Kiểm tra trạng thái Wazuh manager
systemctl status wazuh-managerKiểm tra trạng thái dịch vụ:
$ systemctl status wazuh-manager
● wazuh-manager.service - Wazuh manager
     Loaded: loaded (/lib/systemd/system/wazuh-manager.service; enabled; vendor preset: enabled)
     Active: active (running) since Mon 2021-04-26 09:13:56 UTC; 22s ago
    Process: 252739 ExecStart=/usr/bin/env ${DIRECTORY}/bin/ossec-control start (code=exited, status=0/SUCCESS)
      Tasks: 121 (limit: 4580)
     Memory: 472.5M
     CGroup: /system.slice/wazuh-manager.service
             ├─252805 /var/ossec/framework/python/bin/python3 /var/ossec/api/scripts/wazuh-apid.py
             ├─252844 /var/ossec/bin/ossec-authd
             ├─252860 /var/ossec/bin/wazuh-db
             ├─252883 /var/ossec/bin/ossec-execd
             ├─252897 /var/ossec/bin/ossec-analysisd
             ├─252958 /var/ossec/bin/ossec-syscheckd
             ├─252975 /var/ossec/bin/ossec-remoted
             ├─253006 /var/ossec/bin/ossec-logcollector
             ├─253024 /var/ossec/bin/ossec-monitord
             └─253047 /var/ossec/bin/wazuh-modulesd

Apr 26 09:13:47 node3 env[252739]: Started wazuh-db...
Apr 26 09:13:48 node3 env[252739]: Started ossec-execd...
Apr 26 09:13:49 node3 env[252739]: Started ossec-analysisd...
Apr 26 09:13:50 node3 env[252739]: Started ossec-syscheckd...
Apr 26 09:13:51 node3 env[252739]: Started ossec-remoted...
Apr 26 09:13:52 node3 env[252739]: Started ossec-logcollector...
Apr 26 09:13:53 node3 env[252739]: Started ossec-monitord...
Apr 26 09:13:54 node3 env[252739]: Started wazuh-modulesd...
Apr 26 09:13:56 node3 env[252739]: Completed.
Apr 26 09:13:56 node3 systemd[1]: Started Wazuh manager.
Cài đặt ELK Stack trên Ubuntu 20.04|18.04
Cài đặt Elasticsearch từ Open Distro, đây là một search engine có khả năng mở rộng khá mạnh mẽ. Gói cài đặt này hỗ trợ nhiều tiện ích nâng cao về bảo mật, alerting và phân tích hiệu suất chuyên sâu, quản lý Index và nhiều tính năng khác.
sudo apt install elasticsearch-oss opendistroforelasticsearchTải về file cấu hình theo đường dẫn sau: /etc/elasticsearch/elasticsearch.yml
sudo curl -so /etc/elasticsearch/elasticsearch.yml https://packages.wazuh.com/resources/4.2/open-distro/elasticsearch/7.x/elasticsearch_all_in_one.ymlCấu hình quyền và user kibana theo mẫu sau:
sudo curl -so /usr/share/elasticsearch/plugins/opendistro_security/securityconfig/roles.yml https://packages.wazuh.com/resources/4.2/open-distro/elasticsearch/roles/roles.yml
sudo curl -so /usr/share/elasticsearch/plugins/opendistro_security/securityconfig/roles_mapping.yml https://packages.wazuh.com/resources/4.2/open-distro/elasticsearch/roles/roles_mapping.yml

sudo curl -so /usr/share/elasticsearch/plugins/opendistro_security/securityconfig/internal_users.yml https://packages.wazuh.com/resources/4.2/open-distro/elasticsearch/roles/internal_users.yml
Những câu lệnh trên thêm những User sau cho Kibana:
- Wazuh_user – Will be used for users who need read-only access to the Wazuh Kibana plugin. – Có quyền Read-only, truy cập vào Wazuh Kibana plugin.
- Wazuh_admin – For users who need administrative privileges – Dùng cho những User cần quyền quản trị.
Thêm 2 quyền nữa cũng được khởi tạo:
- wazuh_ui_user – provides wazuh_user permissions to read the Wazuh’s indices. – Cung cấp quyền Read cho các Indices của Wazuh
- wazuh_ui_admin – allows wazuh_admins to perform read/write, management and indexing on wazuh indices. – cho phép admin thực hiện read/write, quản lý và đánh index trên wazuh.
Cài đặt Certicate
Chúng ta có thể cài đặt certificate dùng cho việc cấu hình TLS giữa giao tiếp Elasticsearch và Wazuh.
1. Gỡ bỏ cert demo
sudo rm -f /etc/elasticsearch/{esnode-key.pem,esnode.pem,kirk-key.pem,kirk.pem,root-ca.pem}2. Tải về wazuh-cert-tool.sh
sudo su -
curl -so ~/wazuh-cert-tool.sh https://packages.wazuh.com/resources/4.2/open-distro/tools/certificate-utility/wazuh-cert-tool.sh
curl -so ~/instances.yml https://packages.wazuh.com/resources/4.2/open-distro/tools/certificate-utility/instances_aio.yml
3. Thực thi wazuh-cert-tool.sh để tạo certificate:
# bash ~/wazuh-cert-tool.sh
02/28/2022 22:43:19 INFO: Configuration file found. Creating certificates...
02/28/2022 22:43:20 INFO: Creating the Elasticsearch certificates...
02/28/2022 22:43:20 INFO: Creating Wazuh server certificates...
02/28/2022 22:43:20 INFO: Creating Kibana certificate...
02/28/2022 22:43:20 INFO: Certificates creation finished. They can be found in ~/certs.
4. Chuyển Elasticsearch certificates tới thư mục như sau:
mkdir /etc/elasticsearch/certs/
mv ~/certs/elasticsearch* /etc/elasticsearch/certs/
mv ~/certs/admin* /etc/elasticsearch/certs/
cp ~/certs/root-ca* /etc/elasticsearch/certs/
5. Giảm thiểu lỗ hỏng bảo mật Apache Log4j2 Remote Code Execution (RCE)
Thêm những cấu hình sau để giảm thiểu lỗ hỏng bảo mật ( RCE ) – CVE-2021-44228 – ESA-2021-31.
mkdir -p /etc/elasticsearch/jvm.options.d
echo '-Dlog4j2.formatMsgNoLookups=true' > /etc/elasticsearch/jvm.options.d/disabledlog4j.options
chmod 2750 /etc/elasticsearch/jvm.options.d/disabledlog4j.options
chown root:elasticsearch /etc/elasticsearch/jvm.options.d/disabledlog4j.options
6. Enable và start Elasticsearch service:
systemctl daemon-reload
systemctl enable elasticsearch
systemctl start elasticsearch
Kiểm tra trạng thái Elasticsearch service:
# systemctl status elasticsearch
● elasticsearch.service - Elasticsearch
     Loaded: loaded (/lib/systemd/system/elasticsearch.service; enabled; vendor preset: enabled)
     Active: active (running) since Mon 2022-02-28 22:46:22 UTC; 1min 29s ago
       Docs: https://www.elastic.co
   Main PID: 56511 (java)
      Tasks: 47 (limit: 4682)
     Memory: 1.2G
     CGroup: /system.slice/elasticsearch.service
             └─56511 /usr/share/elasticsearch/jdk/bin/java -Xshare:auto -Des.networkaddress.cache.ttl=60 -Des.networkaddress.cache.negative.ttl=10 -XX:+AlwaysPreTouch -Xss1m -Djava.awt.headless=tru>

Feb 28 22:46:11 ubuntu-20-04-02 systemd[1]: Starting Elasticsearch...
Feb 28 22:46:22 ubuntu-20-04-02 systemd-entrypoint[56511]: WARNING: An illegal reflective access operation has occurred
Feb 28 22:46:22 ubuntu-20-04-02 systemd-entrypoint[56511]: WARNING: Illegal reflective access by com.amazon.opendistro.elasticsearch.performanceanalyzer.collectors.MasterServiceEventMetrics (file:/>
Feb 28 22:46:22 ubuntu-20-04-02 systemd-entrypoint[56511]: WARNING: Please consider reporting this to the maintainers of com.amazon.opendistro.elasticsearch.performanceanalyzer.collectors.MasterSer>
Feb 28 22:46:22 ubuntu-20-04-02 systemd-entrypoint[56511]: WARNING: Use --illegal-access=warn to enable warnings of further illegal reflective access operations
Feb 28 22:46:22 ubuntu-20-04-02 systemd-entrypoint[56511]: WARNING: All illegal access operations will be denied in a future release
Feb 28 22:46:22 ubuntu-20-04-02 systemd[1]: Started Elasticsearch.
Thực thi script Elasticsearch securityadmin để lấy certticate mới và khởi động cluster:
export JAVA_HOME=/usr/share/elasticsearch/jdk/ && /usr/share/elasticsearch/plugins/opendistro_security/tools/securityadmin.sh -cd /usr/share/elasticsearch/plugins/opendistro_security/securityconfig/ -nhnv -cacert /etc/elasticsearch/certs/root-ca.pem -cert /etc/elasticsearch/certs/admin.pem -key /etc/elasticsearch/certs/admin-key.pemTa sẽ thấy Output như sau:
Open Distro Security Admin v7
Will connect to localhost:9300 ... done
Connected as CN=admin,OU=Docu,O=Wazuh,L=California,C=US
Elasticsearch Version: 7.10.2
Open Distro Security Version: 1.13.1.0
Contacting elasticsearch cluster 'elasticsearch' and wait for YELLOW clusterstate ...
Clustername: elasticsearch
Clusterstate: GREEN
Number of nodes: 1
Number of data nodes: 1
.opendistro_security index does not exists, attempt to create it ... done (0-all replicas)
Populate config from /usr/share/elasticsearch/plugins/opendistro_security/securityconfig/
Will update '_doc/config' with /usr/share/elasticsearch/plugins/opendistro_security/securityconfig/config.yml
   SUCC: Configuration for 'config' created or updated
Will update '_doc/roles' with /usr/share/elasticsearch/plugins/opendistro_security/securityconfig/roles.yml
   SUCC: Configuration for 'roles' created or updated
Will update '_doc/rolesmapping' with /usr/share/elasticsearch/plugins/opendistro_security/securityconfig/roles_mapping.yml
   SUCC: Configuration for 'rolesmapping' created or updated
Will update '_doc/internalusers' with /usr/share/elasticsearch/plugins/opendistro_security/securityconfig/internal_users.yml
   SUCC: Configuration for 'internalusers' created or updated
Will update '_doc/actiongroups' with /usr/share/elasticsearch/plugins/opendistro_security/securityconfig/action_groups.yml
   SUCC: Configuration for 'actiongroups' created or updated
Will update '_doc/tenants' with /usr/share/elasticsearch/plugins/opendistro_security/securityconfig/tenants.yml
   SUCC: Configuration for 'tenants' created or updated
Will update '_doc/nodesdn' with /usr/share/elasticsearch/plugins/opendistro_security/securityconfig/nodes_dn.yml
   SUCC: Configuration for 'nodesdn' created or updated
Will update '_doc/whitelist' with /usr/share/elasticsearch/plugins/opendistro_security/securityconfig/whitelist.yml
   SUCC: Configuration for 'whitelist' created or updated
Will update '_doc/audit' with /usr/share/elasticsearch/plugins/opendistro_security/securityconfig/audit.yml
   SUCC: Configuration for 'audit' created or updated
Done with success
Thực thi tiếp câu lệnh sau để xác nhận quá trình cài đặt được hoàn tất:
curl -XGET https://localhost:9200 -u admin:admin -kResponse sẽ trông như sau:
{
  "name" : "node-1",
  "cluster_name" : "elasticsearch",
  "cluster_uuid" : "42mc1BAjQaOpVo4p3Xz5lA",
  "version" : {
    "number" : "7.10.2",
    "build_flavor" : "oss",
    "build_type" : "deb",
    "build_hash" : "747e1cc71def077253878a59143c1f785afa92b9",
    "build_date" : "2021-01-13T00:42:12.435326Z",
    "build_snapshot" : false,
    "lucene_version" : "8.7.0",
    "minimum_wire_compatibility_version" : "6.8.0",
    "minimum_index_compatibility_version" : "6.0.0-beta1"
  },
  "tagline" : "You Know, for Search"
}
Cài đặt Filebeat trên Ubuntu 20.04|18.04
Filebeat được sử dụng vận chuyển alert và các event từ Wazuh server đến Elasticsearch.
sudo apt install filebeatTải file cấu hình của filebeat sau đây, dùng cho việc chuyển tiếp wazuh alerts đến Elasticsearch
curl -so /etc/filebeat/filebeat.yml https://packages.wazuh.com/resources/4.2/open-distro/filebeat/7.x/filebeat_all_in_one.ymlTải mẫu alert với câu lệnh sau:
curl -so /etc/filebeat/wazuh-template.json https://raw.githubusercontent.com/wazuh/wazuh/4.2/extensions/elasticsearch/7.x/wazuh-template.json
chmod go+r /etc/filebeat/wazuh-template.json
Tải Wazuh FIlebeat module:
curl -s https://packages.wazuh.com/4.x/filebeat/wazuh-filebeat-0.1.tar.gz | tar -xvz -C /usr/share/filebeat/moduleCopy Elasticsearch certificates đến /etc/filebeat/certs
mkdir /etc/filebeat/certs
cp ~/certs/root-ca.pem /etc/filebeat/certs/
mv ~/certs/filebeat* /etc/filebeat/certs/
Start và enable Filebeat service
systemctl daemon-reload
systemctl enable --now filebeat
Xác nhận cấu hình Filebeat bằng câu lệnh sau:
# filebeat test output
elasticsearch: https://127.0.0.1:9200...
  parse url... OK
  connection...
    parse host... OK
    dns lookup... OK
    addresses: 127.0.0.1
    dial up... OK
  TLS...
    security: server's certificate chain verification is enabled
    handshake... OK
    TLS version: TLSv1.3
    dial up... OK
  talk to server... OK
  version: 7.10.2
Cài đặt Kibana trên Ubuntu 20.04|18.04
Kibana là một web interface, giúp chúng ta hiển thị và phân tích các sự kiện được lưu trong Elasticsearch.
Sử dụng câu lệnh sau để cài đặt Kibana trên Ubuntu 20.04|18.04
apt install opendistroforelasticsearch-kibanaTải về file cấu hình của Kibana
curl -so /etc/kibana/kibana.yml https://packages.wazuh.com/resources/4.2/open-distro/kibana/7.x/kibana_all_in_one.ymlTạo thư mục cho Kibana
mkdir /usr/share/kibana/data
chown -R kibana:kibana /usr/share/kibana/data
Cài đặt Wazuh Kibana plugin.
cd /usr/share/kibana
sudo -u kibana /usr/share/kibana/bin/kibana-plugin install https://packages.wazuh.com/4.x/ui/kibana/wazuh_kibana-4.2.5_7.10.2-1.zip
Output
Attempting to transfer from https://packages.wazuh.com/4.x/ui/kibana/wazuh_kibana-4.2.5_7.10.2-1.zip
Transferring 33111704 bytes....................
Transfer complete
Retrieving metadata from plugin archive
Extracting plugin archive
Extraction complete
Plugin installation complete
Copy Elasticsearch certificates đến/etc/kibana/certs:
mkdir /etc/kibana/certs
cp ~/certs/root-ca.pem /etc/kibana/certs/
mv ~/certs/kibana* /etc/kibana/certs/
chown kibana:kibana /etc/kibana/certs/*
Liên kết socket của Kibana tới port 443:
setcap 'cap_net_bind_service=+ep' /usr/share/kibana/node/bin/nodeStart và enable Kibana service
systemctl daemon-reload
systemctl enable --now kibana
Cấu hình tường lửa cho Kibana port 443.
sudo ufw allow 443/tcpBạn bây giờ có thể truy cập wazuh kibana interface thông qua:
URL: https://<wazuh_server_ip>
user: admin
password: admin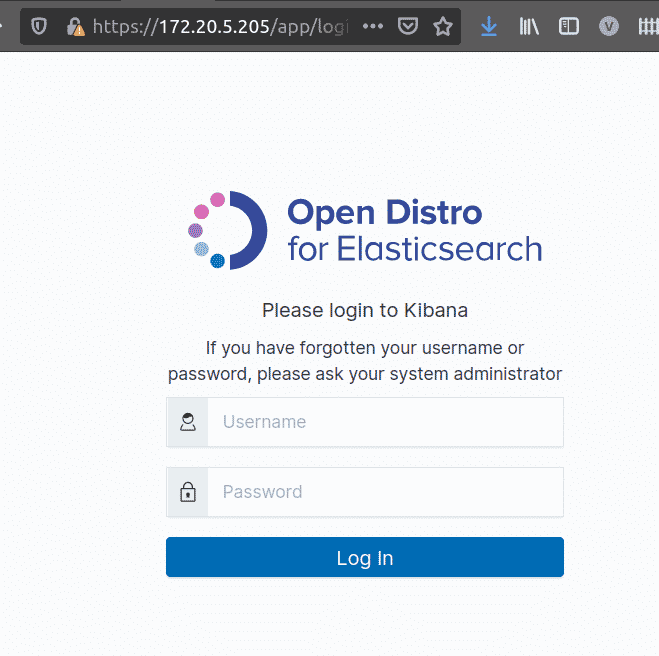
Bạn có thể đăng nhập và nhìn thấy Dashboard như sau:

Kết bài
Với những bước trên, chúng ta đã hoàn tất quá trình cài đặt Wazuh server on Ubuntu 20.04|18.04. Hẹn các bạn trong các bài hướng dẫn tiếp theo.
Chúc các bạn thành công. !!
Add Comment