


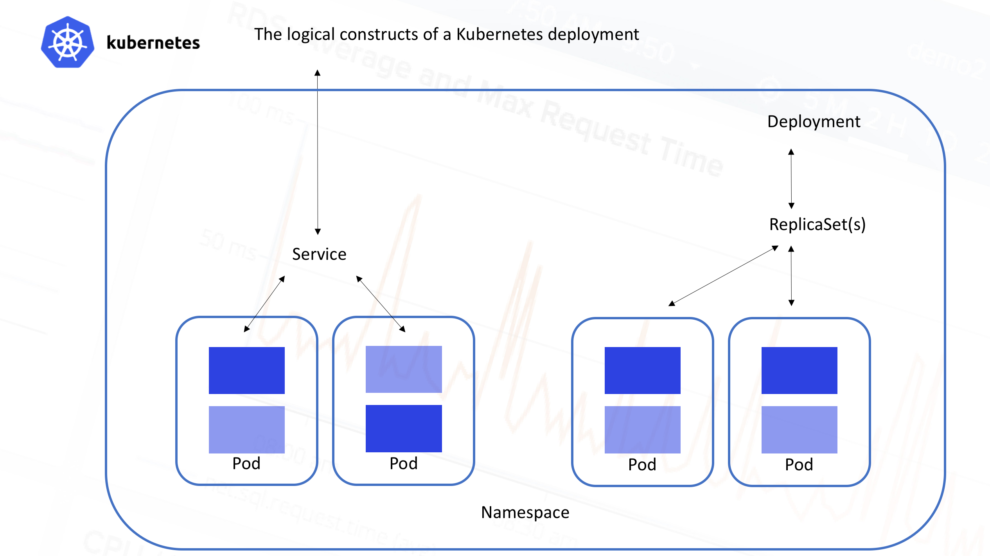
A namespace is helpful when multiple teams are using the same cluster. This is used when there is a potential of name collision. It can be a virtual wall between multiple clusters. For example, we can not have pods with the same name in a Kubernetes Cluster but using Namespace we can virtually divide the Cluster and have pods with the same name.
Some of the important functionalities of a Namespace are as follows.
- It helps pod-to-pod communication using the same namespace.
- It acts as a virtual cluster that can sit on top of the same physical cluster.
- It provides a logical separation between the teams and their environments.
In this article, we will create a namespace and create a pod in the newly created namespace. We will also see how a namespace can be set as a default namespace.
Pre-requisites
- Kubernetes Cluster with at least 1 worker node.
If you want to learn to create a Kubernetes Cluster, click here. This guide will help you create a Kubernetes cluster with 1 Master and 2 Nodes on AWS Ubuntu 18.04 EC2 Instances.
What we will do
- Create Namespaces
Create Namespaces
To list all the namespaces available in the Kubernetes Cluster, execute the following command.
kubectl get namespace #Get all namespace in the cluster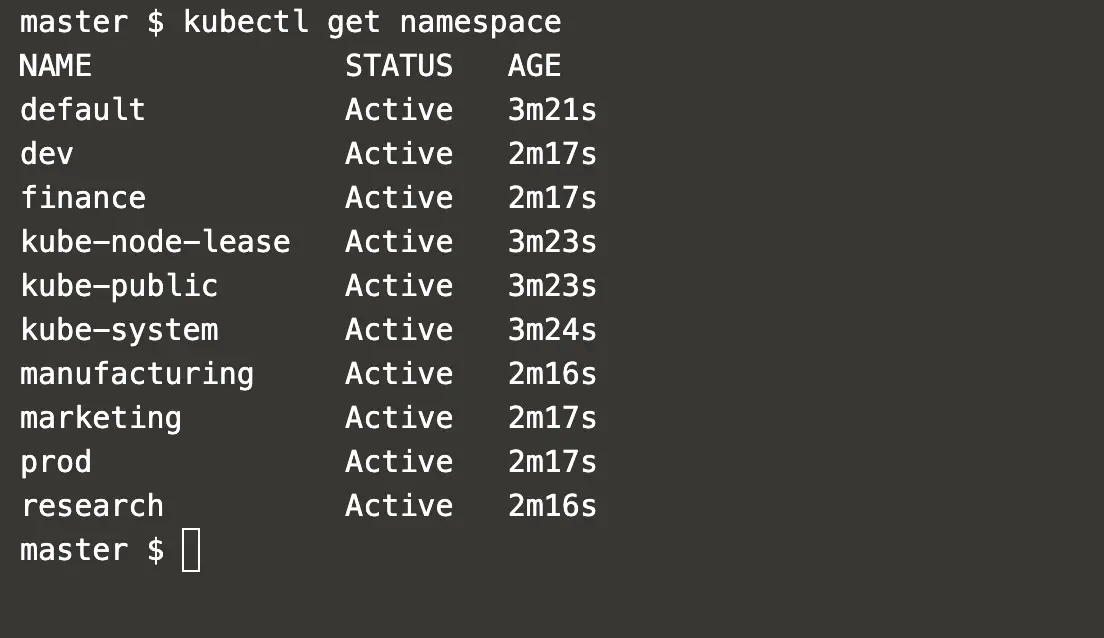
Now let’s try to create a pod in a particular namespace that does not exist.
To create a pod in “test-env” namespace execute the following command.
kubectl run nginx --image=nginx --namespace=test-env #Try to create a pod in the namespace that does not exist.The pod will not get created in the namespace which does not exist hence we first need to create a namespace.
To create a namespace “test-env” execute the following command.
kubectl create namespace test-env #Create a namespacekubectl get namespace #Get a list of namespaces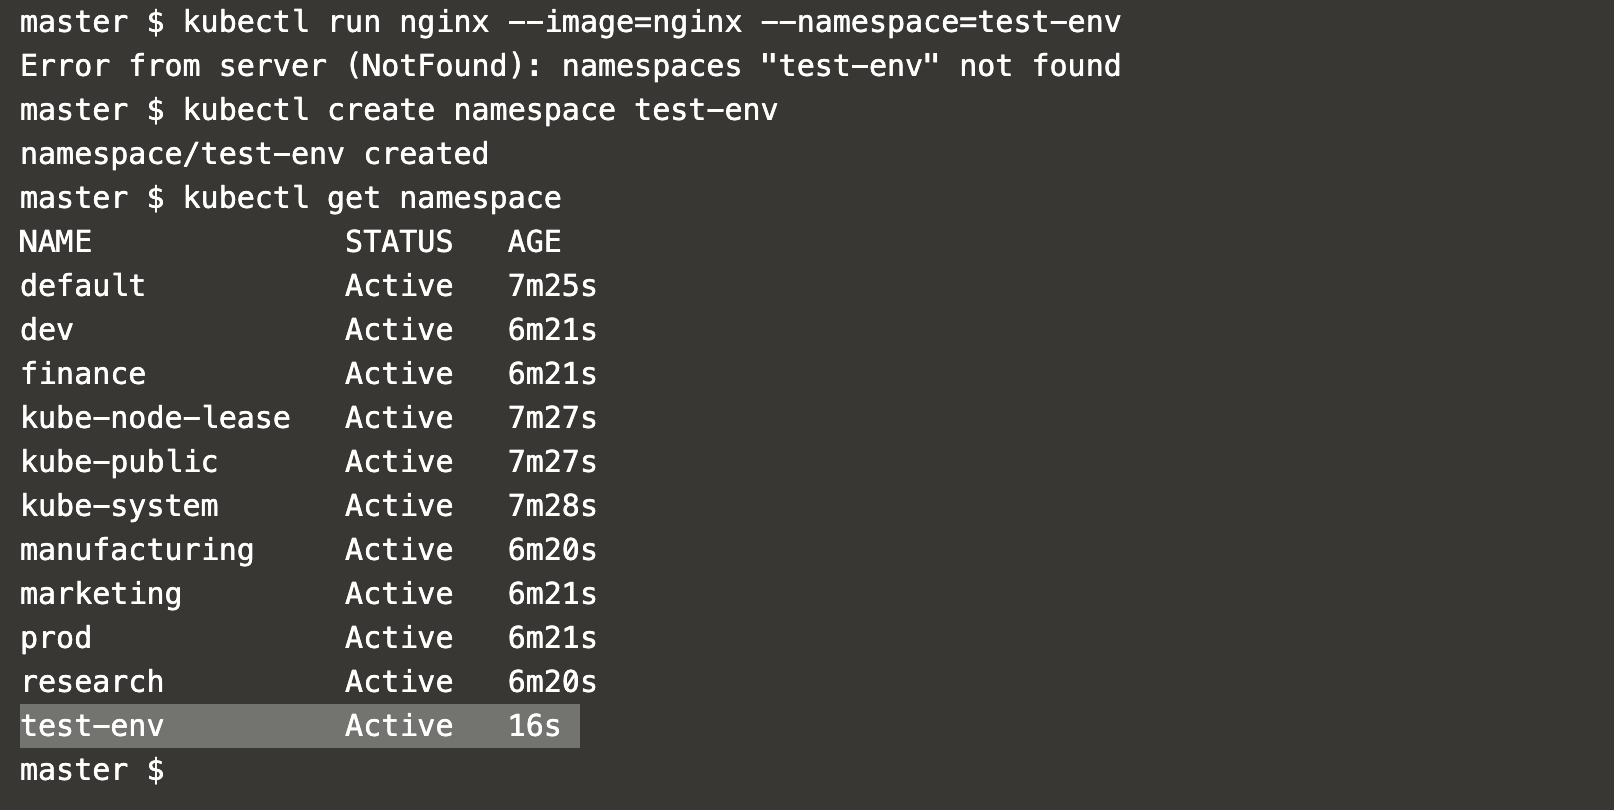
Now we have a namespace in which we want to create a pod.
To create a pod in the namespace we created pass –namespace=test-env option to the command.
kubectl run nginx --image=nginx --namespace=test-env #Create a pod in the namespace.If you try to get pods without specifying the namespace you will not get details of the pod.
kubectl get pods #Get a list of podsTo get details of the pod which belongs to “test-env” namespace use the following command.
kubectl get pods --namespace=test-env #Get a list of pods in the specified namespace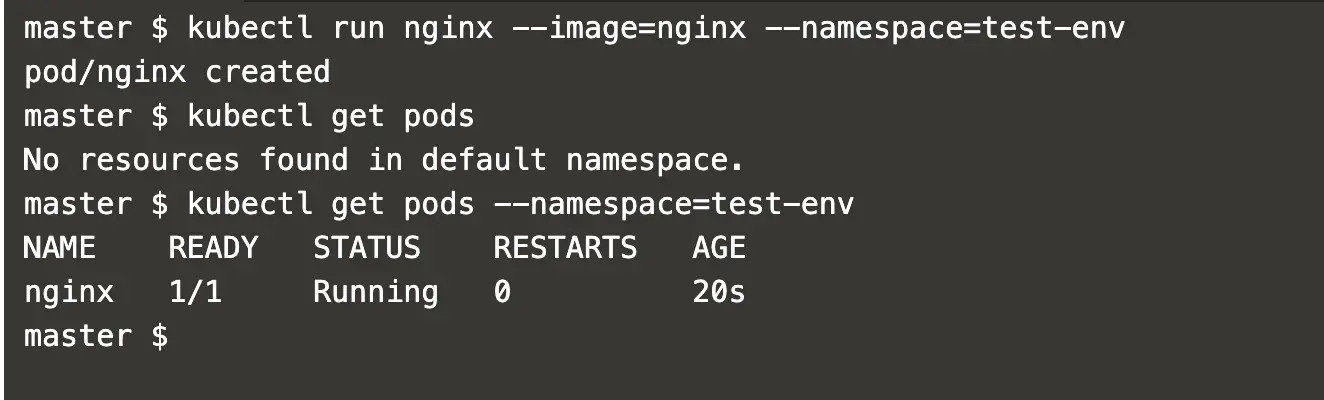
If you want to set your namespace as default namespace so there will not be a need of specifying namespace option in the command, use the following command.
kubectl config set-context --current --namespace=test-env #Set default namespaceNow there is no need to specify the namespace in the command to get details of the pod.
kubectl get pods #Get a list of pods from the default namespace 
To switch to the default namespace use the following command.
kubectl config set-context --current --namespace=default #Check the namespace to defaultkubectl get pods #Get a list of pods
To check which is the default namespace use the following commands.
kubectl config view --minify | grep namespace: #Extract the namespace from the kubernetes config file.kubectl config set-context --current --namespace=test-env #Set default namespace in the config file.kubectl config view --minify | grep namespace: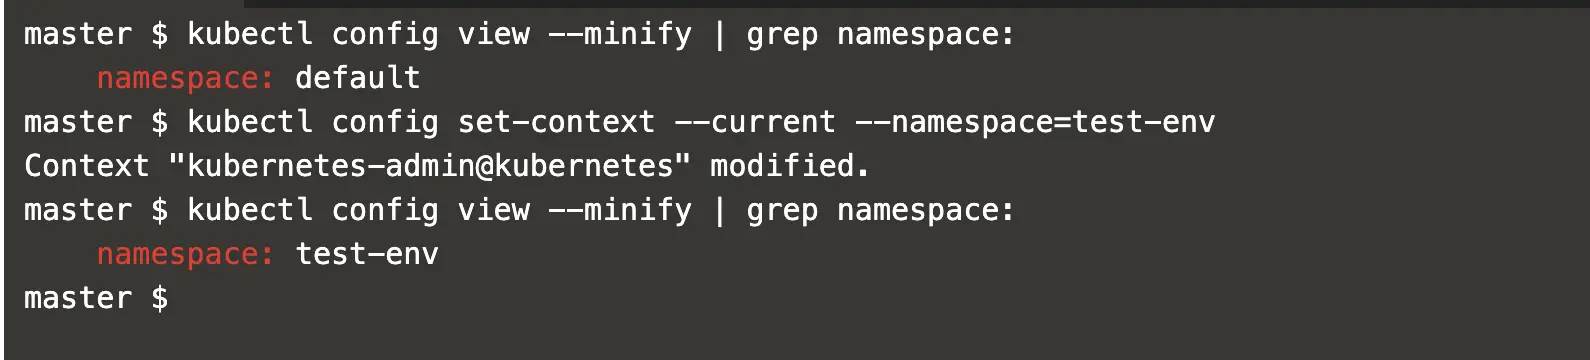
Check which Kubernetes resources are a namespace, execute the following command.
kubectl api-resources --namespaced=true #Get Kubernetes objects which can be in a namespaces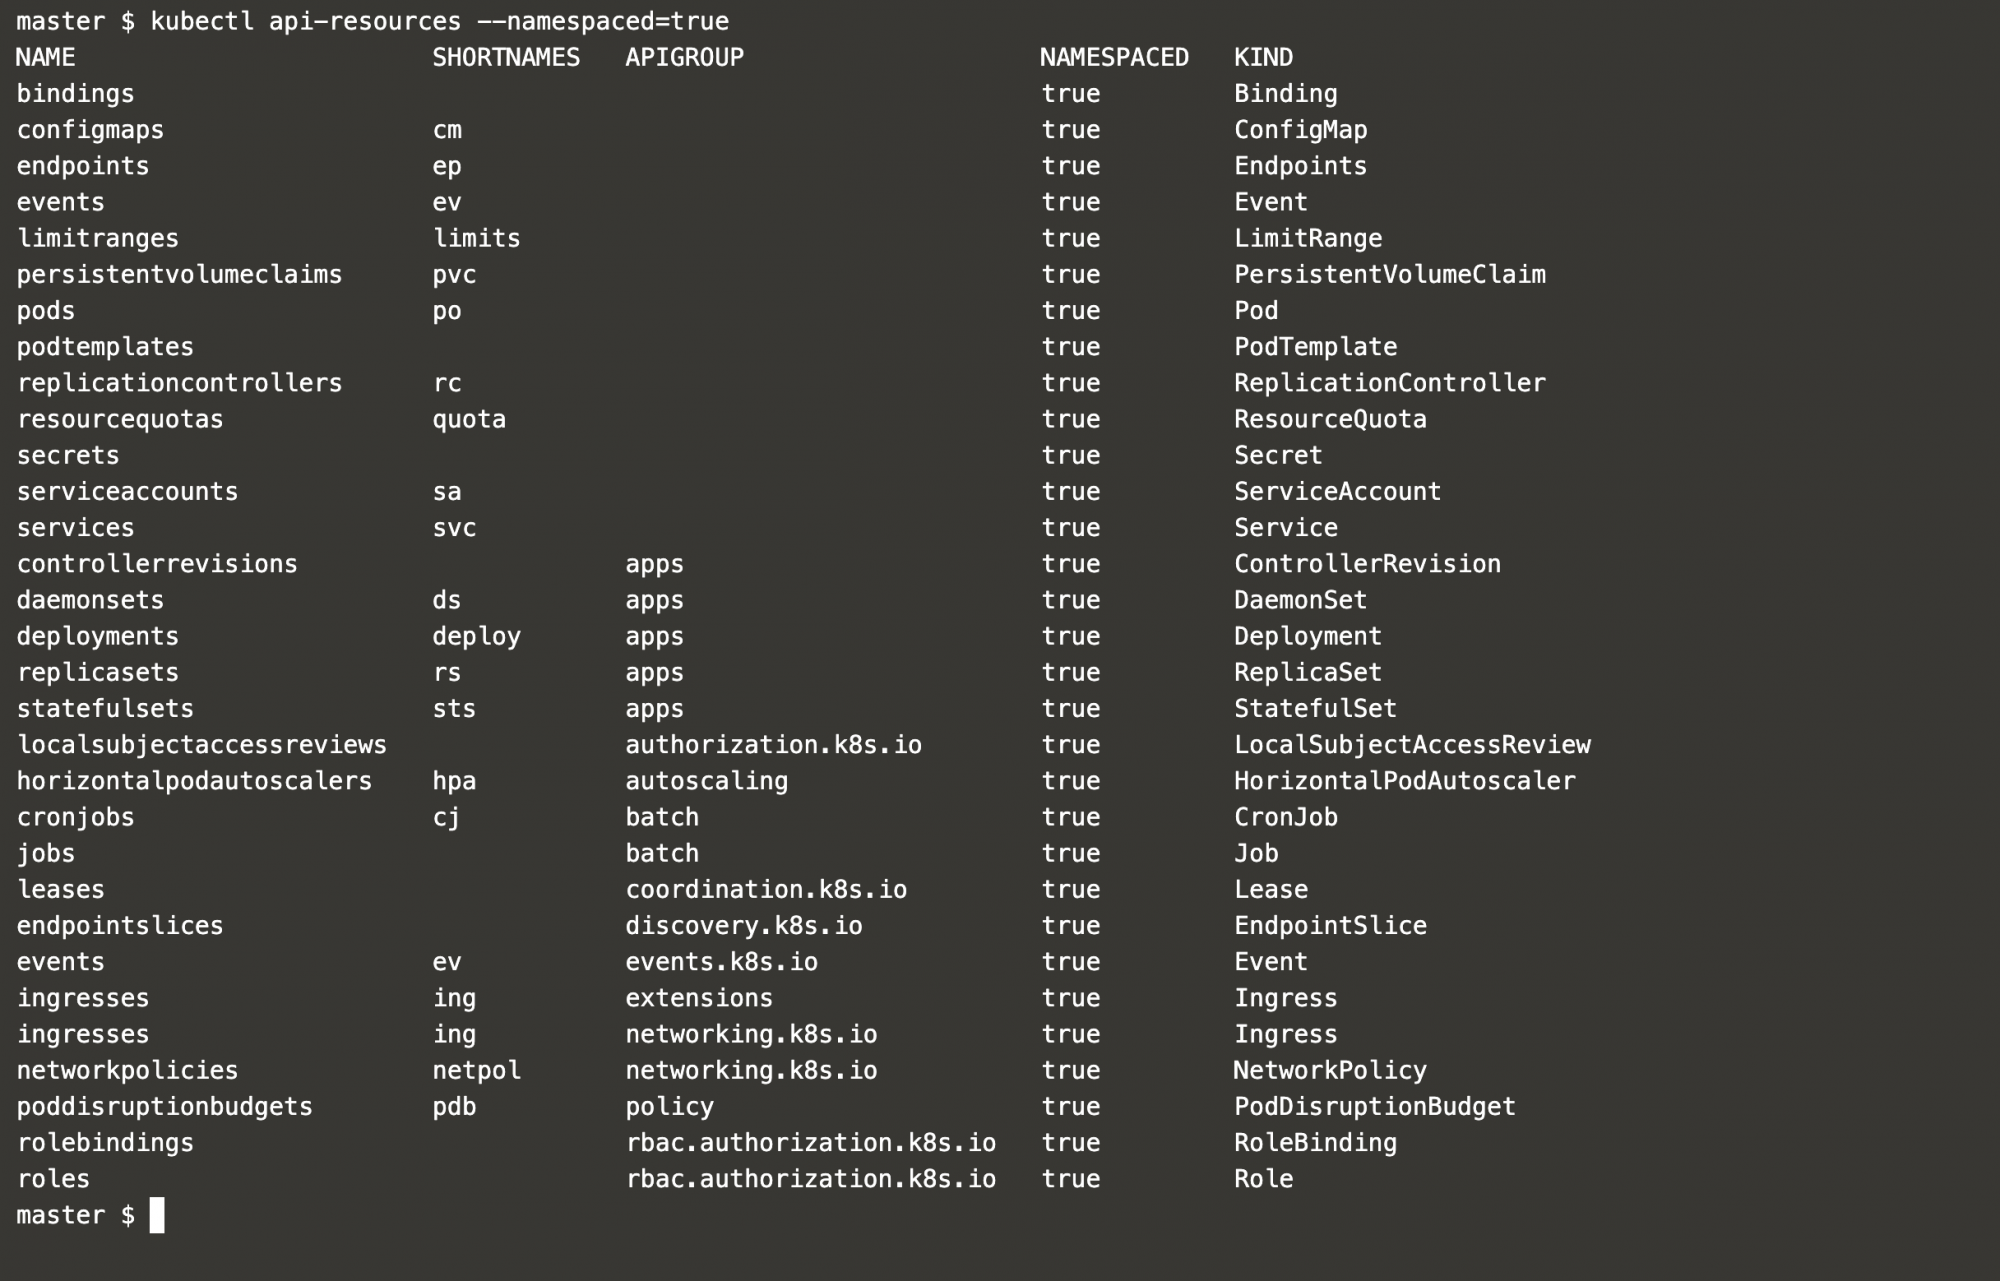
To see which Kubernetes resources are not in a namespace, use the following command.
kubectl api-resources --namespaced=false #Get a list of Kubernetes objects that can never be in a namespace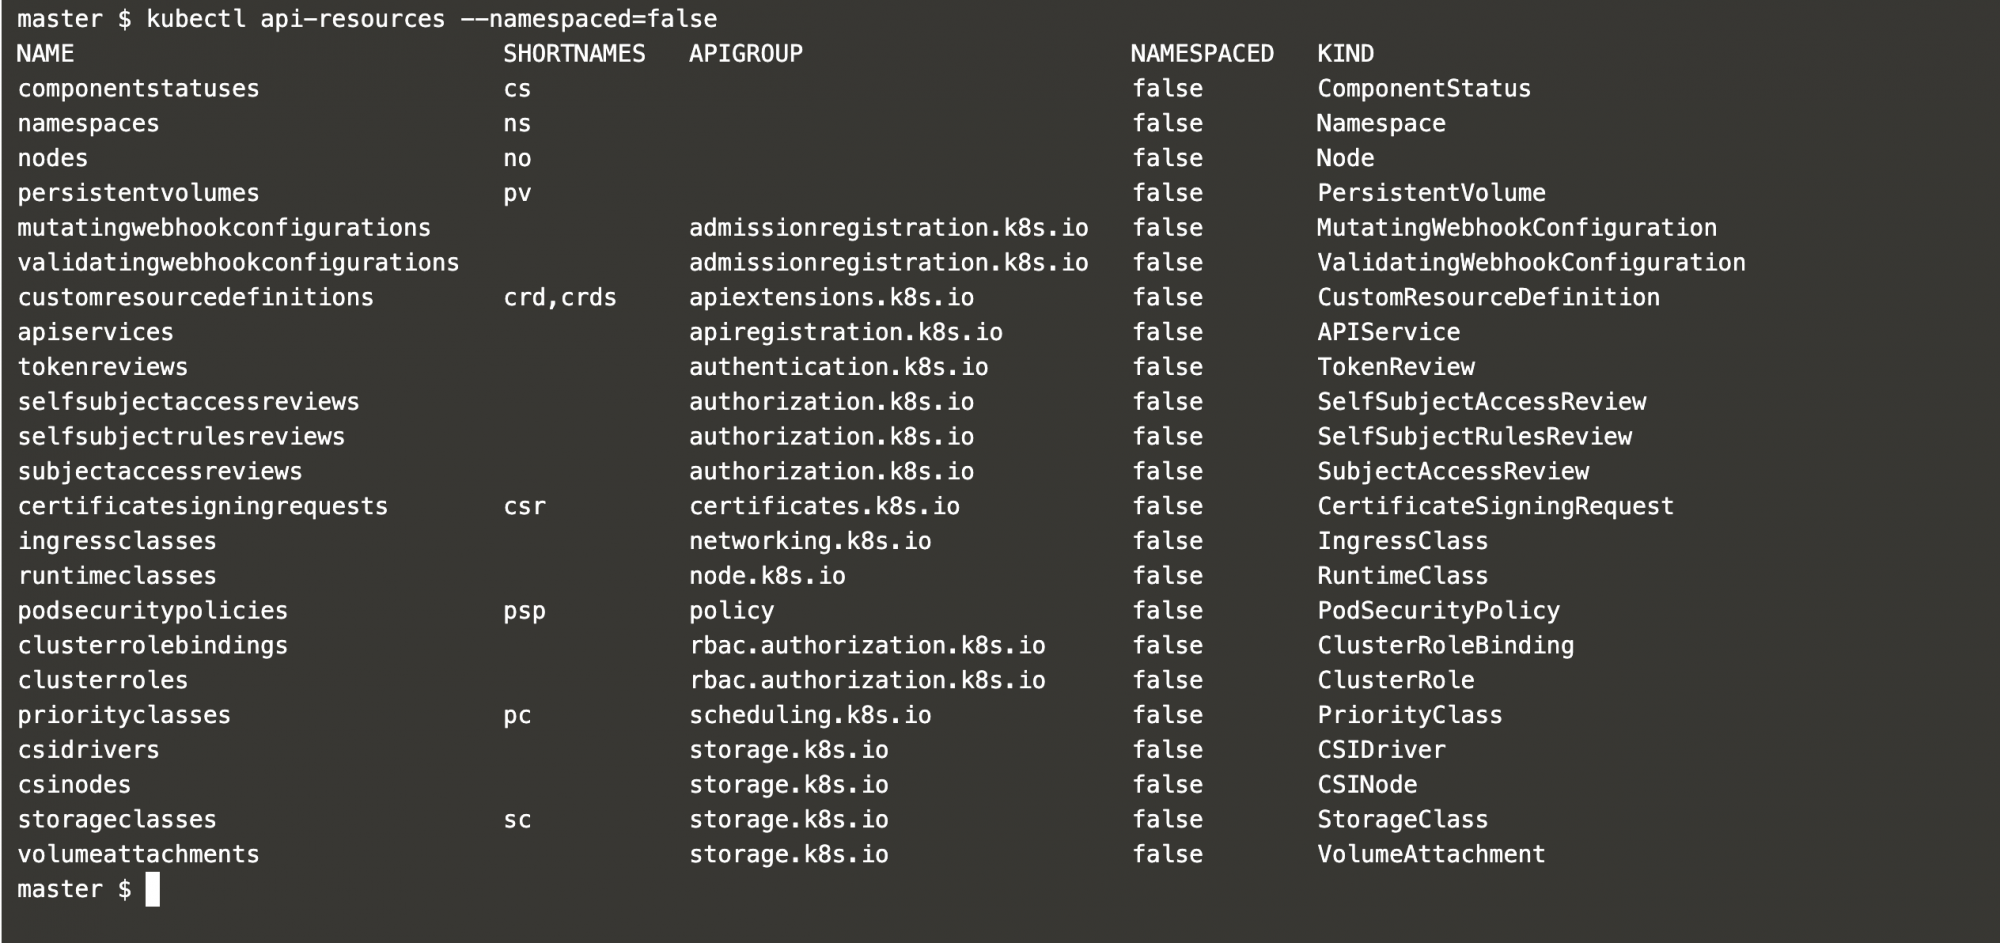
You can get details of the namespace using the command mentioned below.
kubectl get namespaces #Get a list of namespaces.kubectl describe namespace test-env #Get details of a namespace.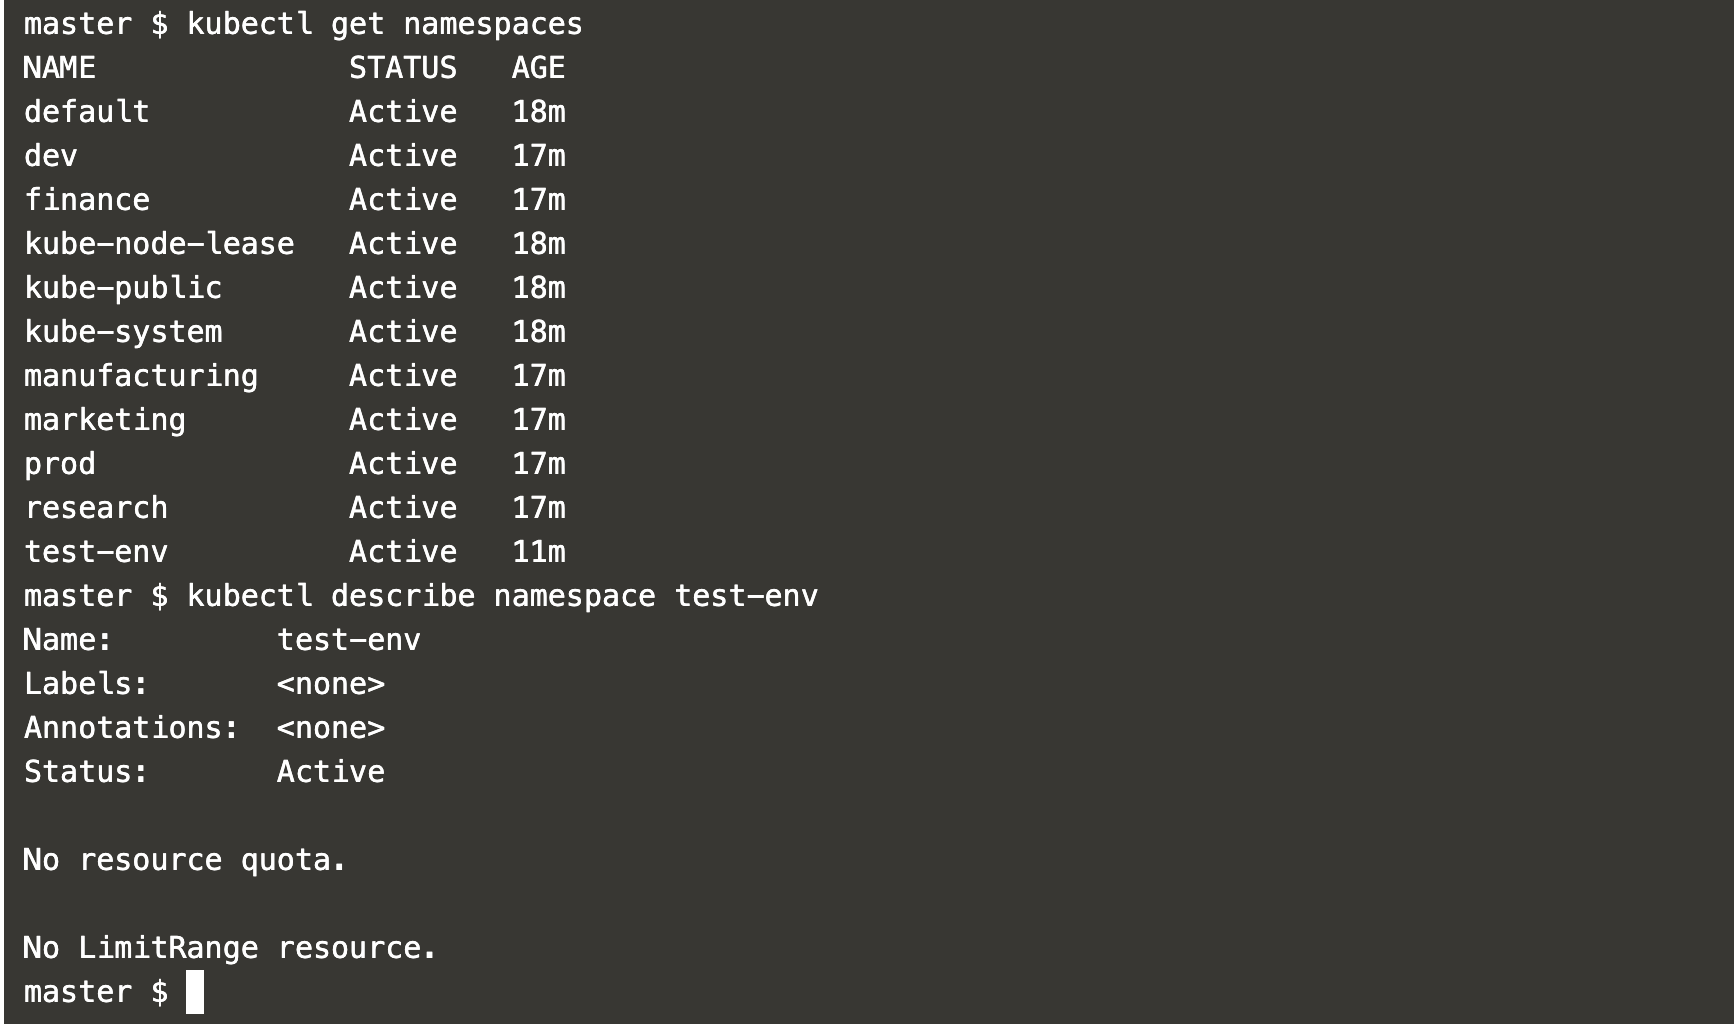
A namespace can also be created using a .yml file.
vim namespace-using-file.yml #Create a namespace definition file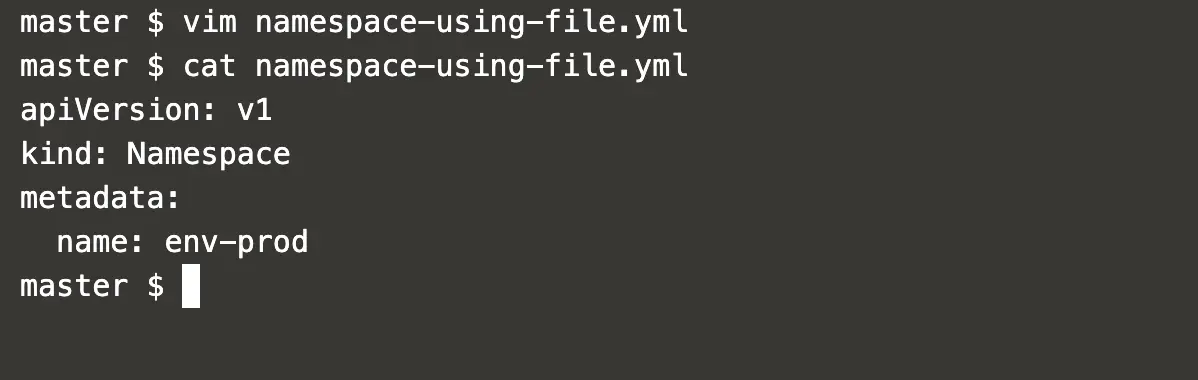
Execute the following command to create a namespace specified in the object definition file.
kubectl create -f namespace-using-file.yml #Create a namespace using a .yml filekubectl get namespaces #Get a list of namespaces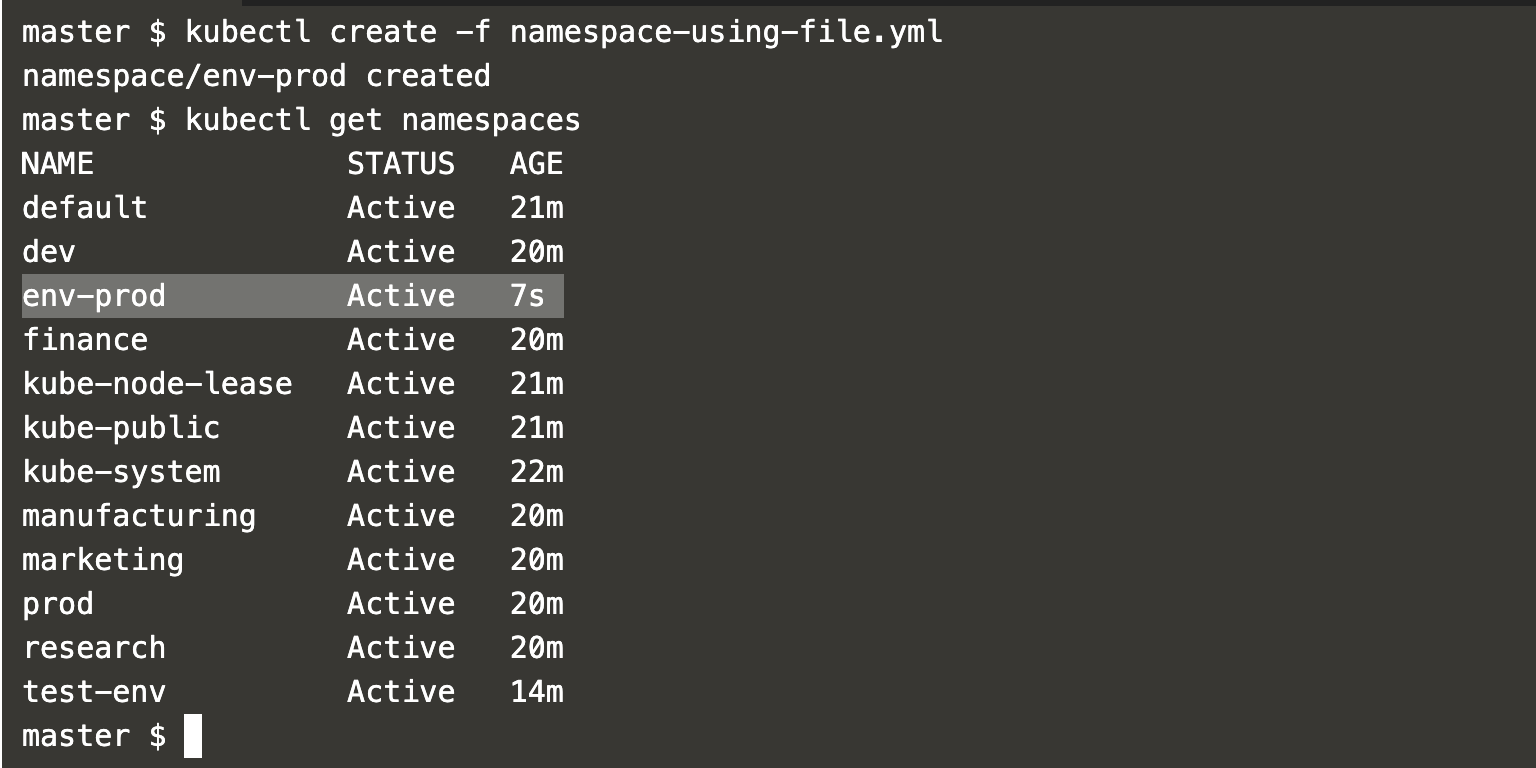
When you no longer need your namespace it can simply be deleted using the following command.
kubectl get namespaces #Get a list of namespaceskubectl delete namespaces env-prod test-env #Delete a namespacekubectl get namespaces #Get a list of namespaces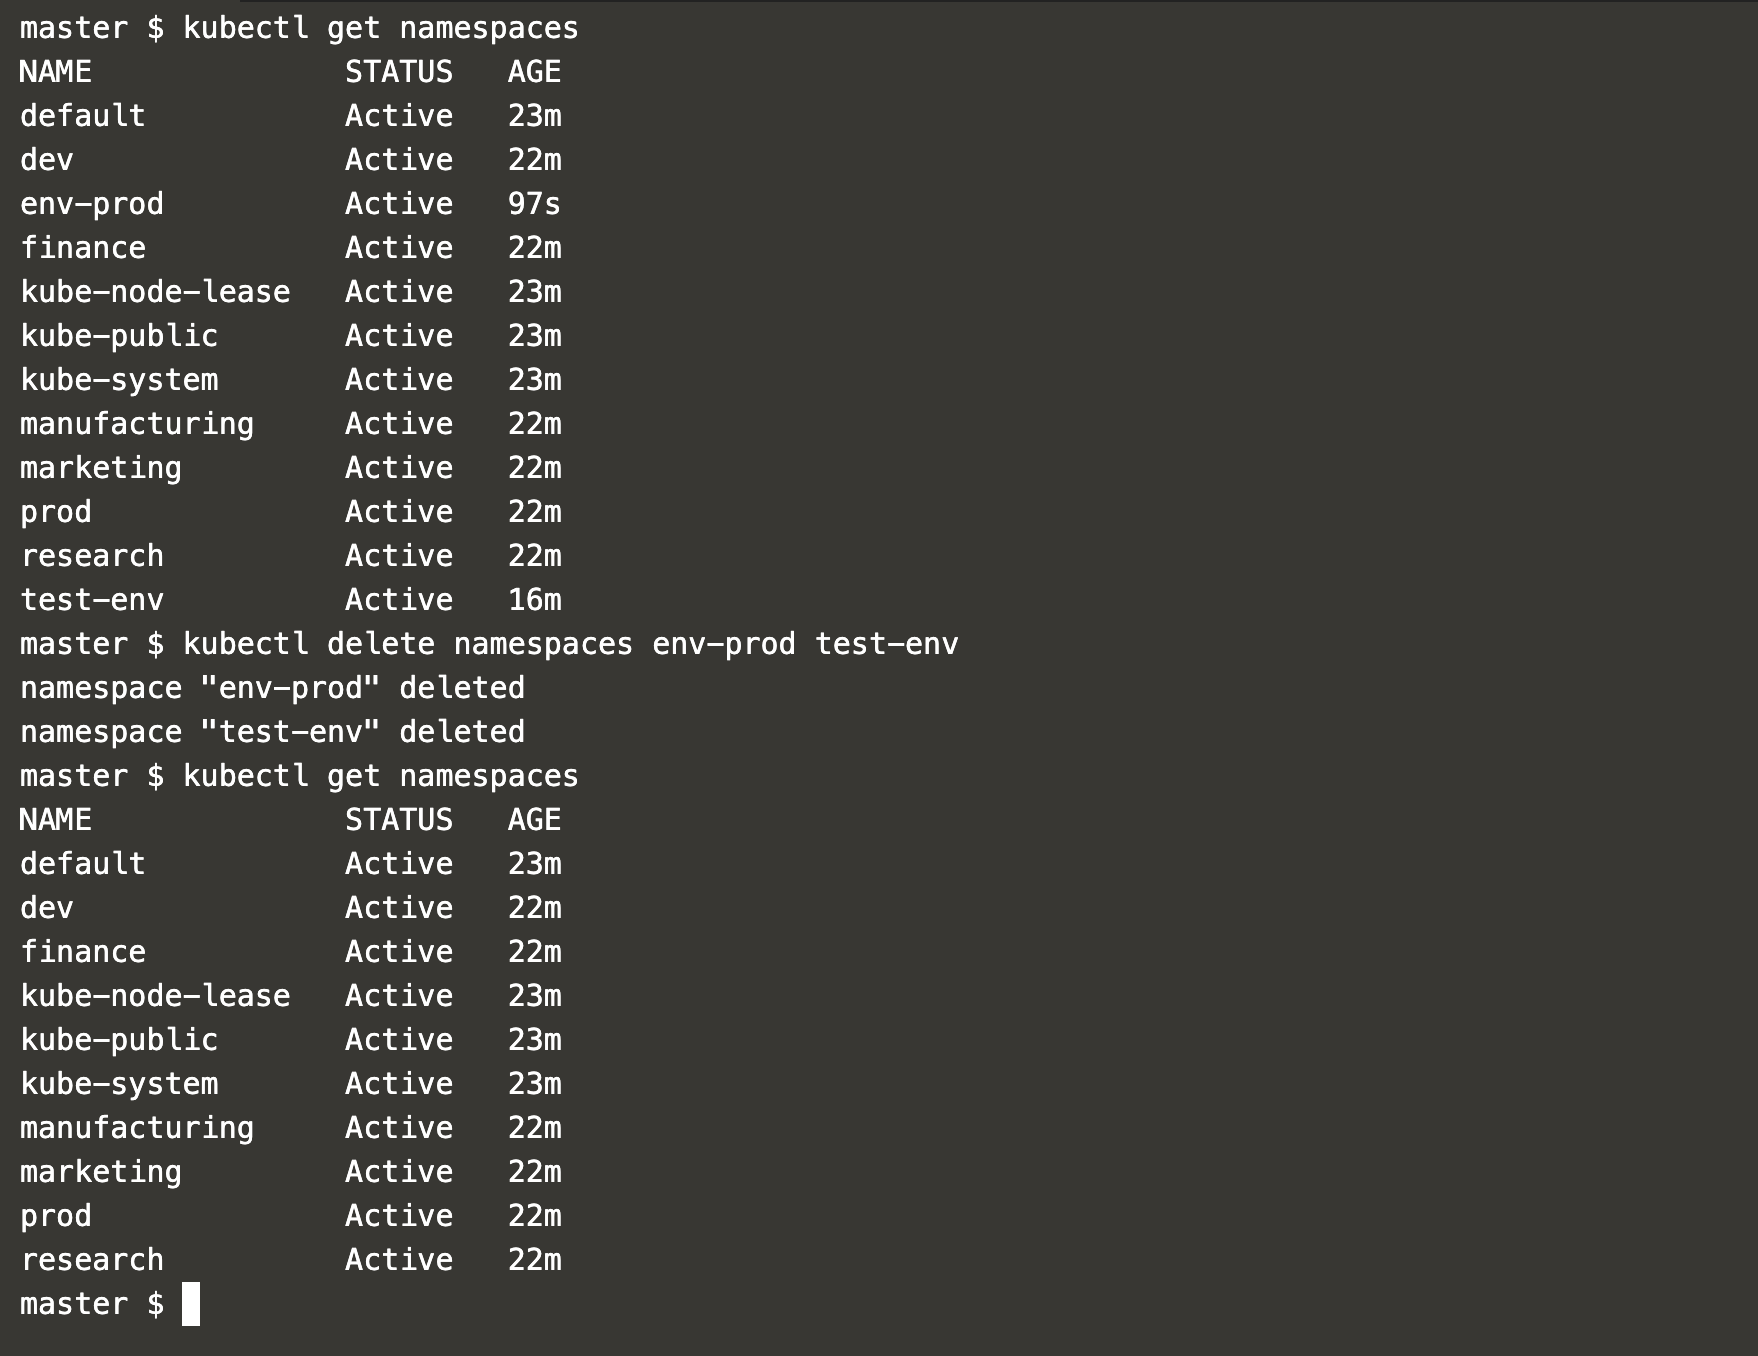
Conclusion
In this article, we learned about namespaces, creating a namespace, and changing the default namespace, checking the Kubernetes resources which are and aren’t in a namespace. We also saw how a Kubernetes object, here pod, can be created in a namespace of our choice.

Add Comment