


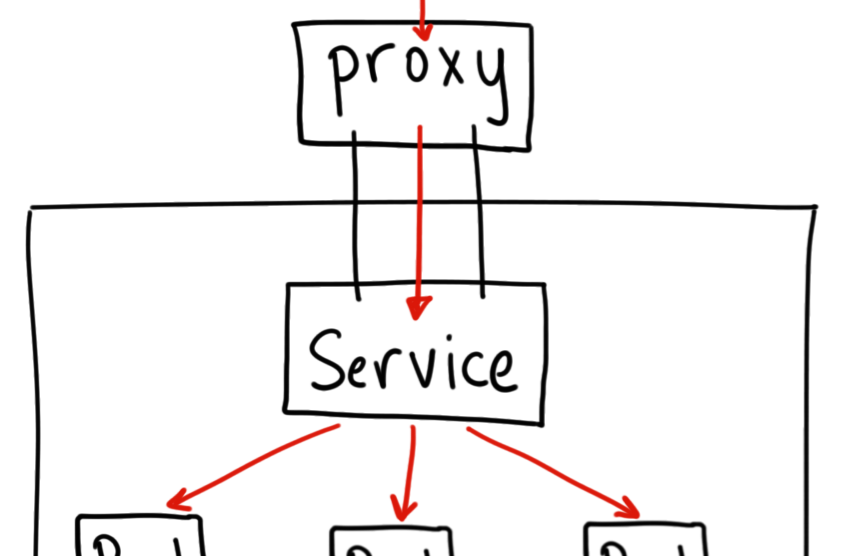
A service is an abstraction layer over Pods. It defines a logical set of Pods. It provides a single IP address and DNS name by which pods can be accessed. It is used to expose the pods.
There are 3 different types of Services in Kubernetes:
- ClusterIP:
It exposes the service within the Kubernetes cluster. This Service is only reachable from within the cluster. It can not be accessed from outside the cluster. - NodePort:
It will expose the service on a static port on the deployed node. This service can be accessed from outside the cluster using the NodeIP:Nodeport. - Load Balancer:
Exposes the Service externally using a cloud provider’s load balancer, this creates a Public IP on the Cloud provider - ExternalName:
It maps the Service to the contents of the externalName field by returning a CNAME record
Click here to know more about Kubernetes Service.
In this article, we will see the steps to create a Serice of type NodePort.
Pre-requisites
- Kubernetes Cluster with at least 1 worker node.
If you want to learn to create a Kubernetes Cluster, click here. This guide will help you create a Kubernetes cluster with 1 Master and 2 Nodes on AWS Ubuntu 18l04 EC2 Instances.
What we will do
- Create a Service
Create a Service
First, we will create a deployment using the following definition to which the service will redirect all requests coming to it.
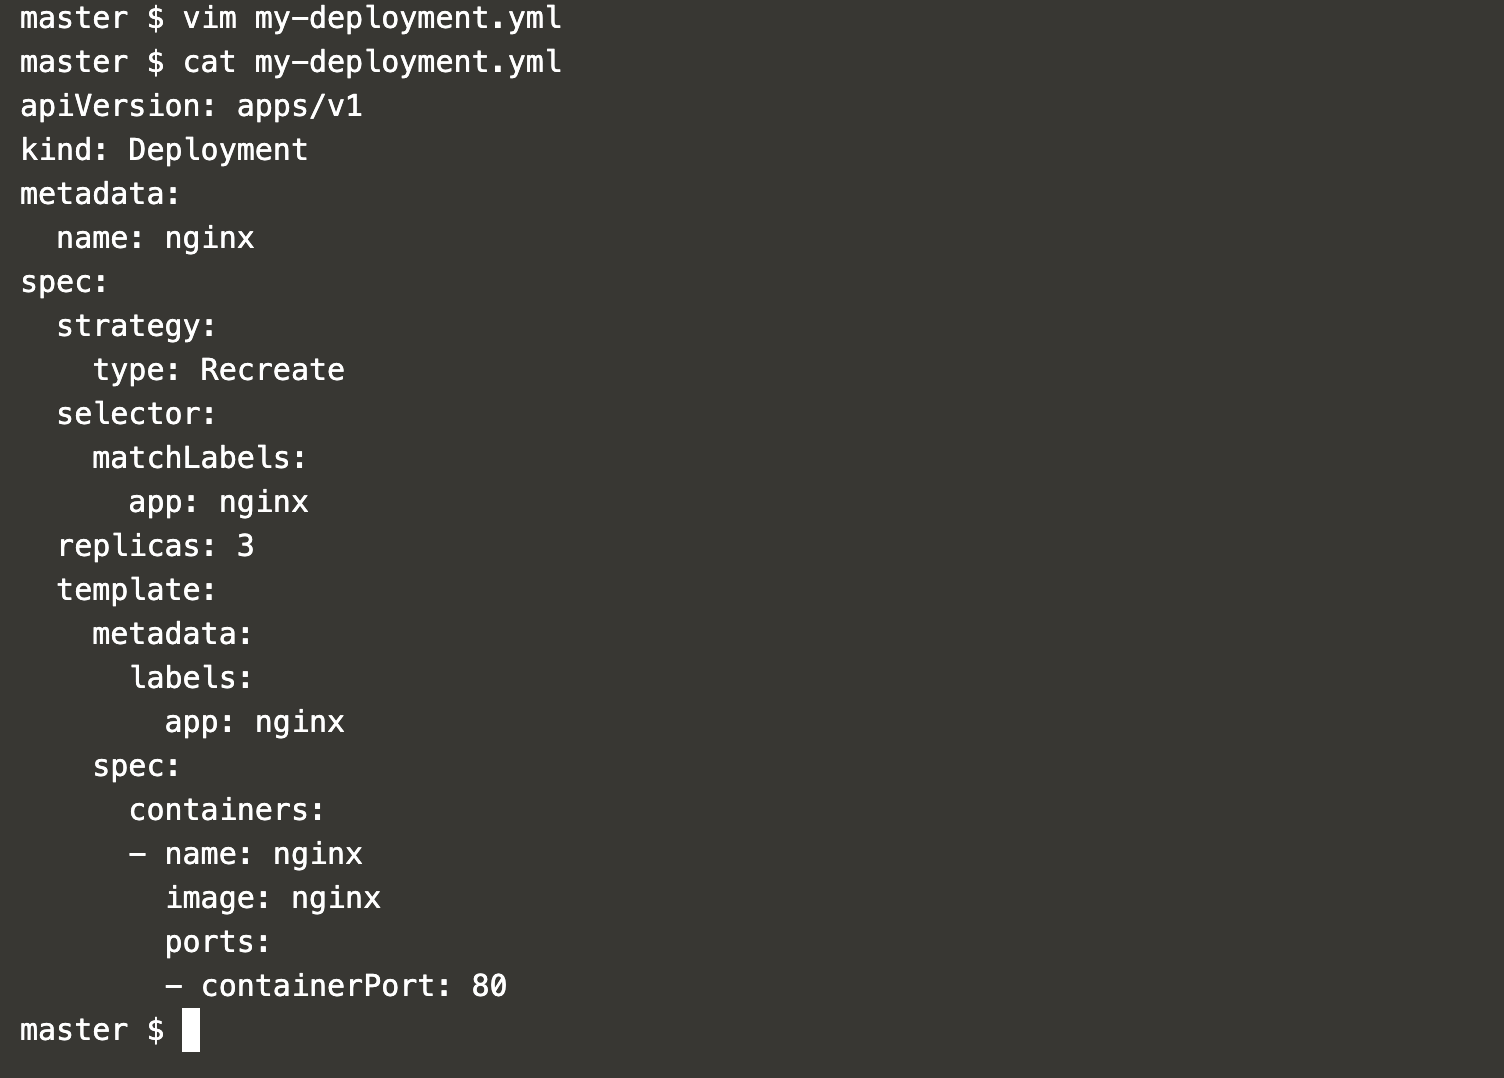
Create a new file and add the following content in it, this will create a deployment for Nginx.
vim my-deployment.yml
apiVersion: apps/v1
kind: Deployment
metadata:
  name: nginx
spec:
  strategy:
    type: Recreate
  selector:
    matchLabels:
      app: nginx
  replicas: 3
  template:
    metadata:
      labels:
        app: nginx
    spec:
      containers:
      - name: nginx
        image: nginx
        ports:
        - containerPort: 80
To create a deployment, execute the following command.
kubectl create -f my-deployment.yml

This will create a deployment for Nginx with 3 replicas.
You can get the details of deployment, replicaset and pod using the following commands.
kubectl get deployment | grep nginx
kubectl get replicaset | grep nginx
kubectl get pod | grep nginx
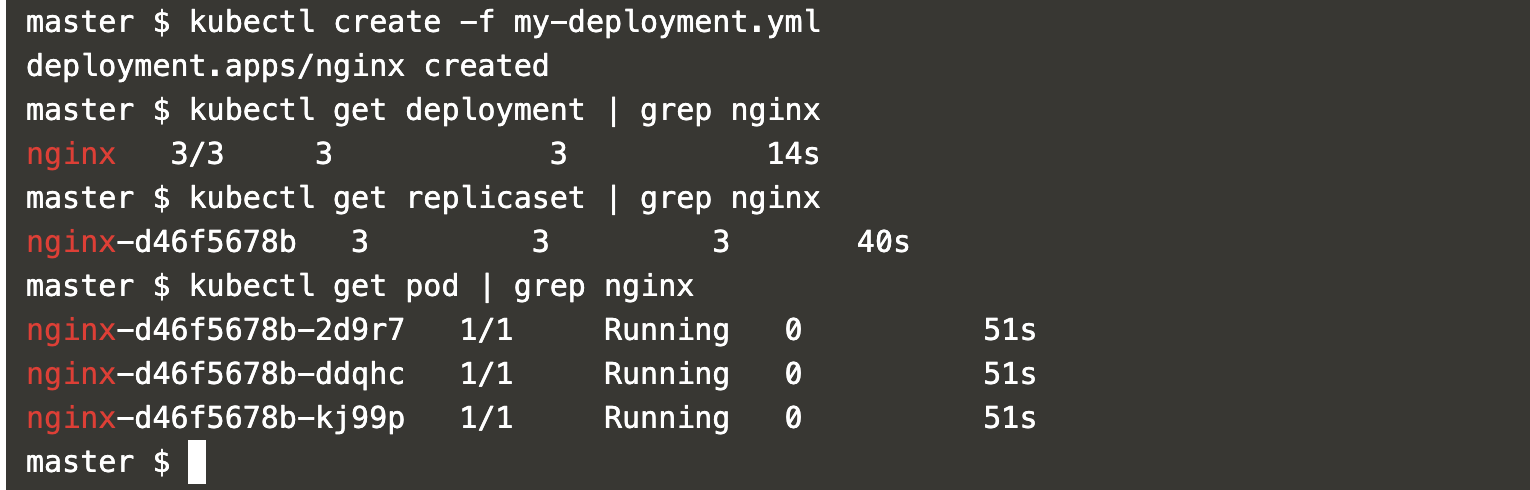
In the above screenshot, you can see 3 replicas of the Nginx have been created.
Now, create a Service definition using the following content.
vim my-service.yml
apiVersion: v1
kind: Service
metadata:
  name: nginx
  namespace: default
  labels:
    app: nginx
spec:
  externalTrafficPolicy: Local
  ports:
  - name: http
    port: 80
    protocol: TCP
    targetPort: 80
  selector:
    app: nginx
  type: NodePort
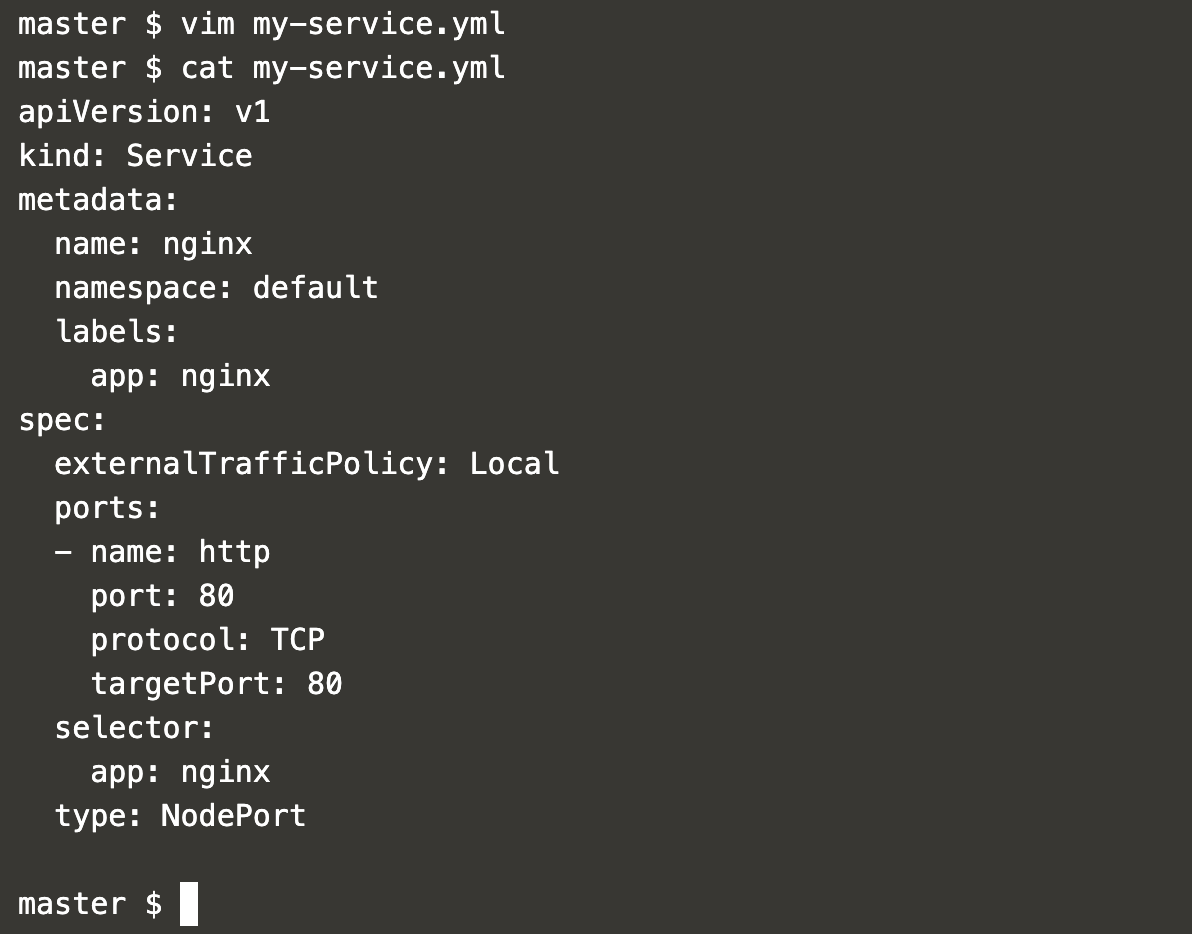
The above service definition will create a Service of type NodePort and redirect requests to Pod matching label nginx, i.e. pods we created using the previous deployment creation step.
Execute the following command to create a Service.
kubectl create -f my-service.yml

Get the details of the service and check for the NodePort on which the service will be available.
kubectl get service | grep nginx
kubectl describe service nginx
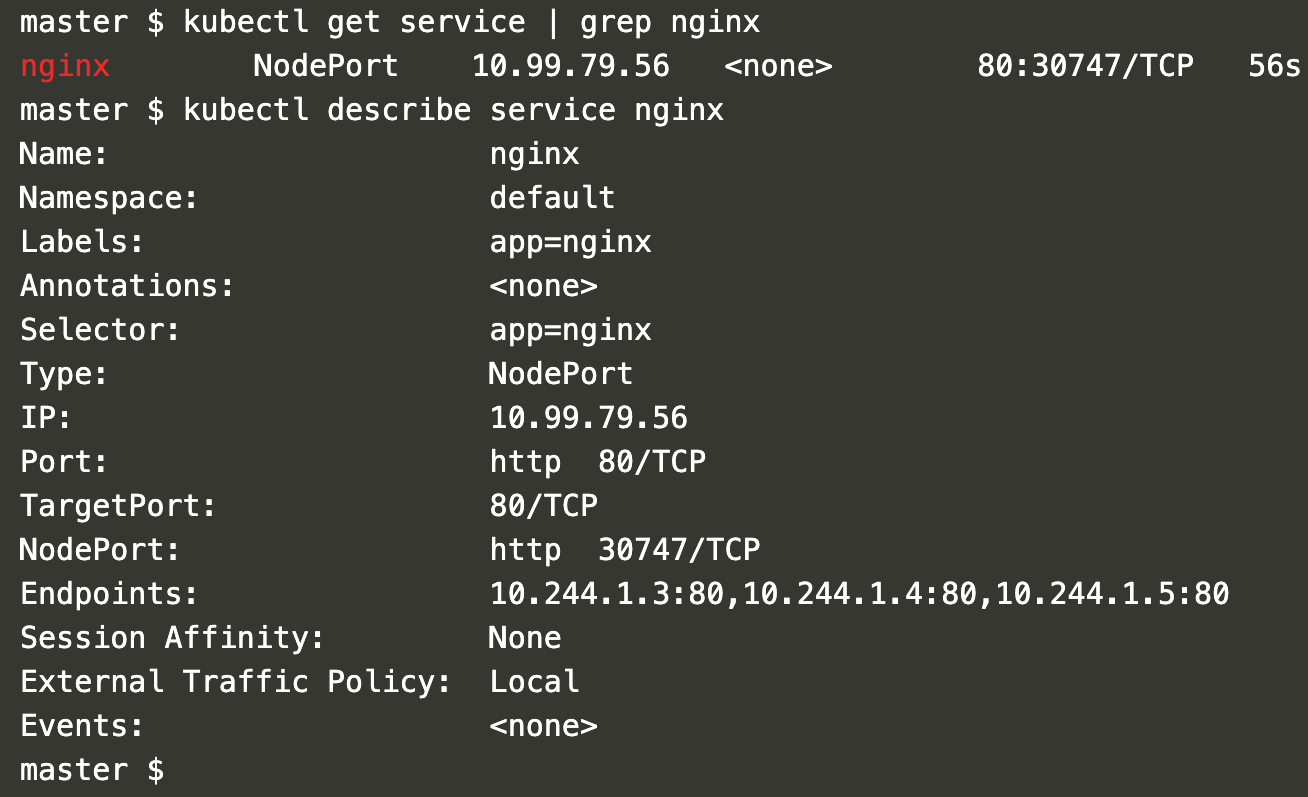
In the above screenshot, it can be seen that the Service is available on Port 30747. This can be different for you as the port is randomly assigned from the available range.
Now, the nginx application can be accessed through this service on NodeIp:NodePort
Here, it is: 106.210.138.189:30747

Conclusion
In this article, we created a deployment for Nginx with 3 replicas and created a Service of type NodePort. We saw how the Nginx application created using the deployment can be accessed on NodeIP:Port.

Add Comment