Introduction
Python is a popular high-level programming language frequently used for scripting in web applications. Although it comes preinstalled on Macs, as of macOS 12.3, it is no longer required for the normal functioning of the operating system.
This article shows how to install Python on a Mac and set up a flexible coding environment with Visual Studio Code.
Prerequisites
- A computer running macOS.
- A user with administrative privileges.
Check if Python Is Installed on Mac
Before installing Python, follow the steps below to check if it already exists on the system:
1. Open Terminal.
2. Type the following command:
python --versionIf Python is installed, the command outputs the version number.

If the system does not find a working Python installation, it displays a command not found message.

Note: Some Python 3 installations respond to the python3 command only. To check for those installations, type python3 --version.
Install Python on Mac
The best way to install Python on macOS is with the PKG file from the official website. Follow the steps below to install Python on your macOS system.
Step 1: Download Latest Version for macOS
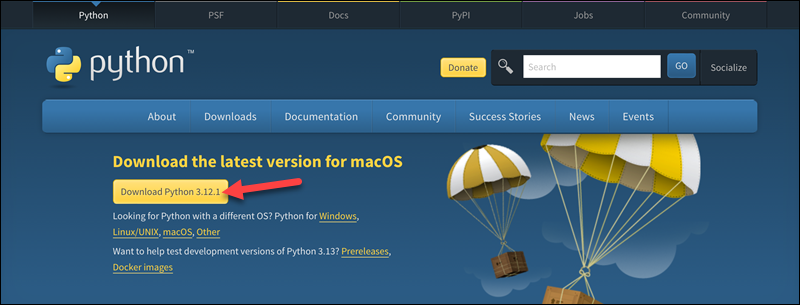
Visit the official Python downloads page. Select the Download Python button and wait for the file download to finish.
Step 2: Run Installer
Use Finder to locate the PKG installer and run it. Go through the installation steps by selecting Continue.
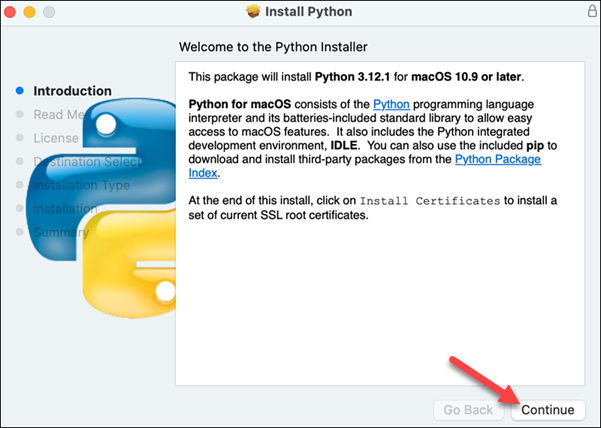
The Installation Type section provides two options:
- Select Install to proceed with a standard installation.
- Choose which components to install by selecting Customize.
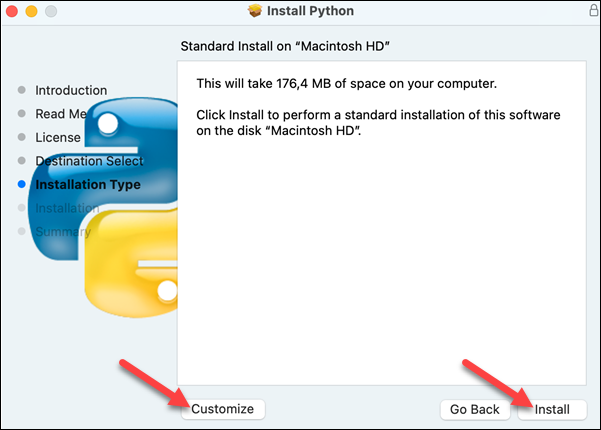
If you choose to customize your installation, select the components you want and select Install.

Wait for the installation to finish, then select Close to exit the installer.
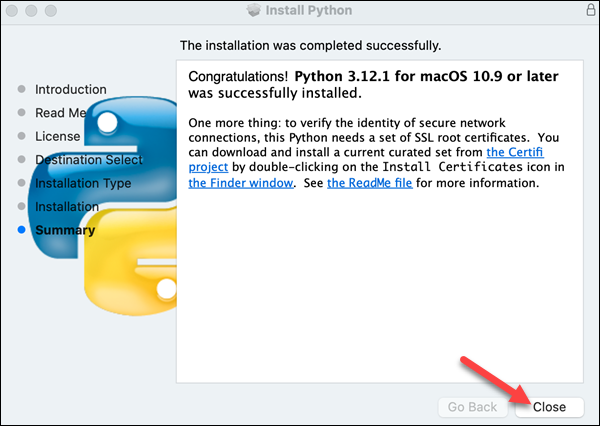
Note: If you have Homebrew installed, install Python with brew install python@[version]. For example, to install version 3.12, type brew install [email protected].
Step 3: Verify Installation
Test the new installation by checking the Python version, as described in the Check if Python Is Installed on Mac section above.
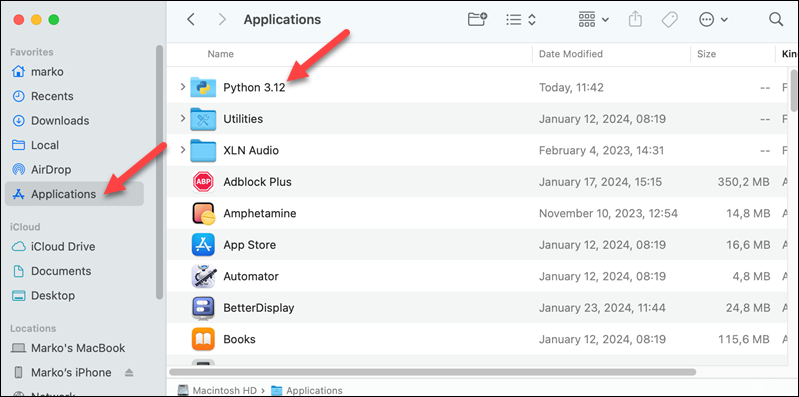
Alternatively, if you installed GUI applications, verify the Python installation by locating and opening IDLE, Python’s native integrated development environment. Follow the steps below to find IDLE on your system:
1. Press Command + N to open Finder.
2. Select the Applications directory from the menu on the left side of the screen.
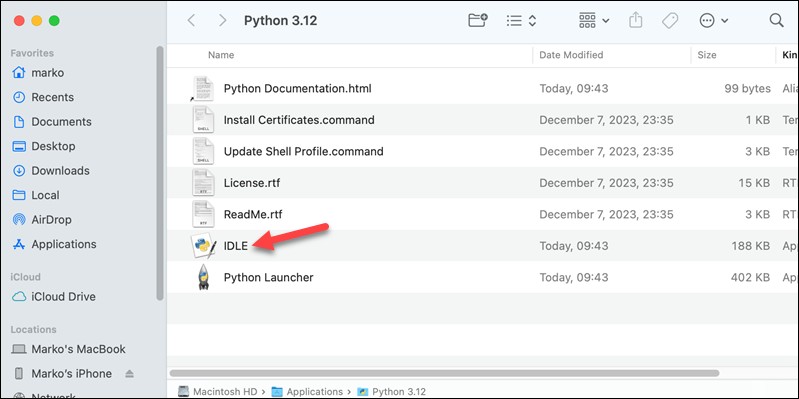
3. Open the Python directory.
4. Double-click the IDLE icon to start the IDE.
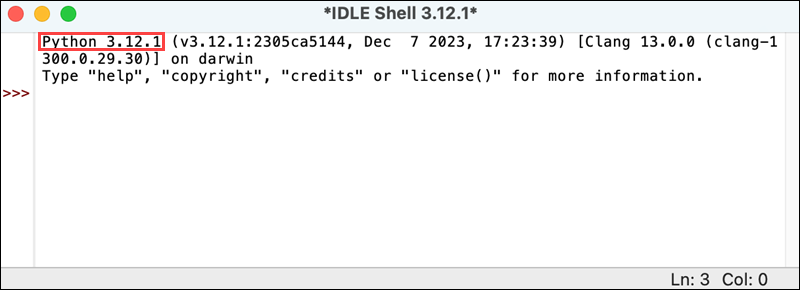
IDLE shows the installed Python version in the header.
Install Visual Studio Code (VS Code) on macOS
If IDLE is not flexible enough, you can use another Python IDE or code editor. This tutorial shows you how to install VS Code, an extensible and lightweight code editor that fully supports programming in Python.
Follow the steps below to install VS Code on your macOS system:
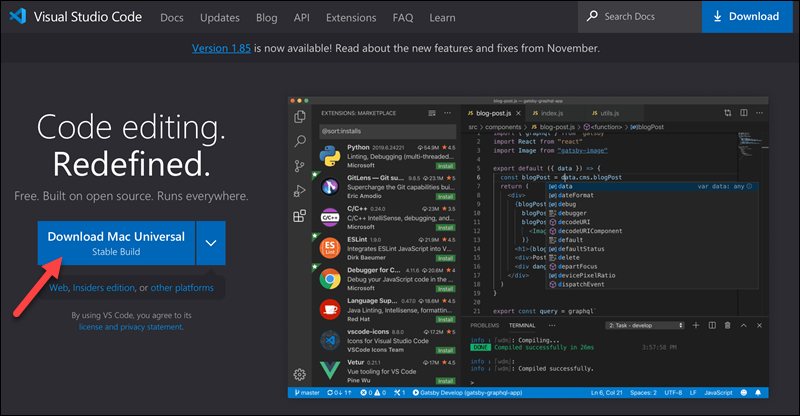
1. Visit the official Visual Studio Code website.
2. Select the Download Mac Universal button and wait for the download to finish.
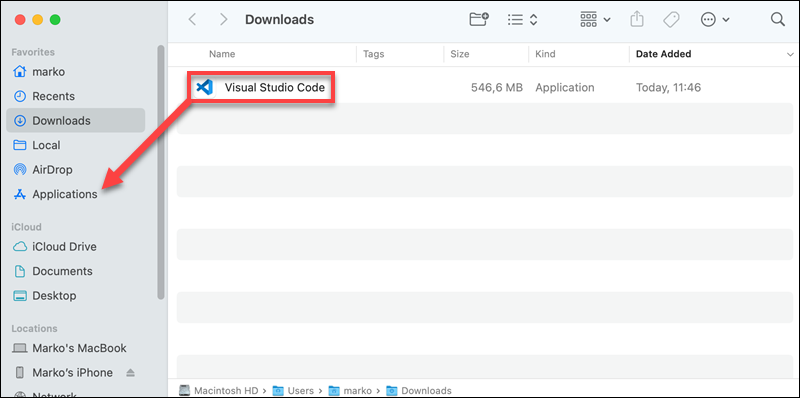
3. Use Finder to locate the downloaded application and drag it to your Applications directory.
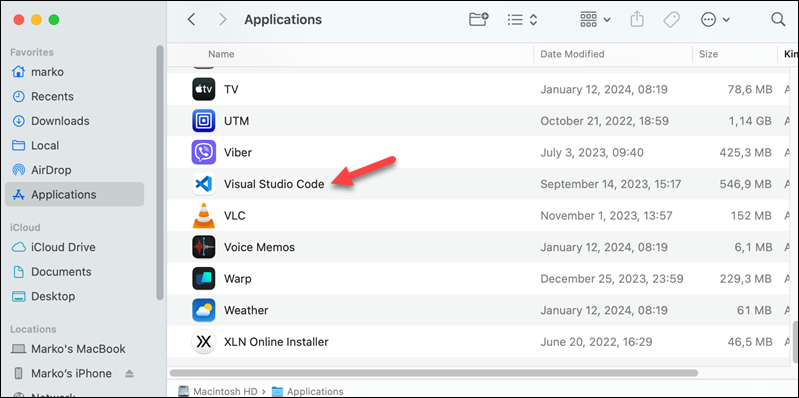
4. Start VS Code from the Applications directory.
5. In VS Code, select the Extensions icon in the menu on the left side of the screen.
6. Use the search box to find and install the Python extension.
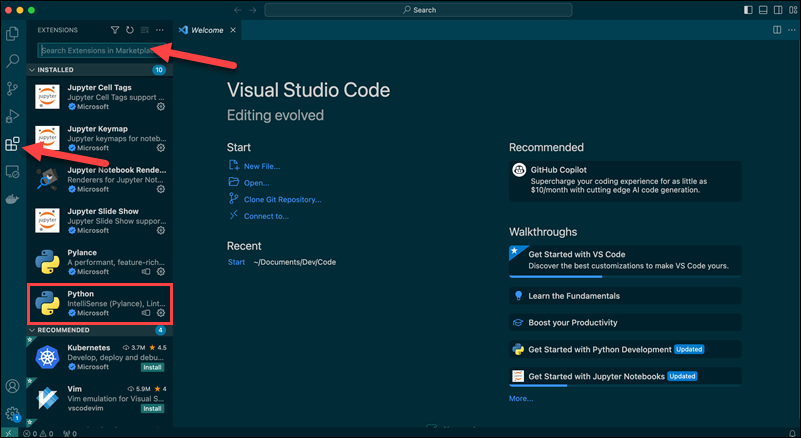
The extension lets you turn VS Code into a full-fledged Python code editor with auto-complete, IntelliSense, debugging, and linting options.
Conclusion
This tutorial listed the simple steps to install Python on macOS. It also showed you how to install Visual Studio Code if you need more than Python’s default IDE.
If you are a Python beginner, read How to Make a Calculator with Python and learn the basics by following a practical example.
Đăng ký liền tay Nhận Ngay Bài Mới
Subscribe ngay
Cám ơn bạn đã đăng ký !
Lỗi đăng ký !


Add Comment