


Plausible is an open-source privacy-focused analytics software to track your site’s traffic. It is a lightweight alternative to Google Analytics, which lets you track visitors without compromising on privacy. It supports GDPR and doesn’t use cookies. You can view the stats in a modern-looking dashboard, and the tracking script it offers is minimal and doesn’t slow down your site. You can either self-host Plausible or buy their subscription.
In this guide, we will install Plausible Analytics using Docker on a Debian 12 server.
Prerequisites
- A server running Debian 12.
- A non-root user with sudo privileges.
- A fully qualified domain name (FQDN) like
plausible.example.compointing to the server. - The Uncomplicated Firewall(UFW) is enabled and running.
- Update everything. $ sudo apt update && sudo apt upgrade
- Install essential packages that your system needs. Some of these packages may already be installed on your system.
$ sudo apt install wget curl nano ufw software-properties-common \
dirmngr apt-transport-https gnupg2 ca-certificates \
lsb-release debian-archive-keyring unzip -y
Step 1 – Configure Firewall
The first step is to configure the firewall. Ubuntu comes with ufw (Uncomplicated Firewall) by default.
Check if the firewall is running.
$ sudo ufw status
You should get the following output.
Status: inactive
Allow SSH port so that the firewall doesn’t break the current connection on enabling it.
$ sudo ufw allow OpenSSH
Allow HTTP and HTTPS ports as well.
$ sudo ufw allow http $ sudo ufw allow https
Enable the Firewall $ sudo ufw enable Command may disrupt existing ssh connections. Proceed with operation (y|n)? y Firewall is active and enabled on system startup
Check the status of the firewall again.
$ sudo ufw status
You should see a similar output.
Status: active
To Action From
-- ------ ----
OpenSSH
ALLOW Anywhere 80/tcp
ALLOW Anywhere 443
ALLOW Anywhere OpenSSH (v6)
ALLOW Anywhere (v6) 80/tcp (v6)
ALLOW Anywhere (v6) 443 (v6)
ALLOW Anywhere (v6)
Step 2 – Install Git
Git is needed to clone the Plausible’s official repository. Install Git. $ sudo apt install git
Verify the installation.
$ git --version git version 2.39.2
Set initial configuration variables.
$ git config --global user.name "Your Name" $ git config --global user.email "[email protected]"
Step 3 – Install Docker and Docker Compose
We will need to install Docker using its official repository. Add Docker’s official GPG key.
$ curl -fsSL https://download.docker.com/linux/debian/gpg | sudo gpg --dearmor -o /usr/share/keyrings/docker.gpg
Add the Docker repository to the system.
$ echo "deb [arch="$(dpkg --print-architecture)" signed-by=/usr/share/keyrings/docker.gpg] https://download.docker.com/linux/debian "$(. /etc/os-release && echo "$VERSION_CODENAME")" stable" | sudo tee /etc/apt/sources.list.d/docker.list > /dev/null
Update the APT repository list and install Docker.
$ sudo apt update
$ sudo apt install docker-ce docker-ce-cli containerd.io docker-buildx-plugin docker-compose-plugin
Verify if the Docker engine is installed correctly.
$ docker --version Docker version 24.0.6, build ed223bc
Execute the following commands so that you don’t need to use sudo to run Docker commands.
$ sudo usermod -aG docker ${USER} $ su - ${USER}
This completes the Docker and Docker compose installation section of the tutorial.
Step 4 – Install Nginx
Debian 12 ships with an older version of Nginx. To install the latest version, you need to download the official Nginx repository.
Import Nginx’s signing key.
$ curl https://nginx.org/keys/nginx_signing.key | gpg --dearmor | sudo tee /usr/share/keyrings/nginx-archive-keyring.gpg >/dev/null
Add the repository for Nginx’s stable version.
$ echo "deb [signed-by=/usr/share/keyrings/nginx-archive-keyring.gpg] http://nginx.org/packages/debian `lsb_release -cs` nginx" | sudo tee /etc/apt/sources.list.d/nginx.list
Update the system repositories.
$ sudo apt update
Install Nginx.
$ sudo apt install nginx
Verify the installation. On Debian systems, the following command will only work with sudo.
$ sudo nginx -v

nginx version: nginx/1.24.0
Start Nginx.
$ sudo systemctl start nginx
Check the service status.
$ sudo systemctl status nginx

? nginx.service - nginx - high performance web server Loaded: loaded (/lib/systemd/system/nginx.service; enabled; preset: enabled)
Active: active (running)
since Wed 2023-10-11 01:35:15 UTC; 3s ago Docs: https://nginx.org/en/docs/
Process: 3598
ExecStart=/usr/sbin/nginx -c /etc/nginx/nginx.conf (code=exited, status=0/SUCCESS)
Main PID: 3599 (nginx)
Tasks: 3 (limit: 4652)
Memory: 2.4M CPU: 8ms
CGroup: /system.slice/nginx.service ??3599 "nginx: master process /usr/sbin/nginx -c /etc/nginx/nginx.conf" ??3600 "nginx: worker process"
??3601 "nginx: worker process" Oct 11 01:35:15 plausible systemd[1]:
Starting nginx.service - nginx - high performance web server... Oct 11 01:35:15 plausible systemd[1]:
Started nginx.service - nginx - high performance web server.
Step 5 – Download Plausible
Clone the Plausible Self-Hosting GitHub repository.
$ git clone https://github.com/plausible/hosting
Switch to the downloaded directory.
$ cd hosting
Step 6 – Configure Plausible
In the downloaded directory, you will see the following files.
docker-compose.yml– This contains the settings for the Docker compose tool to install the Plausible server and everything it needs. Plausible need the PostgreSQL server for the database and the Clickhouse database for stats. It also comes with an option to install an SMTP server to send notifications, password reset, and weekly stats emails.plausible-conf.env– This file contains the environment variables to customize your installation.
The first step is to generate a secret key needed to secure the Plausible app. Run the following command to generate the key.
$ openssl rand -base64 64 | tr -d 'n' ; echo vPkrzp59qQIYtMcyTCKGuyvpkbQ8PYf+Go2ju+DPV/fZUk2eTGNiwV3CoKEueXzypMVLbSkJNGS7xfq96/wepg==
Copy the key displayed on the terminal. Open the plausible-conf.env file for editing.
$ nano plausible-conf.env
Paste the following key in front of the variable BASE_URL.
Add the value for the BASE_URL as https://plausible.example.com or whatever domain you want to install Plausible on. Since we will configure SSL later, make sure you enter the base URL with HTTPS. You can also change the port number on which Plausible listens. By default, it uses port 8000.
BASE_URL=https://plausible.example.com SECRET_KEY_BASE=yQVWmKfhvr/etwTSN/pSUmhAwExBX7eCKXKAMKV4mrtqzFCA5dgrAnTMx2dS2OIZ9KulVwa+vl7iGRbJpycYaA==
PORT=8000
If you want to disable user registration after the installation, add the following line. DISABLE_REGISTRATION=true
If you are opening registration for other users and want them to verify their email addresses, add the following line. For this to work, you will need to configure SMTP details which we discuss next. ENABLE_EMAIL_VERIFICATION=true
You can also configure your SMTP details with the following data. In our example, we are using the Amazon SES [email protected]
MAILER_NAME=Howtforge
SMTP_HOST_ADDR=email-smtp.us-west-2.amazonaws.com
SMTP_HOST_PORT=587
SMTP_USER_NAME=<username>
SMTP_USER_PWD=<password>
SMTP_HOST_SSL_ENABLED=1
SMTP_RETRIES=2
Configure Google Search Console
You can also configure Plausible to connect with the Google Search Console, which allows it to list the search terms people use to arrive at your site. Configuring this part can be a little tricky.
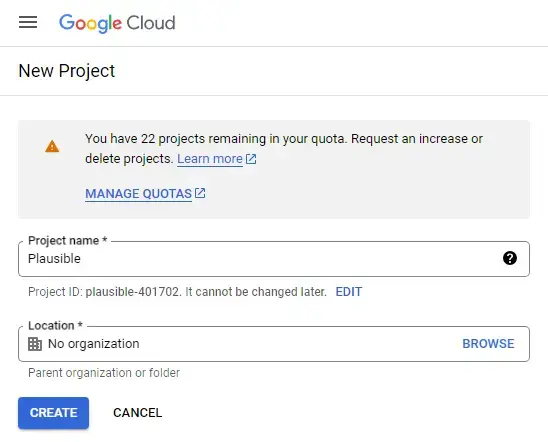
Visit the Google API console and sign in. Once on the API console, create a new project. Give your project a name. You may see the Organization field if you are using a Google Apps account. In the screenshot, we used a Google personal account. Click Create to proceed.
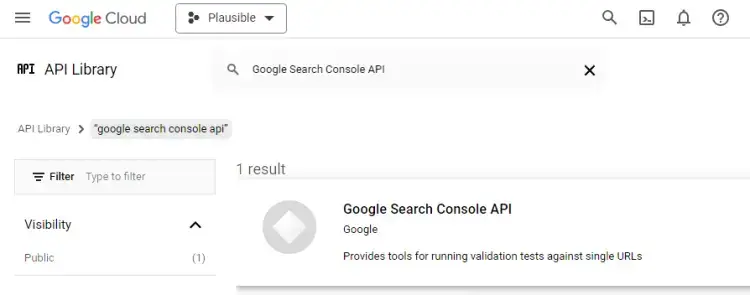
Click Enable APIs and Services on the following screen.

Search and click on the Google Search Console API.
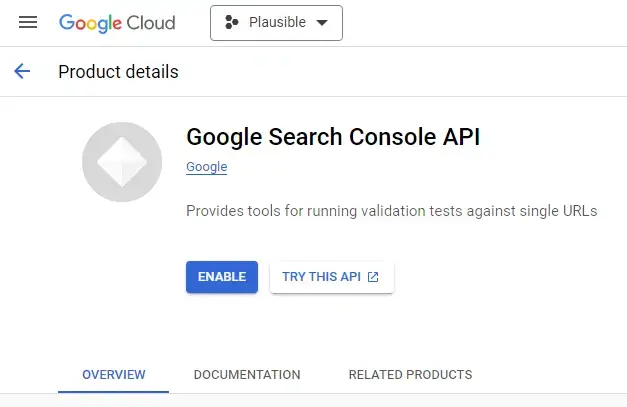
Click on Enable on the following screen.
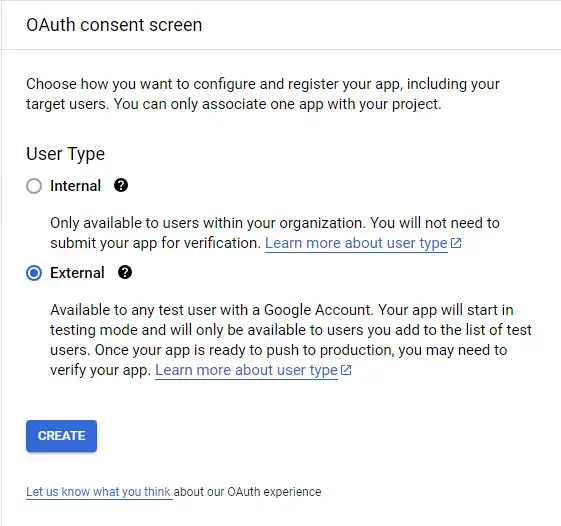
Next, you will need credentials to access the API. But first, you will need to configure the consent screen. To do that, visit the Credentials option from the left and click on the Configure Consent Screen button.

Choose User Type as Internal since we will be accessing it via the code only and click on Create to proceed. If you are using a Google Apps account, you can choose either option as the User Type.
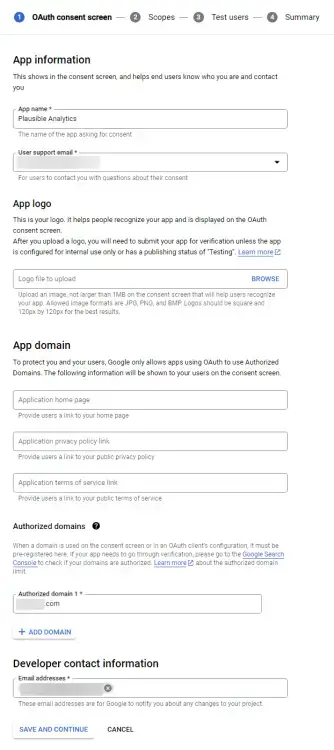
Set your product name and add the support email and the developer contact email associated with your Google Search Console account. Add your domain name as the Authorized domains. If you are installing Plausible at the domain https://plausible.example.com then, add https://example.com as the Authorized domain. If you are hosting Plausible as a top-level domain, use that. Click the button Save and Continue to proceed to the next screen.
Skip the next couple of screens and go back to the dashboard. Once at the dashboard, visit the Credentials tab on the left and click on Create credential. Select OAuth Client ID.
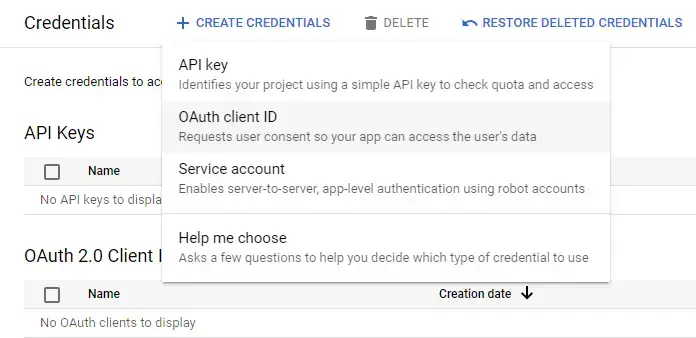
On the next screen, choose Web Application as the project type. Give it a name and hit Create.

You need to save your Client ID and Client Secret keys. Copy those values and paste them into the plausible-conf.env file. You can also download the JSON file to save the credentials for future use.
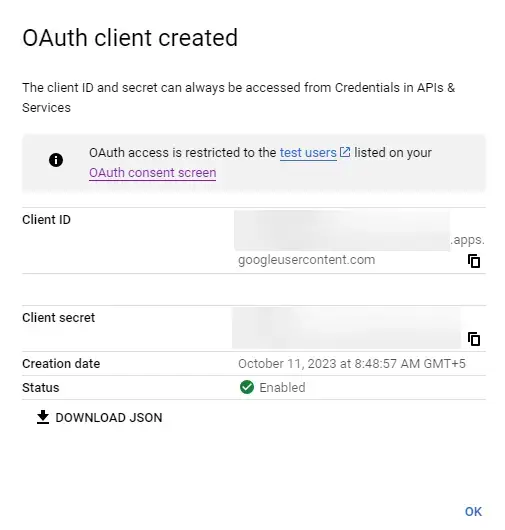
GOOGLE_CLIENT_ID=<ID>.apps.googleusercontent.com GOOGLE_CLIENT_SECRET=<secret>
Once you are finished, save the plausible-conf.env file by pressing Ctrl + X and entering Y when prompted.
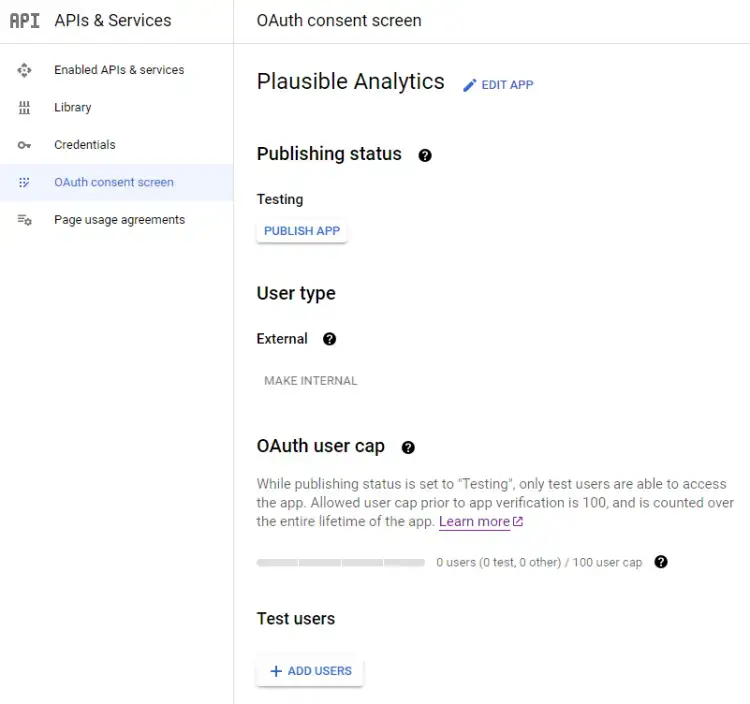
The app you created with the status Testing. The first option is to verify your app with Google which can take 3-5 days. To avoid having to verify with Google, you can enter your Google account as a Test user. Go to the OAuth consent screen, scroll down to the section Test users, and click the Add Users button to add your Google account.
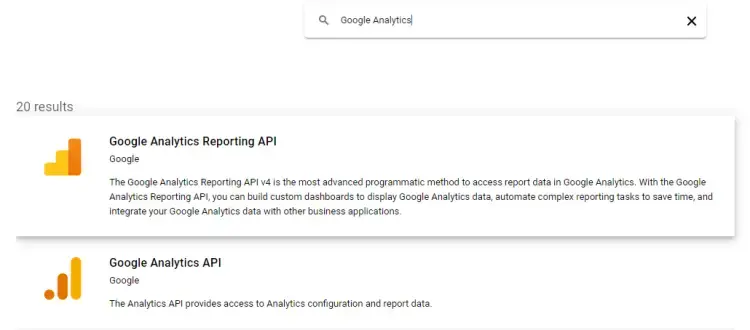
Configure Google Analytics
Plausible also supports importing your Google Analytics data. To do that, we need to enable the following APIs.
Go back to the APIs and Services page and click the Enable APIS and Services button to find and enable the above two APIs.
Step 7 – Install Plausible
To install Plausible, run the following docker command. $ docker compose up -d
Running this command creates a PostgreSQL database for the data, a Clickhouse database for the stats, migrations on both databases to prepare the schema, creates an administrator account with the details from the env file, and starts the server on port 8000.
Check the status of the containers. You can also use the command docker compose ps for the same.
$ docker ps

CONTAINER ID IMAGE COMMAND CREATED STATUS PORTS NAMES
d9d2806a978e plausible/analytics:v2.0 "/entrypoint.sh sh -…" 56 seconds ago Up 54 seconds 0.0.0.0:8000->8000/tcp, :::8000->8000/tcp hosting-plausible-1
99c9a1afff34 clickhouse/clickhouse-server:23.3.7.5-alpine "/entrypoint.sh" 56 seconds ago Up 55 seconds 8123/tcp, 9000/tcp, 9009/tcp hosting-plausible_events_db-1
cf408ae32fc3 postgres:14-alpine "docker-entrypoint.s…" 56 seconds ago Up 55 seconds 5432/tcp hosting-plausible_db-1
a5bae1a9f163 bytemark/smtp "docker-entrypoint.s…" 56 seconds ago Up 55 seconds 25/tcp hosting-mail-1
You should be able to access Plausible on http://<yourserverip>:8000 (you will need to open port 8000 using the firewall for this).
Step 8 – Install SSL
Before configuring Nginx as our reverse proxy to host the plausible domain, we need to first set up the SSL certificate.
We need to install Certbot to generate free SSL certificates offered by Let’s Encrypt. You can install Certbot using Debian’s repository or grab the latest version using the Snapd tool. We will be using the Snapd version.
Debian 12 comes doesn’t come with Snapd installed. Install Snapd package.
$ sudo apt install snapd
Ensure that your version of Snapd is up to date.
$ sudo snap install core
$ sudo snap refresh core
Install Certbot.
$ sudo snap install --classic certbot
Use the following command to ensure that the Certbot command can be run by creating a symbolic link to the /usr/bin directory.
$ sudo ln -s /snap/bin/certbot /usr/bin/certbot
Verify the installation.
$ certbot --version certbot 2.7.1
Generate an SSL certificate.
$ sudo certbot certonly --nginx --agree-tos --no-eff-email --staple-ocsp --preferred-challenges http -m [email protected] -d plausible.example.com
The above command will download a certificate to the /etc/letsencrypt/live/plausible.example.com directory on your server.
Generate a Diffie-Hellman group certificate.
$ sudo openssl dhparam -dsaparam -out /etc/ssl/certs/dhparam.pem 4096
Check the Certbot renewal scheduler service.
$ sudo systemctl list-timers
You will find snap.certbot.renew.service as one of the services scheduled to run.
NEXT                        LEFT        LAST                        PASSED       UNIT                         ACTIVATES
.....
Wed 2023-10-11 06:43:59 UTC 2h 57min left Wed 2023-10-11 00:51:05 UTC 2h 55min ago apt-daily.timer            apt-daily.service
Wed 2023-10-11 06:56:46 UTC 3h 10min left Wed 2023-10-11 00:51:05 UTC 2h 55min ago apt-daily-upgrade.timer    apt-daily-upgrade.service
Wed 2023-10-11 07:32:00 UTC 3h 45min left -                           -            snap.certbot.renew.timer   snap.certbot.renew.servic
Do a dry run of the process to check whether the SSL renewal is working fine.
$ sudo certbot renew --dry-run
If you see no errors, you are all set. Your certificate will renew automatically.
Step 9 – Configure Nginx as a reverse proxy
Until now, Plausible is running on the local system via port 8000. To run on its domain, we will use Nginx to act as a reverse proxy.
Create a configuration file for Plausible in the /etc/nginx/conf.d/ directory.
$ sudo nano /etc/nginx/conf.d/plausible.conf
Paste the following code in it. server
server {
    listen 80; listen [::]:80;
	server_name plausible.example.com;
    return 301 https://$host$request_uri;
}

server {
    server_name plausible.example.com;

    listen 443 ssl http2;
    listen [::]:443 ssl http2;

    access_log /var/log/nginx/plausible.access.log;
    error_log /var/log/nginx/plausible.error.log;

    ssl_certificate /etc/letsencrypt/live/plausible.example.com/fullchain.pem;
    ssl_certificate_key /etc/letsencrypt/live/plausible.example.com/privkey.pem;
    ssl_trusted_certificate /etc/letsencrypt/live/plausible.example.com/chain.pem;
    ssl_session_timeout 1d;
    ssl_session_cache shared:MozSSL:10m;
    ssl_session_tickets off;

    ssl_protocols TLSv1.2 TLSv1.3;
    ssl_ciphers ECDHE-ECDSA-AES128-GCM-SHA256:ECDHE-RSA-AES128-GCM-SHA256:ECDHE-ECDSA-AES256-GCM-SHA384:ECDHE-RSA-AES256-GCM-SHA384:ECDHE-ECDSA-CHACHA20-POLY1305:ECDHE-RSA-CHACHA20-POLY1305:DHE-RSA-AES128-GCM-SHA256:DHE-RSA-AES256-GCM-SHA384:DHE-RSA-CHACHA20-POLY1305;
    ssl_prefer_server_ciphers off;
    ssl_ecdh_curve X25519:prime256v1:secp384r1:secp521r1;

    ssl_stapling on;
    ssl_stapling_verify on;
    resolver 8.8.8.8;
    ssl_dhparam /etc/ssl/certs/dhparam.pem;

    location / {
        proxy_pass http://127.0.0.1:8000;
        proxy_set_header X-Forwarded-For $proxy_add_x_forwarded_for;
    }
}
Save the file by pressing Ctrl + X and entering Y when prompted once finished.
Open the file /etc/nginx/nginx.conf for editing.
$ sudo nano /etc/nginx/nginx.conf
Add the following line before the line include /etc/nginx/conf.d/*.conf;.
server_names_hash_bucket_size 64;
Save the file by pressing Ctrl + X and entering Y when prompted.
Verify the Nginx configuration file syntax.
$ sudo nginx -t

nginx: the configuration file /etc/nginx/nginx.conf
syntax is ok nginx: configuration file /etc/nginx/nginx.conf test is successful
Restart the Nginx service to enable the new configuration.
$ sudo systemctl restart nginx
Step 10 – Add Site and Star Tracking
Launch the domain https://plausible.example.com in your browser, and you should be greeted with the following Plausible registration screen.

Click the Create my account button to proceed.
If you have set the variable ENABLE_EMAIL_VERIFICATION=true then you will be prompted to enter a verification code sent to your email ID. If you have configured the SMTP server, you should receive an email with the code. If you haven’t, or if for some reason you don’t receive the code, run the following command to verify all the users in the database.
$ docker compose exec plausible_db psql -U postgres -d plausible_db -c "UPDATE users SET email_verified = true;"
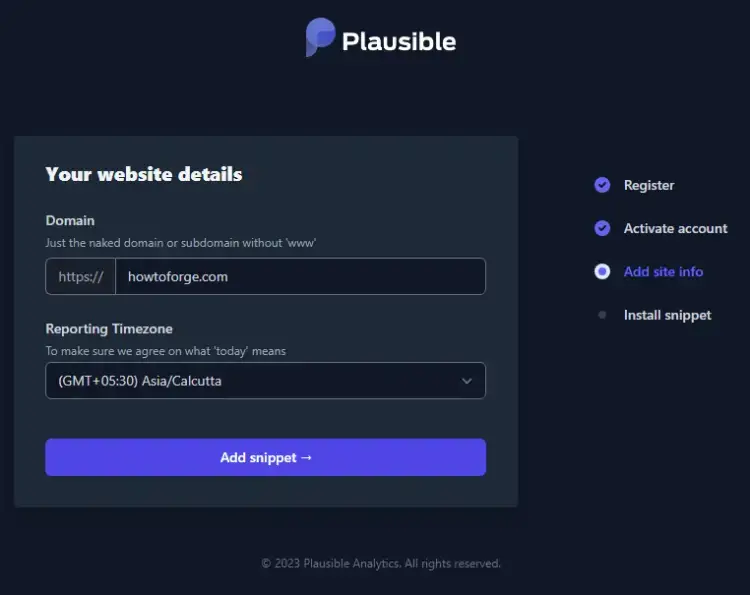
Next, you will be asked to add a site. Enter the domain you want to track and select the Timezone for stats reporting.
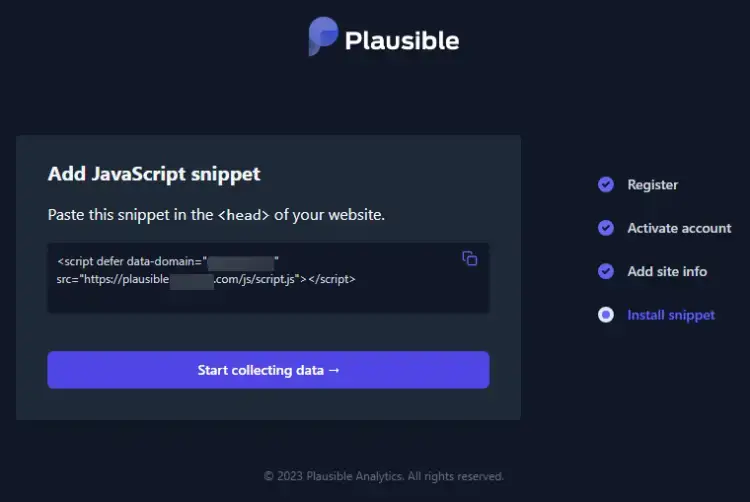
On the next page, you will be given the JavaScript code to track your website. Copy the code and paste it between the <head>....</head> of your site and click the Start collecting data button to proceed.
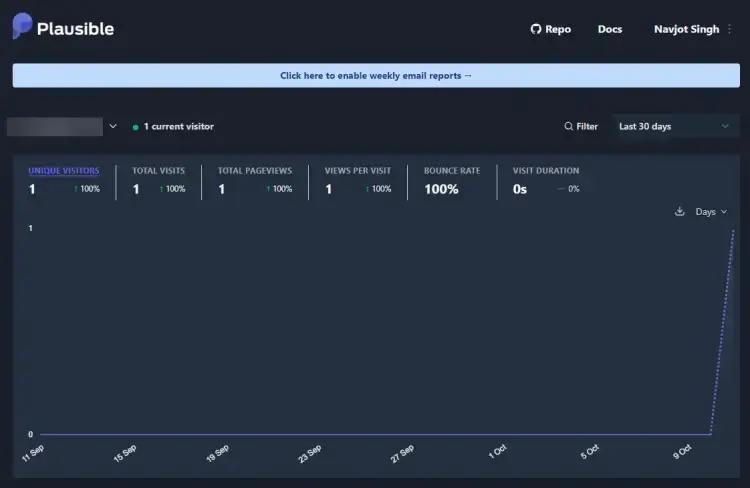
Depending on your site traffic, the dashboard should start showing stats for your website soon.
You can import your Google Analytics data or connect to the Google Search Console by visiting your site settings.
Conclusion
This concludes our tutorial on installing and configuring Plausible Analytics on a Debian 12 server. If you have any questions, post them in the comments below.
Add Comment