


Introduction
When working with Docker images and containers, one of the basic features is committing changes to a Docker image. When you commit to changes, you essentially create a new image with an additional layer that modifies the base image layer.
In this tutorial, you will learn how to commit changes to a Docker image by following our simple examples.
Prerequisites
- Access to a command-line/terminal window (Ctrl+Alt+T)
- A user account with root or sudo privileges
- Docker installed and configured
Steps For Committing Changes to Docker Image
Step 1: Pull a Docker Image
To illustrate how to commit changes, you first need to have an image to work with. In this article, we work with the latest Ubuntu image for Docker. Download the image from Docker’s library with:
sudo docker pull ubuntu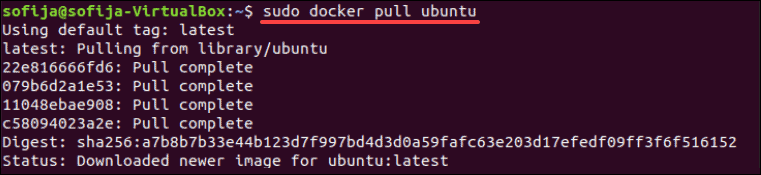
If you recheck the available images, you will see the Ubuntu image:
sudo docker images
Copy IMAGE ID for later use.
Step 2: Deploy the Container
Add the IMAGE ID to the command that will create a container based on the image:
sudo docker run -it cf0f3ca922e0 bin/bashThe –it options instruct the container to launch in interactive mode and enable a terminal typing interface. Upon executing the command, a new container launches and moves you to a new shell prompt for working inside of it.

Step 3: Modify the Container
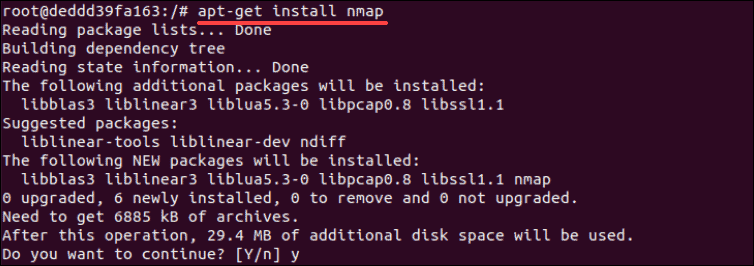
Now that you are in the container, you can modify the image. In the following example, we add the Nmap software for network discovery and security auditing:
apt-get install nmapThe command will download the Nmap package and install it inside the running container.
You can verify the installation by running:
nmap --versionThe output shows you that Nmap version 7.60 is installed and ready to use.

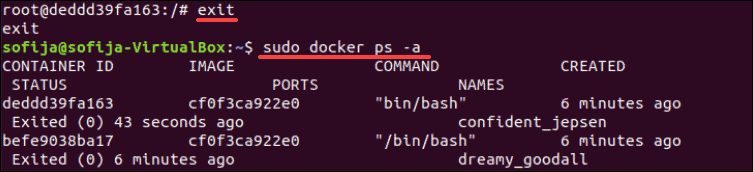
Once you finish modifying the new container, exit out of it:
exitPrompt the system to display a list of launched containers:
sudo docker ps -aYou will need the CONTAINER ID to save the changes you made to the existing image. Copy the ID value from the output.
Step 4: Commit Changes to Image
Finally, create a new image by committing the changes using the following syntax:
sudo docker commit [CONTAINER_ID] [new_image_name]Therefore, in our example it will be:
sudo docker commit deddd39fa163 ubuntu-nmapWhere deddd39fa163 is the CONTAINER ID and ubuntu-nmap is the name of the new image.

Your newly created image should now be available on the list of local images. You can verify by checking the image list again:
sudo docker images
Conclusion
Now that you have learned how to commit changes to a Docker image and create a new one for future uses, take a look at our tutorial on how to set up and use Private Docker Registry.

Add Comment